Pages

Wednesday, December 5, 2012

Gingerbread Party Mix

Gingerbread Party Mix
The kids and I planned on watching "A Christmas Story" for our movie night tonight.  Instead of eating our traditional movie snack of popcorn I decided to try something else.  I remembered a recipe I saw in "Family Circle" magazine for a holiday Chex Mix.  I decided to check it out.  The recipe was so simple and required minimal adult supervision, I thought this would be a great treat the kids could make.  No oven, just the microwave.
You start by combing all the cereals and cinnamon graham snacks -the kids used Cinnamon Teddy Grahams in a large microwavable bowl.  In a smaller microwaveable dish, the butter is melted and the spices and vanilla extract are stirred into the melted butter.  Toss the cereal mixture with the butter and microwave for 5 minutes.  Spread the mixture on paper towels and drizzle melted white vanilla baking chips over the cereal. Let it set and you are ready to eat.   The Party mix was very tasty.  I loved the holiday flavors and the touch of white "chocolate" and candied ginger.   A great snack to enjoy while watching a movie.


Gingerbread Party Mix
From Family Circle Magazine

Ingredients:
3 cups Cinnamon Chex cereal
3 cups Rice Chex cereal
1 1/2 cups cinnamon graham snacks
6 tablespoons butter or margarine
1 teaspoon ground cinnamon
1/4 teaspoon ground cloves
1/4 teaspoon ground nutmeg
2 teaspoons vanilla extract
2 tablespoons crystallized ginger, chopped
1/4 cup white vanilla baking chips

Directions:
1. In a large microwavable bowl, add cereals and graham snacks; set aside.  In small microwavable bowl, microwave butter uncovered on high 40 seconds or until melted.  Stir in cinnamon, cloves, nutmeg and vanilla until blended.  Pour over cereal and stir until coated.

Cereals and Teddy Grahams
Melted butter and Spices
2. Microwave uncovered on high 5 minutes, stirring every 2 minutes.  Stir in ginger until blended.  Spread mixture onto paper towels.  In small microwavable cup, microwave vanilla baking chips uncovered on high 1 minute, stirring every 30 seconds, until melted.  Drizzle over snack; let stand until set.  Store in airtight container.

15 servings


Butter and Cereal Mixture Combined

Mixture on Paper Towels


Baking Chips Drizzled Over Chex Mix

Bowl of Holiday Goodness


Monday, December 3, 2012

Slow Cooker Chili

Chili
Nothing is easier and tastes better than a hot bowl of chili on a chilly evening.  I usually make a crock pot of chili on the day I am decorating the house and setting up the tree for Christmas.  It is a no brainer meal.  Just put everything in the crock pot, set  it on low and dinner will be ready in 6-8 hours.  This chili is loaded with beans, meat, and spices.  I like to season the meat with taco seasoning. I love the flavor it gives the meat and it is so much tastier than eating bland tasting beef. Once the meat is browned and seasoned, I add the tomatoes, tomato sauce, chili powder, green chili, garlic, and spices to the crock pot.  Give everything one big stir, cover and set on low.  The result is a great tasting bowl of chili that is rich and hearty. It is a little spicy - I use 1 tablespoon of chili powder.  Add more or less chili powder depending on your taste.    You can serve it with grated cheese, onions, corn bread, sour cream,  Frito's -  just to name a few garnishes and sides.    Sometimes I cook up some Orzo pasta to spoon  the chili over.


Slow Cooker Chili 

Special Equipment: Slow Cooker – 3-½ quart


Ingredients:

1-pound ground beef
1 package Taco Seasoning
¾ cup water
1 (15.5-ounce) can Pinto Beans drained and rinsed
1 (15.5-ounce) can Red Kidney Beans rinsed and drained
2 (15-ounce) cans tomato sauce
1 (14-ounce) can diced tomatoes
1 (4 ounce) can diced green chilies
2 cloves garlic finely minced
1-2 tablespoons red chili powder depending on taste
2 teaspoons onion powder
1-teaspoon salt
½ teaspoon dried Mexican Oregano
½ teaspoon black pepper
¼ teaspoon cumin
Garnishes: Shredded Mexican Cheese, diced onions, sour cream, Frito's

Directions:

1. In a large skillet brown the ground beef.  Drain the beef and return to the skillet.
2. Sprinkle Taco Seasoning over the beef and add water.  Stir until incorporated.  Cook over medium low to medium heat for 10 minutes stirring occasionally.


3. Remove the beef from the heat and add it to the Slow Cooker.  Add the remaining ingredients to the Slow Cooker and stir well.
4. Set the Slow Cooker on Low and cook 6-8 hours.

5. Serve the Chili in bowls topped with the garnishes of your choice.

Serves 8


Friday, November 30, 2012

Red Velvet - Peppermint Swirl Brownies

Red Velvet-Peppermint Brownies


When I read the title of this recipe, I knew I had to make it.  I love red velvet anything, add peppermint and cream cheese,  and I am in dessert heaven.   Being it is the holiday time, I do not need an excuse to bake something yummy.   I don't worry about the calories,  I just go for it.   I was surprised on how easy these brownies were to make.  You make two layers - the chocolate layer and the cream cheese layer.  Swirl them together and you have beautiful and tasty brownies.
For the chocolate layer:  The chocolate is melted with  the butter in the microwave.  Eggs are then added along with the food coloring, peppermint extract and vanilla extract.  Stir until everything is combined and stir in the dry ingredients.  The batter is poured into a lined 13x9-inch baking dish.
For the cream cheese layer: Next you make the cream cheese topping.  Cream cheese and sugar are beat at medium speed until fluffy.  Add egg whites and vanilla extract and beat until combined.  Stir in the flour and the cream cheese layer is complete.  Spoon it over the brownie batter and swirl the cream cheese into the brownie layer and bake.  Remove the brownies from the oven and cool completely before cutting into squares.
The result: Delicious brownies with melt in your mouth goodness.  They are more fudgy than cake like.  The taste of peppermint is ever so mild and that makes these brownies extra good.  They are a  great treat for your family and friends or to put in your holiday goodie tins:)

Red Velvet-Peppermint Swirl Brownies
From Southern Living Magazine

Ingredients:

1 (4-ounce) bittersweet chocolate baking bar, chopped
3/4 cup butter
2 1/4 cups sugar, divided
4 large eggs
1 (1-ounce) bottle red liquid food coloring
1/4 teaspoon peppermint extract
2 teaspoons vanilla extract, divided
1 1/2 cups all-purpose flour
1/8 teaspoon salt
1/2 (8-ounce) package cream cheese, softened
2 egg whites
2 tablespoons all-purpose flour

Directions:

1. Preheat oven to 350 degrees F.  Line bottom and sides of a 13x9-inch pan with aluminum foil, allowing 2 to 3 inches to extend over sides; lightly grease foil.
2. Microwave chocolate and butter in a large microwave-safe bowl at HIGH 1 1/2 to 2 minutes or until melted and smooth, stirring at 30-second intervals.  Whisk in 2 cups sugar.  Add eggs, 1 at a time whisking just until blended  after each addition.  Add food coloring, peppermint extract, and 1 teaspoon vanilla.  Gently stir in 1 1/2 cups flour and 1/8 teaspoon salt. Pour batter into prepared pan.

Chocolate and Butter
Melted Chocolate and Butter
3. Beat cream cheese and remaining 1/4 cup sugar at medium speed with an electric mixer until fluffy.  Add egg whites and remaining 1 teaspoon vanilla, and beat until blended.  Stir in 2 tablespoons flour until smooth.  Drop cream cheese mixture by heaping tablespoonfuls over batter in pan; gently swirl with a knife.
Chocolate Layer
Dollops of Cream Cheese on Chocolate Layer
Cream Cheese Swirled in Chocolate Layer
4. Bake at 350 degrees F for 30 to 32 minutes or until a wooden pick inserted in center comes out with a few moist crumbs.  Cool completely in pan on a wire rack (about 1 hour).  Lift brownies from pan, using foil sides as handles.  Gently remove foil; cut brownies into squares.

Makes about 2 dozen


Baked Goodness


Wednesday, November 28, 2012

Spiced-Cherry Cheese Log

Spiced-Cherry Cheese Log
During the holiday time, I like having quick bites to eat for family and friends.  One of my favorites is cheese and crackers. I usually make up a cheese ball or log  during the holiday season.  They are quick and easy to make.  This recipe has dried cherries in it along with pumpkin pie spice.  You start by combining cream cheese and Vermont Sharp White Cheddar cheese.  Once the cheeses are combined you add dried cherries and pumpkin pie spice.  Form the mixture into a log and chill for at least 2 hours.  Before you serve, roll the cheese log in some finely chopped pecans.  Serve with crackers.  I love the flavors of this recipe.  The cheese log is very flavorful without a lot of different seasonings.  You use just one - pumpkin pie spice.  The cheeses blend together nicely and the dried cherries add a nice texture and just a slight tartness to the log.


Spiced-Cherry Cheese Log
From Kraft

Ingredients:

1 package (8 ounce) Cream Cheese, softened
1 package (8 ounce) Shredded Vermont Sharp White Cheddar Cheese
1/2 cup dried cherries, chopped
1/4 teaspoon pumpkin pie spice
1/2 cup finely chopped pecans, toasted
Crackers

Directions:

1. Mix cream cheese and Cheddar until blended.  Stir in cherries and spice.


2. Shape into a log; wrap in plastic wrap.  Refrigerate at least 2 hours.


3. Roll in nuts just before servings.  Serve with crackers.

Makes 24 servings, 2 tablespoons spread and 5 crackers each


Monday, November 26, 2012

Sugar-and-Spice Nuts

Sugar-and-Spice Nuts
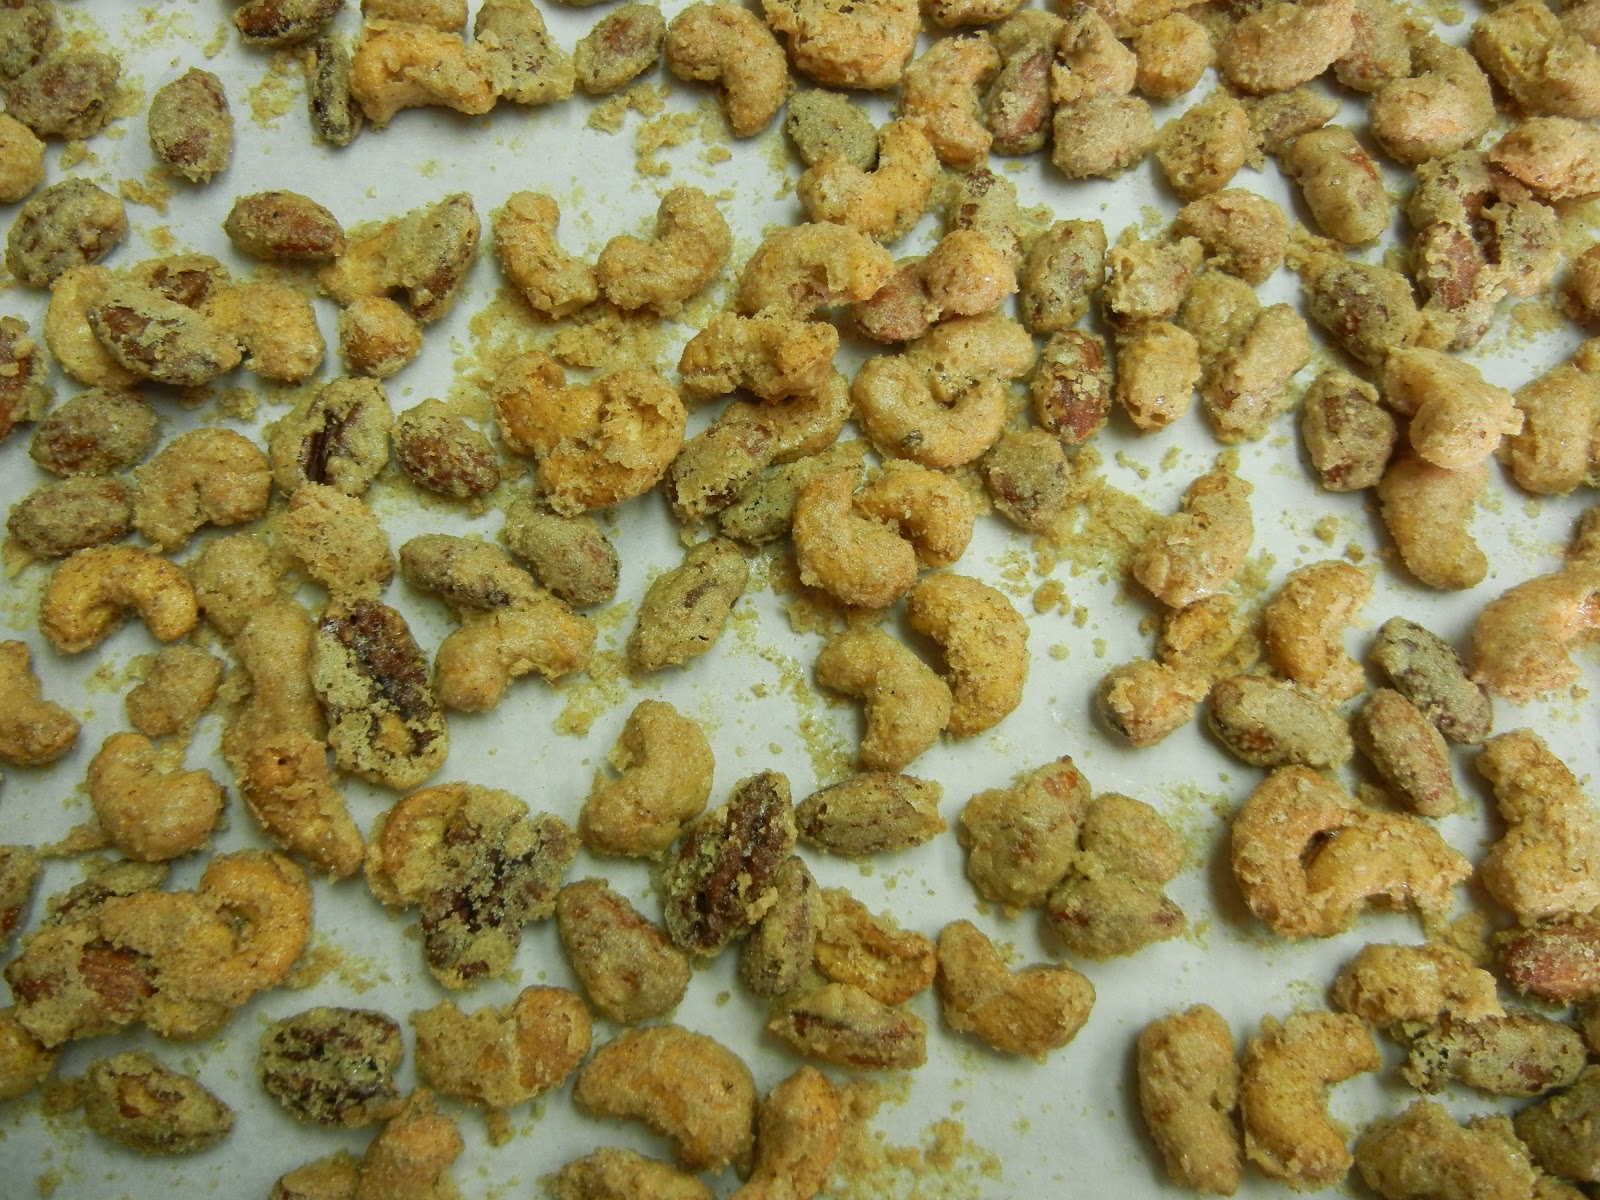
Sugar-and-Spice nuts are perfect for the holidays.   The seasonal spices of cinnamon, nutmeg, and cloves blend so well with the sugar coating in these delicious nuts. The egg white is what coats the nuts with the sugar-and spices and gives them a delicate crunchy texture. It is hard to eat just one.  These nuts are addicting.   You can make these nuts very quickly and they are easy to make.    Start by combing the sugar with the spices.  Toss the nuts with a lightly beaten egg white and coat with the sugar-and-spice mixture. I use a combination of pecans, cashews, almonds and Brazil nuts.    Bake for about 20 minutes on a baking sheet.  For easy clean up, I line my baking sheet with parchment paper.     Let them cool for about 1 hour.  They are ready to eat and enjoy. If you make these nuts in advance, store in an airtight container.  They will keep up to 2 weeks.  Need a quick gift?  These nuts make a wonderful gift from your kitchen.  


Sugar-and-Spice Nuts
From "Ten" by Sheila Lukins

Ingredients:

1/2 cup sugar
1/2 teaspoon ground cinnamon
1/2 teaspoon ground nutmeg
1/2 teaspoon ground cloves
1/4 teaspoon salt
8 ounces mixed nuts
1 large egg white, lightly beaten

Directions:

1. Preheat oven to 350 degrees F.
2. Combine the sugar, spices, and salt in a bowl.  Stir well and set aside.


3. In a separate bowl, toss the nuts with the egg white to coat them.  Then add the sugar-and-spice mixture and mix well.


4. Spread the coated nuts in a single layer on a baking sheet.  You may need to use your fingers to separate the nuts as much as possible.  Bake for 15 minutes.  Remove the baking sheet from the oven and use a metal spatula to scrape up the nuts and break them apart.  Return the nuts to the oven for 5 minutes more to dry them thoroughly.


5. Remove the baking sheet from the oven and shake it to break up the nuts.  Let the nuts sit on the baking sheet in a cool dry place for 1 hour to cool and harden. (Stored in a tin in a cool dry place, the nuts will keep for up to 2 weeks.)


Friday, November 23, 2012

Herbed Olives


Herbed Olives
This week in French Fridays With Dorie we made Herbed Olives.  I made them a few days early so I could serve them at Thanksgiving.  I did just as Dorie suggested -I got the plainest olives I could find.  The olives are marinated in seasoned olive oil.  The olive oil is seasoned with coriander, fennel, black pepper, bay leaves, rosemary, thyme, chili flakes, lemon zest, and garlic.  I took a a taste right after I prepared the olives and they were ok.  Let them macerate in the refrigerator overnight and the next day they are wonderful.  They were some of the best olives I have eaten and so easy and inexpensive to make.  I'll be making this recipe again and again.
You can find this recipe on  pages 16-17 in "Around My French Table."


Thursday, November 22, 2012

Happy Thanksgiving


Wishing you and your family a very Happy Thanksgiving.  

Geri Saucier