Pages

Friday, January 31, 2014

Deviled Ham Spread

Deviled Ham Spread
I remember taking Deviled Ham sandwiches to school for my lunch as I was growing up.  They were one of my favorites.  Many years and four kids later, I have expanded the love for these sandwiches.

Instead of using the little can of deviled ham, I  have finally found a recipe for making your own spread that is easy, quick and very delicious.  Best of all, the family loves it.   Most of the ingredients you will have on hand, and as for the ham a quick trip to the store may be necessary.  With so many varieties of ham available you can personalize the recipe to fit you family's preferences.    The recipe calls for using Black Forest Ham, but the family enjoys this spread using Apple wood Smoked Ham. To make this recipe, you start by chopping the ham  in a food processor.  Then you add some butter and pulse some more.  Transfer to a bowl and add mayonnaise, Dijon mustard, sweet pickle relish, pepper, cayenne pepper, and ground allspice.  Mix everything to together and put it in the fridge for at least 30 minutes.

Remove from the fridge and use for sandwiches or just an all purpose spread.


Deviled Ham Spread
From Cook's Country Magazine

Ingredients:

12 ounces thinly sliced deli Black Forest ham, torn into 1/2-inch pieces
4 tablespoons unsalted butter, softened
5 tablespoons mayonnaise
3 tablespoons Dijon mustard
2 tablespoons sweet pickle relish
1/2 teaspoon pepper
1/4 teaspoon cayenne pepper
1/4 teaspoon ground allspice

Directions:
1. Pulse ham in food processor until coarsely chopped, about 12 pulses.  Add butter and pulse until incorporated and ham is finely chopped, about 10 pulses.

Chopped Ham

Ham Mixed With Other Ingredients


2. Transfer mixture to bowl and stir in mayonnaise, mustard, relish, pepper, cayenne, and allspice until thoroughly combined.  Cover and refrigerate for at least 30 minutes before serving.  Spread will keep, refrigerated, for up to 3 days.

Makes about 2 cups

Wednesday, January 29, 2014

Orecchiette Pasta with Peas, Pancetta, and Cream

Orecchiette Pasta with Peas, Pancetta, and Cream
Pasta is one of my standard go to dinners.  The other day I was at Trader Joe's and I picked up a bag of Orecchiette Pasta and Pancetta.  Instead of using the typical marina sauce I make for pasta, I thought a cream sauce would go better with this pasta.    In the past, I have made a version of this recipe using fettuccine and the cream sauce was made a little differently.

The pancetta added a wonderful flavor to the cheese sauce.  After all, it is Italian bacon so it had to be good.    I have read  that you do not need to cook pancetta. However,   I cooked mine in this recipe until it was a nice golden brown.  It takes about 5-7 minutes to cook.  The addition of the peas was perfect for this sauce.  If your cheese sauce is a little thin for your liking, add more cheese.


This dinner made up quickly and was a nice hearty meal. The sauce coated the pasta nicely and the pancetta and peas added great flavor and color.


Orecchiette Pasta with Peas, Pancetta, and Cream

 Modified Epicurious | 2002
Ingredients:
1 pound orecchiette pasta
3 tablespoons butter
1 small white onion, diced, (about 1/2 cup)
1/2 cup frozen or shelled fresh peas
2 tablespoon water
4 ounces  pancetta cut in small cubes
3/4 cup heavy cream
1/4 cup grated Parmesan cheese
Salt and pepper to taste
Directions:
1. Cook pasta according to package directions.
2.  Cook pancetta until golden brown.  Set aside.  
3. Meanwhile, warm 1 tablespoon of the butter in a medium saucepan over medium-low heat. When the butter starts to bubble, add onion and cook for 3 to 4 minutes, until translucent, stirring often.
4. Add the peas and water to the pan and cook 3 minutes, stirring. Stir in the pancetta and the cream; bring to a low simmer and cook 5 minutes.

Delicious Cream Sauce

5. Drain pasta; place in large serving bowl. Stir remaining 2 tablespoons butter into the cream mixture over low heat until melted. Stir in the cheese. Pour sauce over pasta and toss to coat. Season with salt and pepper to taste.

Makes 4 to 6 servings


Monday, January 27, 2014

Quick Chicken Divan

Quick Chicken Divan
Quick, easy, and satisfying.    It seems as if I am always running short on time.  I can have my plans laid out but something seems to turn up and I have a change of plans.  Why can't weeks or days go as planned?

 Last night, I served some Quick Chicken Divan. This was a perfect recipe for easy, quick, and delicious.   With this dish, the cleanup is minimal.  Start by preparing some steamer frozen broccoli according to package directions.  Place the broccoli in the bottom of a greased baking pan.  Next arrange the cooked chicken over the broccoli.  In a small bowl, you mix well some mayonnaise, cream of chicken soup, and lemon juice.   Spread the sauce over the chicken.  You sprinkle some cheese over the the chicken.  Breadcrumbs mixed with butter are sprinkled over the top of the casserole.  Bake at 350 degrees F until the casserole has been heated through.  Serve.

You have a delicious casserole  for dinner.  I served mine with some rice.


Quick Chicken Divan
From Pillsbury

Ingredients:
1 bag (12 oz)  Steamers  frozen broccoli cuts
2 cups cubed cooked chicken
1 (10 3/4-oz.) can condensed cream of chicken soup
1/2 cup mayonnaise or salad dressing
1 teaspoon lemon juice
2 oz. (1/2 cup) shredded Cheddar cheese
1/2 cup soft bread crumbs
2 tablespoons  butter, melted

Directions:
1. Heat oven to 350°F. Grease 12x8-inch (2-quart) baking dish. Cook broccoli as directed on package; drain.
2. Arrange broccoli in greased baking dish. Layer chicken over broccoli. In small bowl, combine soup, mayonnaise and lemon juice; mix well. Spread over chicken; sprinkle with cheese.
3. In small bowl, combine bread crumbs and margarine; sprinkle over top. Bake at 350°F. for 30 to 35 minutes or until thoroughly heated.
Ready for Oven


Serves 6


Friday, January 24, 2014

Moules Mariniere

Moules Mariniere
This week in French Friday's With Dorie our assignment was mussels.  Fresh mussels are a shell fish the whole family enjoys.  We are not much of a fish eating family.  In Dorie's version, they are cooked in white wine with some chopped onion, shallots, garlic, thyme, parsley, a bay leaf and lemon zest.  Cook until the mussels are steamed open.  That's it - you have a fantastic dinner that is ready in minutes and requires little effort to prepare.  And did I mention, these mussels are delicious:)


This recipe can be found on pages 312-313 in "Around My French Table."


Wednesday, January 22, 2014

Sugar Snap Peas With Bacon

Snap Peas With Bacon
Sugar snap peas are a favorite at my house.  We eat them by themselves, dipped in ranch dip, in salads, etc.  Last night for dinner, I cooked some snap peas with applewood smoked bacon, a touch of lemon juice, bacon dripping and lemon zest.  There were so tasty.  The bacon dripping slightly coated the peas and the lemon juice and zest added the extra flavor that made the peas delicious.  The peas themselves were crisp just as peas should be.

I found this recipe in Cook's Magazine, but I modified it.  My family isn't crazy about mint in peas.  At times, I try to get by with a very small quantity of mint but I knew there was no way they would touch the peas with 1/2 cup of fresh torn mint leaves.   Needless to say,  I eliminated the mint.   I also eliminated the 4 shallots, sliced thin.  I didn't want the shallots over powering the lemon and bacon flavors.

Another plus for this recipe, is it is easy and quick.  You cook up some bacon, let it cool.. The peas are cooked in a tablespoon of bacon drippings, add some salt and water.  Cover and let them cook 2-4 minutes.  Uncover the peas, and cook until the liquid has evaporated.  Then toss with lemon juice, lemon zest and the bacon.  Season with some salt and pepper and your veggies are ready to be served.


Sugar Snap Peas With Bacon
Adapted from Cook's Country Magazine

Ingredients:

4 slices applewood smoked bacon
1 1/2 pound sugar snap peas, strings removed
1/4 cup water
Salt and pepper
1 teaspoon grated lemon zest
2 teaspoons lemon juice

Directions:

1. Cook bacon in 12-inch nonstick skillet over medium heat until crispy.  Drain on paper towel-lined plate.  Once cool crumble and set aside.
2. Reserve 1 tablespoon of the bacon drippings.  Pour off the remaining fat.  Heat the one tablespoon bacon drippings and add snap peas, water, and 1 1/4 teaspoons salt.
3. Cover and cook until the snap peas are crisp - 2 to 4 minutes.  Stir half way through cooking.
4. Uncover and continue to cook the snap peas until the liquid has evaporated 1-3 minutes.
5. Remove from heat and stir in lemon juice, lemon zest, and bacon.  Season with salt and pepper to taste.  Serve.

Serves 6


Monday, January 20, 2014

Hummingbird Power Bars

Hummingbird Power Bars
I will make practically any recipe that has the word Hummingbird in the name.  Hummingbird cake is my favorite of all.  When I found this recipe in Southern Living magazine, I read the description of the recipe which stated, "What could be better than a breakfast that tastes like the classic Hummingbird cake without the colossal calories?"  This recipe had to be a winner.

I did change the recipe a little.  Instead of using walnuts, I used pecans, and instead of oat bran (I figured the bars already had oats) I used ground flax seed.    This recipe uses some of my favorites as ingredients - flaked coconut, dried banana chips (I love them) and dried pineapple.  These bars also have regular oats (not quick oats) high-fiber cereal, I used Fiber One like the recipe testers did,  and salt.  You mix together the oats, high-fiber cereal, nuts, banana chips, pineapple, coconut, oat bran or ground flax seed and salt in a medium bowl.   A syrup is made using light brown sugar, honey light corn syrup, olive oil and vanilla extract.  You pour the syrup over the cereal mixture and coat well.  Finally eggs whites are stirred into the oat mixture.  Press the mixture in a prepared 9-inch square pan.  The bars are baked for 50 minutes.  Cool complete and then cut into 16 bars.

These bars did not last long - they were so good.  I cut my first one to take a picture and when I went back to the kitchen, they were half gone.  By dinnertime they were gone.  So much for a breakfast bar.

These bars were quick to put together and did not take alot of time.  Best of all - they are packed with goodness and are delicious:)


Hummingbird Power Bars
Adapted from southern Living Magazine

Ingredients:

1 1/2 cups uncooked regular oats
1 cup high-fiber cereal
1 cup chopped pecans
1 cup chopped dried banana chips
1/2 cup chopped dried pineapple
1/2 cup unsweetened shredded or flaked coconut
1/2 cup ground flax seed
1/2 tablespoon salt
1/4 cup firmly packed light brown sugar
1/4 cup honey
2 tablespoons light corn syrup
2 tablespoons olive oil
1 teaspoon vanilla extract
2 large egg whites

Directions:
1. Line a 9-inch square baking pan with parchment paper.  Lightly grease the parchment paper and set aside.
2. Preheat oven to 300 degrees F.
3. Stir together the uncooked oats, high-fiber cereal, pecans, banana chips, dried pineapple, coconut, ground flax seed and salt in a medium  bowl.


4. Microwave in a microwave safe dish the brown sugar, honey, light corn syrup, olive oil and vanilla extract on HIGH for one minute.
5. Pour warm honey mixture over oat mixture, stirring to coat.
6. Whisk the egg whites and stir into oat mixture.  Press into the prepared pan.


7. Bake 50 minutes or until brown.  Cool completely in pan on a wire rack (about 45 minutes).
8. Cut into 16 bars.

Makes 16 bars


Friday, January 17, 2014

Christine's Simple Party Soups


Christine's Simple Party Soups
Today in French Fridays With Dorie we made a very simple soup.  There were three different soups to make, Asparagus, Broccoli, and Red Pepper.  I made only the Broccoli Soup.   The main star of these soups are the veggies.

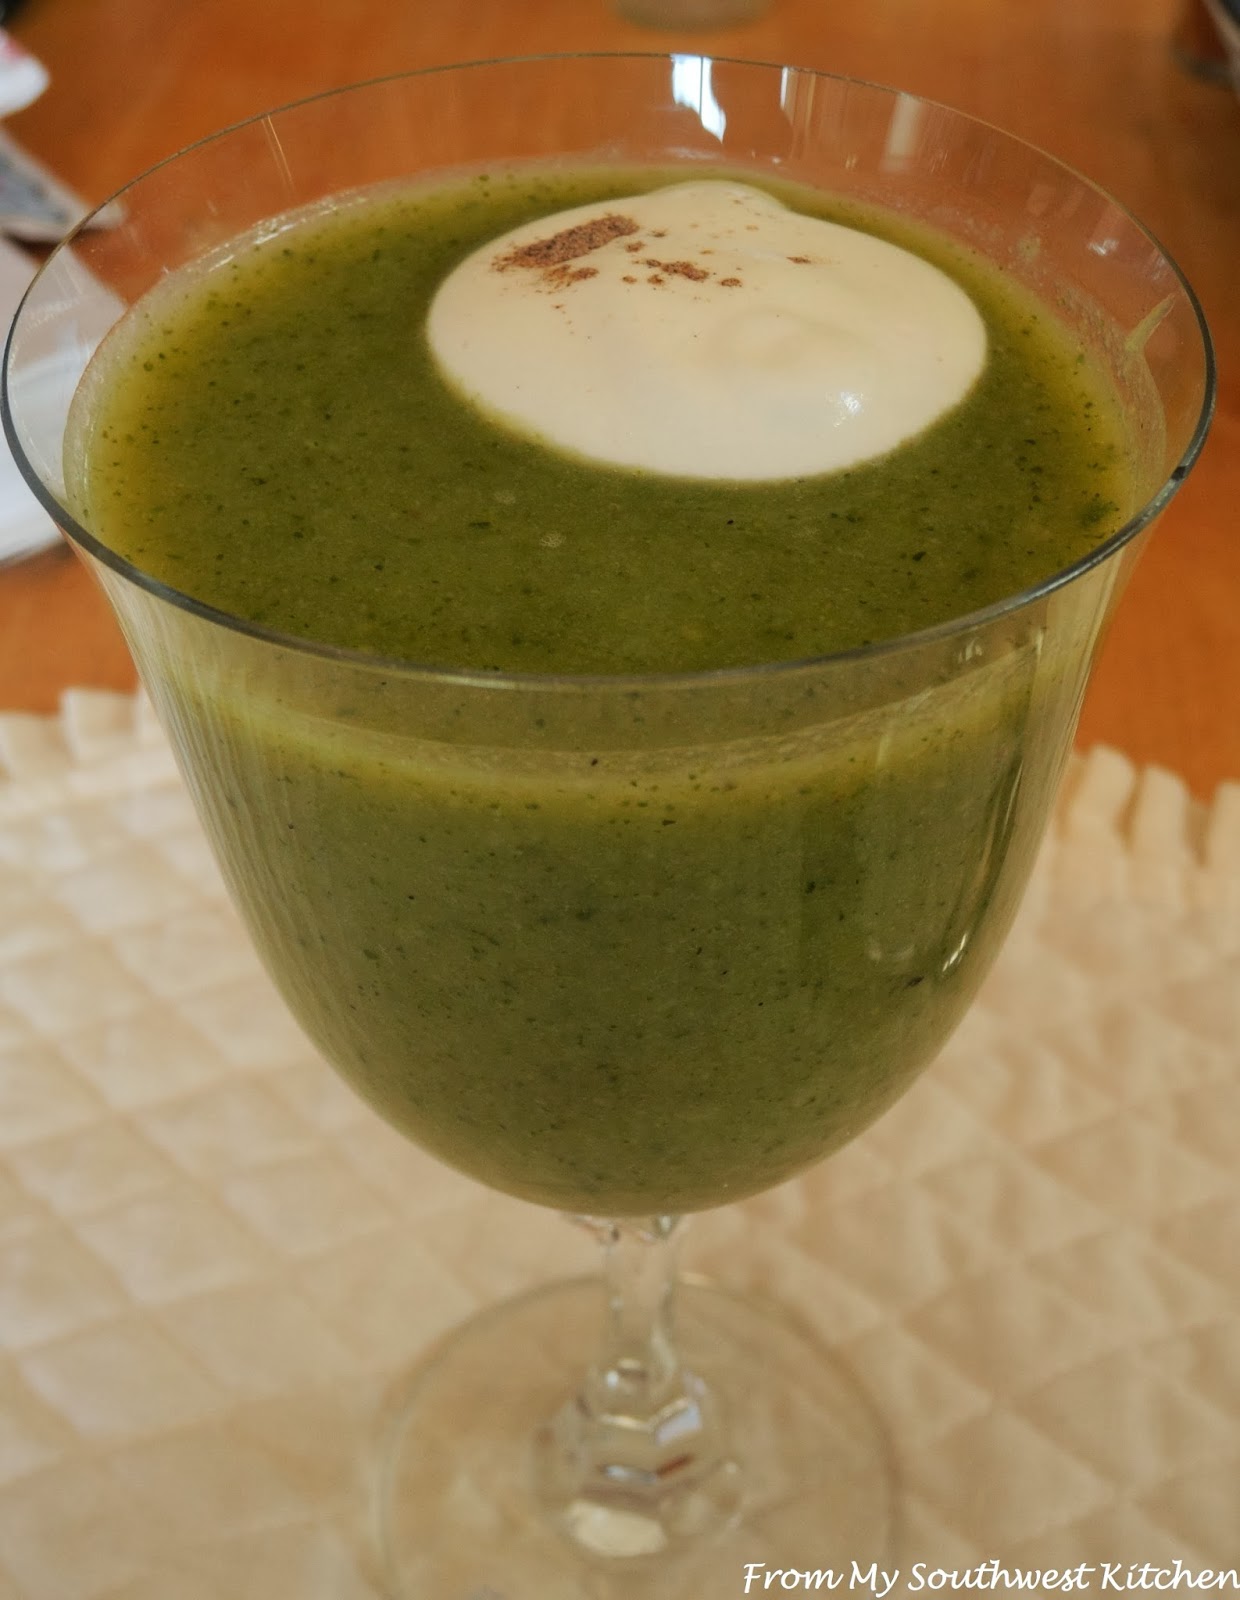
For the Broccoli soup,  you just cook the veggies, broccoli and zucchini in some chicken or vegetable broth.  If you do not have any broth on hand, you can use bouillon cubes and water.  The liquid of your choosing is brought to a boil and then the cut up veggies are dropped in and seasoned with salt and pepper.  Cook until the veggies are tender.  The soup is then pureed in a blender or food processor.  I used a stand blender and had a very smooth puree.  Now you have a decision to make - do you want to serve the soup hot or cold.  I chose to serve mine cold so I put it in the fridge until  I was ready to serve it.


I poured the soup in glasses and topped the soup with a cream topping that was flavored with a pinch of salt and some ground cardamom.

The Broccoli soup was wonderful.  A velvety texture with a rich veggie flavor.  The soup was a beautiful color and the splash of cream added extra richness and color.

These soup recipes can be found on Pages 62-63 in "Around My French Table".