Pages

Wednesday, May 30, 2012

Chilled Raspberry-Chile Soup

Chilled soups are tasty and refreshing on hot summer days.  I saw this recipe for Chilled Raspberry-Chile soup in the June issue of  "Better Homes and Gardens" magazine.  The use of Jalapeno peppers is what caught my eye in reading over this recipe.  This is a very easy recipe to make.  You put the raspberries, bananas, orange juice, yogurt and agave syrup in a blender until smooth.   My blender was not large enough to handle all the ingredients, so I processed the fruit in batches with some of the orange juice, then  stirred the remaining ingredients together.  Chill the soup and it is ready to serve.   The taste: A delicious rich velvety texture from the bananas, a hint of tartness,  and a little heat with a crunch.  Not only does this soup taste good, it is a lovely soup to serve.   This soup is perfect for luncheons, or as a starter.

As a whole, the family enjoyed the soup.  The youngest wasn't too sure about the jalapenos.  The family did suggest the next time I made the soup mixture was to make popsicles with it.   Tim (the youngest) stated without the jalapenos.  Jalapenos are not meant to be in popsicles.


Chilled Raspberry-Chile Soup
From Better Homes and Gardens - June 2012


Ingredients:

4 cups fresh raspberries
4 ripe bananas, peeled and cut up
1 cup fresh orange juice
1 (6 -oz) carton plain low-fat yogurt
2 tablespoons agave syrup or corn syrup
2 fresh jalapeno peppers, minced
Whole or sliced fresh raspberries (optional)
Sliced fresh jalapeno or serrano peppers (optional)


Directions:
1. In a blender combine the  4 cups raspberries, bananas, orange juice, yogurt, and syrup.  Cover and blend until smooth.
2. Stir in minced jalapeno peppers, then refrigerate at least 1 hour.
3. Serve the soup in small bowls.  Garnish with raspberries and sliced chiles, if desired.

Makes 6 servings


Monday, May 28, 2012

Lentil and Couscous Salad with Mint

Every summer, I try new ideas for salads.  I truly enjoy a salad during the hot days of summer.  They are light and refreshing.  I found this salad recipe in Country Living using lentils and couscous.  Pearl couscous  (aka Israeli couscous) is used instead of the traditional couscous.  This type of couscous is much larger than the traditional couscous but it is similar in flavor.   It adds a nice chewy texture to the salad. Add tomatoes, mint, scallions,  toss in a tangy mustard vinaigrette and you have a delicious salad.


Lentil and Couscous Salad with Mint
From Country Living

Ingredients:

6 tablespoons cider vinegar
4 tablespoons Dijon mustard
1/4 cup olive oil
1/4 teaspoon coarse black pepper
Salt to taste
1 1/3 cups French lentils (cooked, drained, and cooled)
1 cup pearl couscous (cooked, drained, and cooled)
3/4 cup chopped mint
4 scallions (white part only, sliced)
3 plum tomatoes (seeded and chopped)

Directions:

1. Whisk the vinegar, mustard, olive oil, and black pepper together in a small bowl. Add salt to taste and set aside.
2. Place the lentils, couscous, mint, scallions, and tomatoes in a large bowl.
3. Add the dressing to the lentil mixture and toss.
4.  Serve at room temperature.


Pearl Couscous


Friday, May 25, 2012

Lyonnaise Garlic and Herb Cheese (aka Boursin's Mama)

It is great making Dorie's recipes again.  I missed my French Friday's With Dorie.   Today we made"Lyonnaise Garlic and Herb Cheese (aka Boursin's Mama)." This is a delicious herb cheese  you can use as a spread for crackers or bread, a dip for raw veggies, or thin it out a bit and you have a delicious salad dressing. You start with ricotta cheese or fromage blanc, add some onion, garlic, an assortment of fresh herbs, red wine vinegar, olive oil, salt,  and pepper.  Mix gently and voila it's done.  I served mine as a spread for crackers and it was a family hit. Dorie also suggested using it as a stuffing for hollowed out tomatoes, piquillo peppers, or cherry peppers. You can make this recipe ahead of time - it lasts 2 days in the fridge.  Just stir it gently before serving.

You can find this recipe on pages 20-21 in "Around My French Table."


Wednesday, May 23, 2012

Chia Limeade

I was flipping through my new Issue of "Bon Appetit" and I ran across a section entitled "Agua Fresh."    They had such refreshing beverage  recipes(Agua Frescas) for summertime I had to try one.   Chia Limeade  was the family choice.   My kids had fun with this recipe.  The first thing you do is soak the Chia seeds in water.  As the seeds are soaking,  they get a gelatinous texture.  They are nice and chewy.  My eight year old son renamed the drink "Bug Juice."  It looked like there were little bugs swimming around in his drink.  The imagination of kids you gotta love it.
Chia Limeade aka Bug Juice


I  haven't cooked with Chia seeds before so I did some research.   I found they are a  powerhouse seed.  Chia seeds contain essential mineral such as phosphorus, manganese, calcium, potassium and sodium.  They are also rich in Omega-3 Fatty Acids.  Wow- all this from one tiny seed.

The limeade was very refreshing and not too tart.  The Chia seeds added an interesting and fun texture.  Great for a hot summer day.    I am going to make this Agua Fresh again.


Chia Limeade
From Bon Appetit

Ingredients:

2 tablespoon black or white chia seeds
5 cups of water
2 cups fresh lime juice, about 12-14 limes
1 1/2 cups superfine sugar


Directions:

1. Whisk together the black or white chia seeds and 5 cups of water in a pitcher.  Let the seeds soften, about 10 minutes.
2.  Add the fresh lime juice and  sugar to the water mixture.  Stir until the sugar is dissolved.  Taste and add more sugar if needed.
3. Fill glasses with ice; stir the limeade well before pouring into the glasses.


Makes 8 servings


Chia Seeds


Monday, May 21, 2012

Homemade Caramel Sauce

My husband is a  caramel sauce junkie.    He eats it whenever he can.   Now that I think about it, three out of four of my kids are caramel sauce junkies too.  One uses it in Hot Apple Cider, the other in coffee, and I have one who will eat it right from the jar.  I must confess, I like dipping apple slices in caramel sauce.

I decided I would try making my own caramel sauce.  I found this great recipe for Caramel Sauce from  My Baking Addiction. It really is quite easy to make, but you must watch the syrup closely as it  starts turning a dark amber.  It will burn on you quickly.  I burnt my first batch.   On my first batch I relied on my candy thermometer and when it reached the Caramel Stage I could smell the sugar burning.  The second time around, I still used the candy thermometer but primarily I  watched for the syrup to turn a dark amber.  The watching/candy thermometer technique worked better for me than just the candy thermometer method.   Also, use  at least a 2-quart saucepan because when you add the cream  to the mixture, it does boil furiously.

Once the sauce has cooled you have a slightly salty, sweet, heavenly sauce that is great on, ice cream, brownies, frozen yogurt, and yes, just eating it out of the jar.  Enjoy:)


Homemade Caramel Sauce
From My Baking Addiction

Ingredients:

1 cup sugar
1 tablespoon corn syrup
1/4 liquid cup water
1/2 liquid cup heavy cream, heated until warm
2 tablespoons unsalted butter, softened
1/2 teaspoon fine grain sea salt
1 teaspoon pure vanilla extract

Directions:

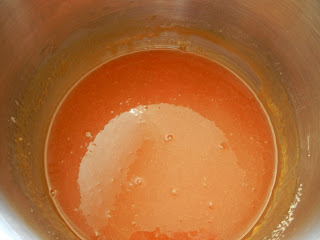
1. In a heavy saucepan (at least 5 cup capacity), stir together the sugar, syrup, and water until the sugar is completely moistened.  Place your candy thermometer into the pot taking care that the tip is immersed into the sugar mixture.
Sugar, Water, and Corn Syrup

2. Heat, stirring constantly, until the sugar dissolves and the syrup is bubbling.  Stop stirring completely and allow it to boil undisturbed until it turns a deep amber (like the color of Bass Ale).  If using a thermometer, start paying close attention at about 340 degrees.  Once the syrup is a deep amber immediately remove it from the heat.   Slowly and carefully pour the warm cream into the caramel.  It will bubble up furiously.

Bubbly Syrup Mixture
Beginning to Turn Amber
Dark Amber


Cream Added to Syrup

3. Use a high-temperature heat-resistant rubber spatula or wooden spoon to stir the mixture until smooth, scraping up the thicker part that settles on the bottom.  If any lumps develop, return the pan to the heat and stir until they dissolve.  Stir in the butter and salt.  The mixture will be streaky but become uniform after cooling slightly and stirring.

4. Allow the sauce to cool for 3 minutes.  Gently stir in the vanilla extract.
Sauce Cooling


Makes 1 cup.

Notes:  Keep at room temperature for up to 3 days; refrigerated, about 3 weeks.  To reheat, simply place in a microwave safe container and heat for about 45-60 seconds.   Stir well.


Delicious!


Friday, May 18, 2012

Sesame Crusted Tuna

Pineapple Plant
I just got back from an incredible two week Family Vacation/High School Graduation trip (my oldest daughter graduated from High School) .   We took a Hawaiian cruise and ate lots  and lots of delicious food,  saw  the beautiful Hawaiian Islands, and relaxed.  I loved seeing  all the beautiful flowers and fruits growing along the roadside.  My favorite  food discovery was on the island of Kaui - coffee. I did not get a chance to tour the plantation  but I caught a glimpse of it from the road.  A good reason to go back.   Kaui Coffee is a smooth tasting coffee with a luscious flavor.   I bought several bags  to enjoy at home.


Bird of Paradise


Kauai Coffee Company
Coffee Plants


My New Favorite Coffee


As I said earlier,  I relaxed.  I loved the cruise sea days because you set your own agenda and best off all -the cooking demonstrations:)  They had demonstrations for appetizers, main courses, and of course desserts.  My favorite was the Sesame Crusted Tuna demonstration.  You start with some Ahi Tuna rolled in sesame seeds and toasted on each side.  You serve the tuna with a delicious Cilantro Salad and Baba Ghanoush.   The taste can be summed up in one word - delicious.


Sesame Crusted Tuna with Cilantro Salad and Baba Ghanoush
From Disney's Art of Entertaining

Ingredients For the Tuna:

1 pound Ahi Tuna Loin (2"x1")
2 tablespoons White Sesame Seeds
1 tablespoon Black Sesame Seeds
1/2 cup of egg whites - about 4 egg whites
2 tablespoons Corn Starch

Ingredients for the Cilantro Salad:

1 Red Bell Pepper Julienne
1/2 of a Red Onion finely sliced
1 Zucchini Julienne
1 bunch of Cilantro finely chopped
3/4 cup olive oil
1/2 cup Balsamic Vinegar
1/2 cup Soy Sauce
1 teaspoon ground black pepper
1/2 teaspoon salt

Ingredients for the Baba Ghanoush:

1 eggplant
3 tablespoons Tahini Paste
1 teaspoon Lemon juice
1 clove of garlic crushed
Dash cumin powder for seasoning
Dash ground pepper for seasoning
1/2 teaspoon salt


Directions for the Tuna:

1.  Mix the White and Black Sesame seeds together with the corn starch and reserve.
2.  Brush the Ahi Tuna Loin with the egg white then roll the tuna into the sesame seed mixture.
3.  Preheat a non-stick pan and then place the sesame crusted tuna into the pan.   Toast each side and remove.
4.  Let cool to room temperature.  Reserve.

Directions for the Cilantro Salad:

1. Place the Balsamic Vinegar and soy sauce into a pan and reduce by a third.  Cool
2. Once cooled mix with the remaining ingredients and marinade for 2 hours before serving.

Directions for the Baba Ghanoush:

1. Place the eggplant into a pre-heated oven (310F) for approximately 30 minutes until cooked through.  The eggplant should be soft and supple to touch when ready.
2. Remove from the oven and cool to room temperature.  Once cooled, peel the eggplant and drain off any excess liquor.
3. Finely chop the eggplant pulp and mix the pulp with the remaining ingredients.

Assembly:


Place a tablespoon of the Cilantro Salad into the center of the plate. Slice the Sesame seed tuna into 1/2 inch slices and arrange around the Cilantro Salad (5 slices per portion).  Place a quenelle of the Baba Ghanoush onto the Cilanto Salad and garnish with a sprig of Cilatro.  Drizzle any excess Soy Balsamic reduction around the plate.  Serve.

Makes 10 servings


Pretty Melon Carving and Veggies


Wednesday, May 16, 2012

Thai Iced Coffee

I have made the switch from hot beverages to cool beverages.  Kinda like switching off the heater and turning on the air conditioner.    The other day I was in the mood for some good iced coffee.  I  found a recipe from Williams- Sonoma for Thai Iced Coffee. The recipe called for sweetened condensed milk,  I had to try it.    In this recipe you  grind the coffee beans with  cardamom pods  then brew the coffee.  Caution:  You are brewing very strong coffee.   The recipe stated to add 1 tablespoon sweetened condensed milk per glass of coffee but I added a little more.  The coffee was tasty and refreshing but a little too strong for my taste.   Next time I make it, I will not use a dark roast, I'll  use a lighter one.   I did love the flavor the cardamom gave the coffee.


Thai Iced Coffee
From Williams-Sonoma

Green Cardamom Pods
Ingredients:
3/4 cup French roast or other darkly roasted coffee beans
5 green cardamom pods
4 1/2 cups water
3/4 cup sweetened condensed milk
Crushed ice as needed


Directions:

1. In a coffee grinder, combine the coffee beans and cardamom pods and pulse until finely ground, about 15 seconds.  Transfer the coffee mixture to the filter of a drip coffeemaker.  Fill the top of the coffeemaker with the water and brew according to the manufacturer's instructions.


2. Transfer the coffee to a heatproof pitcher and let cool to room temperature. Refrigerate until cold, at least 2 hours or up to overnight.
3. Pour 1/3 cup coffee into each of 12 small glasses.  Add 1 tablespoon sweetened condensed milk to each glass and stir to combine.  Add ice and stir again, then serve.

Serves 12


Brewed Coffee With Cardamom


Monday, May 14, 2012

Banana Strawberry Bread

I had some very overripe bananas and a few strawberries so I decided to combine the two into a flavorful quick bread.  I made the loaf like I usually make banana bread- bananas, flour, sugar, eggs, all the common ingredients  typically used with two exceptions - strawberries and oat flour.     No spices were added.  The rich flavor came mostly from the fruit.   This bread has more banana flavor than strawberry, but you get wonderful  bursts of strawberry flavor  as you are eating a slice.  This bread is delicious warm with butter or cream cheese or just sliced straight from the loaf.  My kids like to make Peanut Butter and Jelly sandwiches with this bread.


My Bunch of Bananas


Banana Strawberry Bread


Ingredients:

3 overripe bananas
1-cup sugar
1 cup sliced fresh strawberries
1-cup sugar
1-2/3 cups all-purpose flour
1/3-cup oat flour
1-teaspoon baking soda
1-teaspoon salt


2 large eggs
1-teaspoon vanilla extract
8 tablespoons unsalted butter, melted and cooled
1 cup chopped walnuts

Directions

1. Position rack in center of oven.  Preheat oven to 350 degrees F.
2. Spray a 9x5x2-1/2-inch loaf pan with Bakers Joy or similar product. Or line the baking pan with foil and spray with Baker's Joy or similar product.   Set aside.
3. Place the bananas and sugar in a medium bowl.  Mash bananas with a potato masher until smooth.


Mashed Bananas and Sugar


4. Place strawberries in a food processor and puree.  Add the puree to the banana mixture and stir until well combined.
Banana Strawberry Mixture

5. Whisk together in a medium bowl the all-purpose flour, oat flour, baking soda and salt.  Set aside.


Flour Mixture


6. Whisk together the eggs and vanilla extract together in a medium bowl.  Slowly whisk in butter and continue whisking until combined.


Eggs and Butter Combined
7. Add the banana strawberry mixture to the egg mixture.  Stir until well combined.
8. Stir the egg mixture into the flour mixture.  Mix well.
9. Fold in the nuts.  Pour the batter into the prepared pan and bake 50-60 minutes or until a toothpick inserted in the middle come out relatively clean.


10. Cool for 15 minutes in the pan.  Remove from pan and place on a rack to cool.  Cool completely before slicing.
11.  Wrap the bread tightly when storing.


Makes 1 loaf


Friday, May 11, 2012

Cardamom Brown Sugar Snickerdoodles

I was reviewing my blog reading list the other day, and I ran across a recipe for Snickerdoodles.   Dorie Greenspan on her blog "Dorie Greenspan - On the Road and in the Kitchen with Dorie" posted a recipe for Cardamom Brown Sugar Snickerdoodles.   Snickerdoodles are a favorite of mine.    I was intrigued by this recipe because it used cardamom.    Cardamom is a spice native to the Middle East, North Africa, and Scandinavia.  It has a unique spicy- sweet taste.   A new twist on a favorite cookie.


The traditional ingredients of flour, cream of tartar, baking soda, salt , butter, eggs, and vanilla were used.  Instead of cinnamon and white sugar, cardamom and brown sugar were used.  These cookies came together very nicely.  The dough was easy to work with.  I refrigerated the dough between baking so the cookie dough would not get too soft.

When the cookies came out of the oven, I could not wait to try them.  The result - a delicious Snickerdoodle - with the slight crispiness on the edges, a soft creamy center, and a spicy-sweetness.  I could not eat just one.


CARDAMOM BROWN SUGAR SNICKERDOODLES
From Dorie Greenspan's Blog  "On the Road and in the Kitchen with Dorie"

From Joe Yonan’s “Serve Yourself: Nightly Adventures in Cooking for One” (Ten Speed Press, 2011).


Makes about 84 cookies


2 3/4 cups flour

2 teaspoons cream of tartar

1 teaspoon baking soda

2 teaspoons ground cardamom

1/4 teaspoon salt

16 tablespoons (2 sticks) unsalted butter, at room temperature

1 1/2 cups packed light brown sugar

2 large eggs

1 teaspoon vanilla extract

1/2 cup granulated sugar, for rolling


Sift together the flour, cream of tartar, baking soda, 1 teaspoon of the cardamom and the salt in a large bowl.

 Combine the butter and brown sugar in the bowl of a stand mixer or hand-held electric mixer. Beat on medium speed for 1 minute. Increase the speed to high and beat until very light and fluffy, 2 or 3 minutes, stopping a couple of times to scrape down the sides of the bowl as needed. Reduce the speed to medium and beat in the eggs, one at a time, and the vanilla extract. Stop to scrape down the sides of the bowl.

 Add about one-third of the dry ingredients; beat on low speed until fully incorporated. Repeat two more times, stopping to scrape down the sides of the bowl as needed, until the dry ingredients are incorporated.

 Cover and refrigerate for about an hour, until firm.

 Preheat the oven to 350 degrees, positioning the racks in the upper and lower thirds of the oven. Line several baking sheets with parchment paper or silicone liners.

Stir together the granulated sugar and remaining 1 teaspoon of cardamom in a medium bowl. Use a #100 disher (a 3/4-tablespoon scoop) or a tablespoon to scoop small balls of dough, a few at a time, into the sugar-cardamom mixture, then roll the pieces to coat them and lightly roll them into balls between your palms, pressing the sugar mixture into the dough. Arrange the cookies 2 inches apart on each baking sheet.

Bake two sheets at a time for 5 minutes, then rotate the baking sheets top to bottom and front to back. Bake for 4 to 6 minutes, until the tops of the cookies are crackled and the edges are just barely browned. Transfer to a wire rack to cool before serving or storing. Use a strainer to sift any extra cardamom-sugar mixture onto the cookies (this will keep separate any clumps of dough that might be left in the sugar).


Wednesday, May 9, 2012

Layered Salad

I was in the mood for a nice salad- one that had lots of goodies in it. My mind quickly thought of a Layered Salad I had made before.  Not only is this salad easy and delicious, it looks pretty.  You can put almost anything in a Layered Salad.  In this recipe I have lettuce, spinach, hard boiled eggs, bacon, tomatoes, cheese,  green onions, and peas.  The veggies are then topped with an amazing dressing consisting of mayonnaise, sour cream sugar, and dill. MMM good.  Then it is topped with shredded cheese.  Refrigerate, toss, and enjoy.  The flavors of this salad compliment one another very nicely.
This is a terrific salad for potlucks, picnics, luncheons.   I also  like to  serve it as a light dinner.


Layered Salad
Adapted From The Pioneer Woman Cooks

Ingredients:


1 (10 ounce) bag Hearts of Romaine chopped
1 (6 ounce) bag Baby Spinach, washed and dried
Salt and Pepper, to taste
6 hard-boiled eggs chopped
16 ounces, weight bacon, cooked and chopped
3 whole tomatoes, chopped
1 bunch green onions thinly sliced up to the light green portion
1cups shredded cheddar cheese
1 (10 ounce bag) fresh peas, washed and drained or frozen peas, partially thawed


For the Dressing:

½ cup mayonnaise
½ cup sour cream
1-tablespoon sugar (more to taste)
1 tablespoon fresh dill, chopped

Topping:

½ cup shredded cheese


Directions:
1. In a large clear glass bowl, layer the salad ingredients in the order they appear above, concentrating ingredients around the perimeter of the bowl and filling in the center with spinach, if needed.
End with the layer of peas.
2. Combine the dressing ingredients in a separate bowl and mix well.  Pour over the top of the peas and spread to cover, bring dressing all the way out to the edges of the bowl.
 3. Sprinkle with the shredded cheese.
4. Cover and refrigerate for up to 8 hours.  Toss just before serving.


Makes 12 servings

Monday, May 7, 2012

Sauerbraten

I wanted to make something other than the usual pot roast for dinner a few nights ago.  As I was searching, I found a recipe for Sauerbraten from Alton Brown that I hadn't made in a long time.  Sauerbraten is a German dish (German Pot Roast) that is traditionally made with beef.   The important item to remember when making Sauerbraten is you need to marinate the meat for at least 3 days.  The marinate consists of water, vinegar, an onion, carrots, and spices.  You pour the marinade over the meat and refrigerate.  Once you are done marinating you cook the meat.  I cooked mine in a large oval crock pot, but you can cook it in and oven also.  Once the meat is done, you make a sauce from the liquid and add some gingersnaps.  The sauce is served with the meat.  The meat, when done has a tanginess to it but it isn't over powering.  The sauce adds a mild ginger flavor to the meat.


Sauerbraten
Adapted From Alton Brown

                                             
Special Equipment:  Crock Pot
Special Instructions:  Meat needs to marinate for 3 days

Ingredients:
2 cups water
1-cup cider vinegar
1 cup red wine vinegar
1 medium onion coarsely chopped
1-cup carrots sliced
1-tablespoon kosher salt
½ teaspoon ground black pepper
2 bay leaves
6 whole cloves
1 teaspoon mustard seeds
1 (3-3 ½ pound) boneless beef round rump roast
1-tablespoon vegetable oil
Salt
1/3 cup packed brown sugar
1 cup crushed gingersnaps

Directions:

1.  In a large saucepan add water, vinegars, onion, carrots, salt, black pepper, bay leaves, cloves and mustard seeds.  Cover and bring mixture to a boil.  Reduce heat and simmer for 15 minutes.  Remove from heat and let cool.
2. Pat the roast dry and rub with vegetable oil.   Salt all sides of the roast.
3. Heat a large skillet over medium-high heat.  Add the meat and brown on all sides.
4.Place meat in the crock of the crock-pot.  Pout the marinade over the meat and place in the refrigerator for 3 days. If the meat is not completely submerged in the marinade, turn it once a day.
5. After 3 days add the sugar to the meat and marinade.  Cook roast on low for 8-10 hours.
6. Remove meat from crock-pot (oven)  and keep it warm.  Strain the liquid.  Discard the solids.
7. In a medium saucepan, place the liquid and heat over medium-high heat.  Whisk in the crushed gingersnaps.  Cook until the sauce is thickened, stirring occasionally.
8. Strain the sauce. Slice the roast and serve with sauce.

Makes 6 servings

Note:  To cook in Oven:  Preheat oven to 325 degrees F.  Cover meat and place on the middle rack of the oven and cook until tender, about 4 hours.  Continue to step 6.


Friday, May 4, 2012

Taco Casserole

Last night,  I was so tired, I made something quick and easy for dinner - Taco Casserole.    It takes minutes to prepare,  is tasty, items are well stocked in the kitchen, and it's in the spirit of Cinco De Mayo.

The ingredients are simple, some ground beef, cheese, refried beans (from a can) black olives, taco seasoning, salsa,  and crushed tortilla chips ( a great way to use the crumbs in the bottom of your chip bag).   You layer the ingredients in a casserole dish, bake and dinner is ready.


Taco Casserole


Ingredients:
2 cups coarsely broken tortilla chips
1 pound ground beef
1 package (1 ¼ ounce) taco seasoning
½ cup water
1 (16 ounce) can refried beans
1 cup Salsa Verde or your favorite salsa
2 cup shredded Mexican cheese, divided
1 (2.25 ounce) can sliced black olives
1 tomato diced


Directions:

1. Preheat oven to 375 degrees F.
2. Spray lightly with cooking spray an 8x8 inch-baking dish.
3. Scatter tortilla chips in the bottom of the dish.


 4. Brown ground beef in a skillet.  Drain any excess fat.
5. Add taco seasoning and water to the ground beef.  Mix well and cook on low for 3-4 minutes.
6.Heat refried beans in a saucepan over medium heat.  Add 1-cup cheese and salsa.  Stir until combined and heated through.
7. Spread beans over chips.


8. Cover the beans with the beef.


9. Sprinkle remaining cheese over beef.


10. Sprinkle black olives over cheese.


11. Bake until the cheese is melted – about 7-10 minutes.  Check after 5 minutes to be on the safe side.
12.  Remove the casserole from the oven.  Sprinkle the diced tomato over the casserole.  Let the casserole set for about 5 minutes and serve.

Makes 8 servings