Pages

Wednesday, December 27, 2017

Slow Cooker Beef Stew

A wonderful dinner for those chilly nights when you need something to warm you up.  Tender chunks of beef cooked  in a tasty sauce which has some red wine.  Add carrots, potatoes, mushrooms, and some tomatoes and you have the ingredients for a hearty stew.  Cook for 6 hours and serve.

Slow Cooker Beef Stew
From Family Circle Magazine

Ingredients:

1/4 cup all-purpose flour
1 1/4 teaspoon salt
1/2 teaspoon freshly ground black pepper
1/4 cup canola oil
2 1/4 pounds boneless beef short ribs cut into 1 1/2-inches pieces
1 package (10-ounce) white or brown mushrooms, trimmed and cut into wedges
1 cup red wine
1 1/2 pounds russet potatoes, peeled and cut into 1-inch pieces
1 can (14.5-ounce) diced tomatoes with garlic and onions
5 medium carrots, peeled and sliced into 1/2-inch rounds

Directions:
1.  In a large bowl, toss beef with flour, 1/2 teaspoon salt and the pepper.  Heat 2 tablespoons oil in a large stainless skillet over medium-high.  Add half the beef and brown, 4 minutes.  Remove to a 5 quart slow cooker.  Repeat with remaining oil and beef and transfer second batch to slow cooker.  Reduce heat under skillet to medium and add mushrooms and wine.  Cook 1 minute, scraping up brown bits.
2. Stir skillet contents plus potatoes, tomatoes, carrots, and 3/4 teaspoon salt and 1 cup water into slow cooker.  Cover and cook on HIGH for 6 hours or LOW for 8 1/2 hours.  Serve.

Serves 6


Monday, December 18, 2017

Chocolate Crinkles

Chocolate -  a great flavor for the holidays.  These cookies are not only lovely they also taste fantastic.  A deep chocolate flavored cookie dough (the dough looks and taste like brownie batter) rolled in confectioners' sugar then baked for about 12 minutes.  Once these cookies are cooled you have a chewy delicious chocolate fudge cookie with a dusting of confectioner's sugar.  Perfect for any holiday party, cookie exchange, or cookie tray.    Make some for this holiday season  - everyone who tastes this cookie will be so glad you did.

Chocolate Crinkles
From Simply Recipes

Ingredients:
1 cup unsweetened cocoa powder
1 1/2 cups white granulated sugar
1/2 cup vegetable oil
4 eggs
2 teaspoons vanilla extract
2 cups  all-purpose flour
2 teaspoons baking powder
1/2 teaspoon salt
1 cup confectioners' sugar

Directions:
1.  In a large mixing bowl beat together with an electric mixer the cocoa powder, white sugar and vegetable oil.  Mix until the dough is shiny and gritty - like brownie batter.
2. Add the eggs one at a time until incorporated in the batter then add next egg.  Once all eggs have been added beat in the vanilla extract.
3. In a medium mixing bowl, whisk together the flour, baking powder, and salt.
4. Add the dry ingredients into the wet ingredients a spoonful at a time mixing until incorporated into the batter.
5. Cover the dough with plastic wrap and refrigerate for 4 hours or overnight.
6. Preheat the oven to 350 degrees F. Line 2 baking sheets with parchment paper.  Place the confections' sugar in a wide bowl.
7. Using about a rounded teaspoon scoop out the dough and roll into a ball.  Roll the ball into the confections' sugar and place on the baking sheet.  Repeat until there are 12 cookies on each sheet.
8. Place in the oven and bake for about 10-12 minutes rotating sheets halfway through baking.  Allow the cookies to cool for about 2 minutes before transferring to wire rack to cool completely. Repeat until all the dough has been used.

Makes about 4 dozen cookies


Sunday, December 10, 2017

Cornflake Chocolate Chip Cookies

These cookies have some wonderful flavors and texture.  Cornflakes to make them crunchy, chocolate and marshmallows to add extra jazz to these cookies. As they come out of the oven the centers are just a little soft and the chocolate and the marshmallows are slightly gooey.  A wonderfully tasty cookie to present to your family and/or guests.  My family loved these cookies. They were gone within an hour and they were asking for more.


Cornflake Chocolate Chip Cookies
From Family Circle Magazine Adapted Slightly by From My Southwest Kitchen

Ingredients:


1 cup (2 sticks) unsalted butter, at room temperature
1 1/4 cups granulated sugar
2/3 cup packed light-brown sugar
1 large egg
1 tsp vanilla extract
1 1/2 cups all-purpose flour
1/2 teaspoon baking powder
1/2 teaspoon baking soda
1 1/2 teaspoons kosher salt
Cornflake Crunch (recipe follows)
2/3 cup mini chocolate chips
1 1/4 cup mini marshmallows

Directions:
1. With an electric mixer, beat butter and sugars on medium-high speed for 2 to 3 minutes.  Scrape down bowl, add egg and vanilla extract, and beat 7 to 8 minutes.
2. Reduce speed to low and add next 4 ingredients;  beat until well combined.  Beat in Cornflake Crunch and chocolate chips.  Beat in marshmallows until just incorporated.
3. Using a 1/3-cup measure, drop  dough onto a baking sheet. Pat dough flat and refrigerate 1 to 2 hours, until chilled.
4.  Heat oven to 375 degrees.  Line 2 baking sheets with parchment paper.
5. Place chilled cookies at least 4 inches apart on prepared baking sheets (no more that 4 cookies per sheet).  Bake 1 or 2 sheets at a time, 18 minutes per batch.  Cookies will crackle and spread.  Cool completely on sheets.  Repeat with remaining dough and cooled baking sheets.

Cornflake Crunch
Crush 5 cups cornflakes in a medium blow until they're one-fourth their original size.  Add 1/2 cup milk powder, 3 tablespoons sugar, and 1 teaspoon kosher salt; toss to mix.  Melt 9 tablespoons unsalted butter; add to cereal mixture and toss to coat, creating small clusters.  Spread clusters on a parchment-paper lined rimmed sheet pan and bake at 275 degrees F for 20 minutes.  Clusters should look toasted, smell buttery and crunch gently when cooled slightly.  Cool completely before using.  If not using right away, Cornflake Crunch will keep  for 1 week in an airtight container at room temperature or for 1 month in the fridge or freezer.

Makes 18 cookies


Wednesday, December 6, 2017

Cinnamon Chip Scones


Today's post uses another holiday favorite  flavor - cinnamon.  These scones have cinnamon morsels t which give this traditional cream scone a nice holiday flavor.  I love the moist texture and the rich flavor of these scones.    They are not dry and chewy like some scones.

This recipe also comes together very nicely.  Butter is cut into the dry ingredients and then the cinnamon morsels are tossed in.  The cream and vanilla extract are then poured into the dry ingredients and mixed together until a nice  dough is formed.  The dough is rolled out and the scones are cut.  Bake the scones for about 20 minutes or until the edges start to turn golden.  Remove from oven and serve warm.

A delicious holiday scone to go with your tea. Serve with your favorite jam, butter, or some clotted cream.

Cinnamon Chip Scones
Tea Time Magazine

Ingredients:
2 1/2 cups all-purpose flour
1/3 cup granulated sugar
2 1/4 teaspoons baking powder
1/2 teaspoon salt
4 tablespoons cold unsalted butter, cut into pieces
1/2 cup cinnamon morsels
1 cup plus 2 tablespoons cold heavy whipping cream, divided
1/2 teaspoon vanilla extract

Directions:

1. Preheat oven to 350 degrees F.  Line a rimmed baking sheet with parchment paper.
2. In a large bowl, combine flour, sugar, baking powder, and salt, whisking well.  Using a pastry blender, cut butter into flour mixture until it resembles coarse crumbs.  Add cinnamon morsels, stirring until blended.
3. In a small bowl, combine 1 cup plus 1 tablespoon cream and vanilla extract, stirring well.  Add to flour mixture, stirring until mixture is evenly moist.  If dough seems dry, add more cream, 1 tablespoon at a time.  Working gently, bring mixture together with hands until a dough forms.
4. Turn out dough onto a lightly floured surface.  Knead gently 4 to 5 times.  Using a rolling pin, roll dough to a 1-inch thickness.  Using a 2 1/4-inch square cutter, cut 10 scones from dough, rerolling scraps as necessary.  Place scones 2 inches apart on prepared baking sheet.
5.  Brush tops of scones with remaining 1 tablespoon cream.  Bake until edges are golden brown and a wooden pic inserted in the centers comes out clean, approximately 20 minutes.

Serve warm.

Makes 10 scones.

Saturday, December 2, 2017

Peppermint Meringues

Peppermint is my favorite flavor of the Christmas Season.  When I found this recipe for Peppermint Meringues in Bon Appetit magazine, I got busy and started making them.  The basic ingredients for these cookies are egg whites, salt, sugars, peppermint extract, and red food coloring.

The meringue in spooned into a pastry bag and piped onto a baking sheet.  The meringues are baked for about 2 1/2 hours.  The meringues cool for about 1 hour and then are ready to enjoy.

These cookies are light and very delicious.  Perfect for any holiday gathering.


Peppermint Meringues
Bon Appétit Magazine

Ingredients:
3 large egg whites, room temperature
1/8 teaspoon kosher salt
1/3  cup sugar
1/2 cup powdered sugar
1/8 teaspoon peppermint extract
12 drops red food coloring

Directions:

1. Preheat oven to 200 degrees F.  Line a baking sheet with parchment paper.  Using an electric mixer, beat egg whites and salt on medium-high speed until white and foamy, about 1 minute.  With mixer running, gradually add sugar in 3 additions, beating for 2 minutes between each addition.  Beat until firm peaks form, about 2 minutes longer.  Add powdered sugar and peppermint extract; beat to blend, about 1 minute.
2. Dot coloring over surface of meringue; do not stir (the coloring will form swirls when piped).  Spoon meringue into a pastry bag fitted with a 1/2" tip.  Twist top; pipe 1" rounds onto prepared sheet,   spacing 1" apart.
3. Bake meringues until dry, about 2 1/2 hours.  Let cool completely, about 1 hour.

Store airtight at room temperature between sheets of parchment or waxed paper.


Friday, December 1, 2017

Amish Sugar Cookies

My Christmas baking has begun.  I have a bunch of recipes I want to try.  My first baking adventure was baking a batch of  Amish Sugar Cookies.  I found this recipe on the Taste of Home website. They looked so good I just had to make some.  The ingredients are common items you probably have in your pantry.  In addition to being tasty these cookies are so easy to make.
Place butter, oil and sugars in a large bowl and beat. Next add in the eggs and vanilla.  In a separate bowl add the flour, baking soda, and cream of tartar.  Add in small amounts of the flour mixture to the cream mixture.  Drop by teaspoon onto a baking sheet and bake for 8-10 minutes.  Cool and  enjoy a wonderful tasting cookie. They just melt in your mouth.


Amish Sugar Cookies
Taste of Home
 Ingredients
1 cup butter, softened
1 cup vegetable oil
1 cup sugar
1 cup confectioners' sugar
2 large eggs
1 teaspoon vanilla extract
4-1/2 cups all-purpose flour
1 teaspoon baking soda
1 teaspoon cream of tartar

Directions
1. In a large bowl, beat the butter, oil and sugars. Beat in eggs until well blended. Beat in vanilla. Combine the flour, baking soda and cream of tartar; gradually add to creamed mixture.
2. Drop by small teaspoonfuls onto ungreased baking sheets. Bake at 375° until lightly browned, 8-10 minutes. Remove to wire racks to cool.

Yield: about 5 dozen


Thursday, November 23, 2017

Thursday, November 16, 2017

Pretzel Rolls

It seems I gear up on my baking as the holidays come around.  I found an absolutely wonderful recipe for Pretzel Rolls on Our Best Bites blog.  Who doesn't love Pretzel Rolls?   They are perfect for dinner, to make sliders/sandwiches, served along side a nice bowl of soup, etc.

This recipe is very easy to make and you probably have everything you need in the pantry.  You start by making a basic bread dough and letting it rise for 1 hour.  Next you divide the dough into  a dozen 3-ounce balls and let rise.  While the rolls are raising, make some baking soda water to boil the rolls in.  You boil each roll individually for 30 seconds on each side.  Remove them with a slotted spoon and place on a baking sheet.   Brush with an egg wash and sprinkle with some salt.  Bake until golden brown.

It will be hard but let them cool before devoting one of these delicious rolls.

Pretzel Rolls
Our Best Bites

Ingredients

1 1/2 cups warm water (105-115 F)
1 tablespoon rapid rise or bread machine yeast
1 tablespoon sugar
4 3/4 -5 cups all-purpose flour
2 teaspoons kosher salt, plus more for sprinkling
1/4 cup melted butter
1 egg, separated
1/4 cup baking soda
8 cups water

Instructions

In a large measuring cup, combine the water, sugar, and yeast and allow to stand for 10 minutes and the mixture is frothy.
While the yeast is proofing, combine the salt and 4 1/2 cups flour in the bowl of a heavy-duty mixer (or a large bowl, if mixing by hand). Add the melted butter, egg yolk, and the bubbly yeast mixture. Mix until combined. If necessary, add up to an additional 1/2 cup of flour, about a tablespoon at a time, until the dough pulls off the sides of the bowl and barely sticks to your finger when you touch it. Cover the bowl and place it in a warm, draft-free area and allow the dough to rise for an hour or until doubled in bulk.
When the dough has risen, turn it onto a surface lightly sprayed with non-stick cooking spray. Divide into 12 equal pieces or use a scale to measure out 3-ounce pieces of dough. Shape the dough into balls, place on a lined baking sheet (parchment or a silicone liner), cover, and allow to rise for 30 minutes.
While the dough is rising the second time, preheat the oven to 425. Bring 8 cups of water to a boil in a medium saucepan. When the water begins to boil, add the baking soda and bring back to a full boil. Working with one roll at a time, carefully place each roll, seam-side down into the baking soda bath. Boil for 30 seconds then flip and boil for another 30 seconds. Use a slotted spoon to remove the boiled roll from the water and place, seam-side down, on the baking sheet. Repeat with remaining dough balls.
Whisk together the reserved egg white and 2 tablespoons of water. Brush the egg white over the boiled dough balls and then sprinkle with kosher salt. Bake for 12-18 minutes or until the tops are golden brown. Remove from oven and cool on baking sheets.

Makes 12 rolls

Friday, November 3, 2017

Chili con Carne

Chili con Carne is a delicious one pot meal that is extremely versatile.  You can eat it by itself with a flour tortilla, serve it over rice,  serve it over has browns topped with cheese,  make some tacos, serve it as a side with a nice Mexican meal.  It also goes great with scrambled eggs.

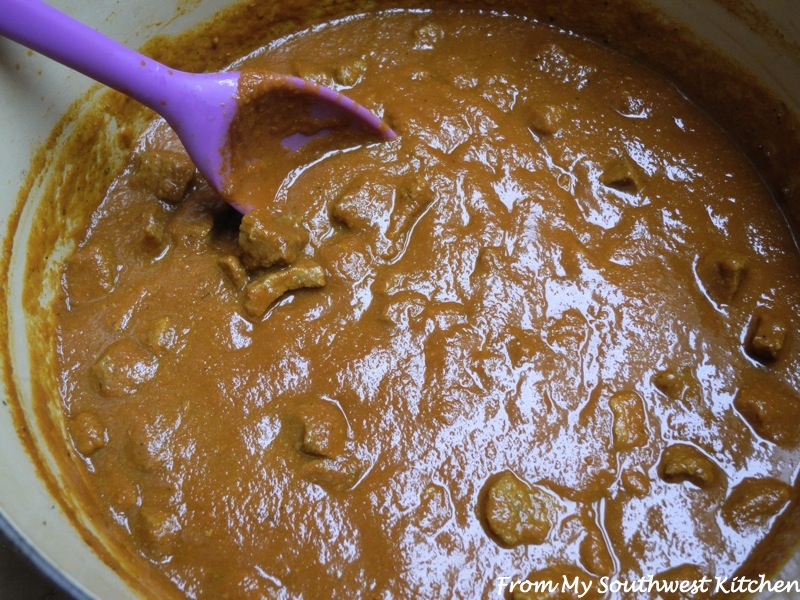
Chili con Carne is not difficult to make.   You basically cook all of the ingredients  for about 2 hours and then serve.  This dish smells wonderful as the meat is cooking in a rich red chili sauce.

I like making this dish ahead of time, the flavor gets better with time.  Chili con Carne is a dish I cook for our Christmas Eve Buffet.  Everyone enjoys it.

Chili con Carne
From Cook's Country Magazine

Ingredients:

1 (14.5-ounce) diced tomatoes
2 teaspoons minced canned chipotle chile in adobo sauce
4 slices bacon, chopped fine
1 (3.5 to 4 pound) boneless beef chuck-eye roast, pulled apart at seams, trimmed, and cut into 1-inch cubes
Salt and pepper
1 onion chopped fine
1 jalapeno chile, stemmed, seeded, and chopped fine
3 tablespoons chili powder
4 garlic cloves, minced
1 1/2 teaspoons ground cumin
1/2 teaspoon dried oregano
4 cups water
1 tablespoon packed brown sugar
2 tablespoons yellow corn muffin mix

Directions:

1. Process tomatoes and their juice and chipotle  in food processor until smooth, about 30 seconds; set aside.  Cook bacon in Dutch oven over medium heat until crisp, about 8 minutes.  Transfer bacon to paper towel-lined plate, reserving 3 tablespoons fat.
2.  Pat beef dry with paper towels and season with salt and pepper.  Heat 1 tablespoon reserved bacon fat in now-empty pot over medium-high heat until just smoking.  Brown half of beef on all sides, about 8 minutes; transfer to bowl.  Repeat with 1 tablespoon bacon fat and remaining beef.
3. Add remaining 1 tablespoon bacon fat, onion, and jalapeño to now-empty pot and cook until softened, about 5 minutes.  Stir in chili powder, garlic, cumin, and oregano and cook until fragrant, about 30 seconds.  Add water, reserved tomato-chipotle mixture, bacon, browned beef, and sugar, and bring to a boil.  Reduce heat to low and simmer, covered, for 1 hour.  Skim fat and continue to simmer, uncovered until meat is tender, 30 to 45 minutes.
4.  Transfer 1 cup chili liquid to bowl and stir in muffin mix.  Microwave, covered, until mixture is thickened, about 1 minute.  Slowly whisk mixture into chili and simmer until slightly thickened, 5 to 10 minutes.  Season with salt and pepper to taste.  Serve.
Note:  Chili can be refrigerated for up to 3 days.

Serves 6 to 8


Friday, October 27, 2017

Broccoli Cheddar Soup

It is getting that time of year when a nice bowl of soup is very comforting.  I must say soup is one of my favorite meals.  So good, nutritious, and easy to make.  The ingredients needed are common staples and if you do not have exactly what a recipe calls for, you can substitute  ingredient(s).


Today's recipe is for a rich and creamy Broccoli Cheddar Soup.   Fresh broccoli is cooked in some chicken stock with chopped onion, garlic and tarragon.  When the broccoli is tender, remove from heat a puree ingredients with an immersion blender.  This is a step I added,  I prefer my soup creamy with just a few whole florets.   Return the soup to the heat and stir in cream.  I then added in the thickening and cooked for about 5 minutes.   Add the cheese a small amount at a time.  Stir until the cheese has melted before adding more.   Ladle the soup into bowls and top with some grated cheese.  Serve.

Broccoli Cheddar Soup
From Epicurious Adapted by From My Southwest Kitchen


Ingredients

6 tablespoons (3/4 stick) butter, room temperature
2 pounds fresh broccoli  florets chopped into bite-size pieces
1 large onion, chopped
2 garlic cloves, minced
1 teaspoon chopped fresh tarragon or 1/2 teaspoon dried
6 1/2 cups chicken stock
1 cup whipping cream
3 tablespoons all purpose flour
2 cups (packed) grated extra-sharp cheddar cheese (about 8 ounces)
Salt and pepper
Grated cheese for garnish - optional

Directions

1. Melt 3 tablespoons butter in heavy medium pot over medium-high heat. Add broccoli  and onion; sauté until onion is translucent, about 6 minutes. Add garlic and tarragon; sauté 1 minute. Add stock; bring to boil. Simmer uncovered until broccoli is tender, about 15 minutes.
2. Remove from heat and puree with an immersion blender.  Return to heat and  stir in cream.
Mix remaining 3 tablespoons butter with flour in small bowl to make paste. Whisk paste into soup.  Simmer until soup thickens  stirring frequently, about 5 minutes.
3. Add cheese a handful at a time.  Whisk until the cheese has melted before adding more.  Repeat until all the cheese has been used. Taste and season with salt and pepper.    Ladle into bowls, garnish with grated cheese and serve.

Makes 6 servings

Mmmm good

Tuesday, October 24, 2017

Shredded Ginger Brussels Sprouts

Brussels Sprouts - you love them or you don't.  In my family two out of six love Brussels sprouts.  We  will eat them roasted, sautéed, in salad, etc.  The remaining members of the family need to be coaxed into eating this veggie.  I am looking for new ways to get them to eat this delicious veggie.


I found a tasty recipe on the Taste of Home website.   This is a very quick and easy recipe to make. You start by cutting the Brussels sprouts into thin slices.  Toss in some  oil and  most of the other ingredients. Cook over medium heat until tender and serve.  That is all there is to make this delicious side.  Perfect for the upcoming Thanksgiving holiday.

All members of the family loved this dish.

Shredded Ginger Brussels Sprouts
Taste of Home

Ingredients
1 pound fresh Brussels sprouts (about 5-1/2 cups)
1 tablespoon olive oil
1 small onion, finely chopped
1 tablespoon minced fresh ginger root
1 garlic clove, minced
1/2 teaspoon salt
2 tablespoons water
1/4 teaspoon pepper
Directions
1. Trim Brussels sprouts. Cut sprouts lengthwise in half; cut crosswise into thin slices.

2. Place a large skillet over medium-high heat. Add Brussels sprouts; cook and stir 2-3 minutes or until sprouts begin to brown lightly. Add oil and toss to coat. Stir in onion, ginger, garlic and salt. Add water; reduce heat to medium and cook, covered, 1-2 minutes or until vegetables are tender. Stir in pepper.

Yield: 6 servings


Thursday, October 12, 2017

Creamy Fresh Tomato Soup

I am finishing up my tomatoes from the garden.  This year has been an exceptionally good year.  I have had a great crop of tomatoes.  Usually I can the tomatoes or make sauce out of them.  With this batch of tomatoes, I decided to make some garden fresh Tomato soup. 

This is an easy and delicious recipe from Ina Garten.   I modified it slightly using less chicken broth.   We like our soup thick.  If you perfect thinner soup add more chicken broth or cream. Also, I peeled, seeded, and chopped my tomatoes before I cooked them in the broth.  I did not used a food mill as suggested in the recipe.  I pureed my soup using an immersion blender.

I served my soup with a Grilled Cheese sandwich.  This made a delicious and satisfying dinner.  


Creamy Fresh Tomato Soup
From Ina Garten adapted by From My Southwest Kitchen

Ingredients:
4 pounds vine-ripened tomatoes (5 large)
3 tablespoons olive oil
1 1/2 cups chopped onions (2 onions)
2 carrots, peeled and chopped
1 tablespoon minced garlic (3 cloves)
1 1/2 teaspoons sugar
1 tablespoon tomato paste
1/4 cup packed chopped fresh basil leaves
2 cups chicken stock
1 tablespoon kosher salt
2 teaspoons freshly ground black pepper
3/4 cup heavy cream
Fresh basil leaves

Directions:
1. In large saucepan, heat 3 quarts water to boiling. With sharp knife, cut shallow X in bottom of each tomato. Add to boiling water, 2 or 3 at a time, for 10 seconds. Using a slotted spoon, remove tomatoes from boiling water; immediately plunge into ice water until cold. Drain. Peel and chop tomatoes.
2. Heat the olive oil in a large, heavy-bottomed pot over medium-low heat. Add the onions and carrots and saute for about 10 minutes, until very tender. Add the garlic and cook for 1 minute. Add the tomatoes, sugar, tomato paste, basil, chicken stock, salt, and pepper and stir well. Bring the soup to a boil, lower the heat, and simmer, uncovered, for 30 to 40 minutes, until the tomatoes are very tender.
3. Puree the soup using an Immersion Blender.  If you are using a standard blender let the soup cool and process in batches.  You may want to remove  the cap a little from the top of the blender to let out steam if necessary.
4. Add the cream to the soup  and  reheat the soup over low heat just until hot and serve.  Garnish with fresh basil leaves.

Serves 6


Sunday, October 1, 2017

Instant Pot Honey Sesame Chicken

Another great meal prepared in my Instant Pot - Honey Sesame Chicken.  Tender bites of chicken cooked in a flavorful sauce served over cooked rice and sprinkled with  toasted sesame seeds.  A very satisfying meal which cooks in 3 minutes and takes only 20 minutes from beginning to table.

To begin cook the chicken in the Instant Pot on the saute setting for about 3 minutes.  Next add some soy sauce, ketchup, and red pepper flakes to the pot.  Pressure cook on high for 3 minutes.  When the chicken is done you add the sesame oil and honey to the pot.  Add some cornstarch and water to the pot and simmer until the sauce thickens.  Serve over rice and sprinkle with toasted sesame seeds.

Note:  The recipe calls for chopped green onions which I omitted - the family isn't a fan of green onions.


Instant Pot Honey Sesame Chicken
From Pressure Cooking Today

Ingredients:
4 large boneless skinless chicken breasts, diced (about 2 lbs.)
Salt and pepper
1 tablespoon vegetable oil
1/2 cup diced onion
2 cloves garlic, minced
1/2 cup soy sauce
1/4 cup ketchup
2 teaspoons sesame oil
1/2 cup honey
1/4 teaspoon red pepper flakes
2 tablespoons cornstarch
3 tablespoons water
2 green onions, chopped
Sesame seeds, toasted

Directions:

1. Salt and pepper chicken. Preheat pressure cooking pot using the saute setting. Add oil, onion, garlic, and chicken to the pot and saute stirring occasionally until onion is softened, about 3 minutes.
2. Add soy sauce, ketchup, and red pepper flakes to the pressure cooking pot and stir to combine. Pressure cook on high for 3 minutes. When timer beeps, turn pressure cooker off and do a quick pressure release.
3. Add sesame oil and honey to the pot and stir to combine. In a small bowl, dissolve cornstarch in water and add to the pot. Select Saute and simmer until sauce thickens. Stir in green onions.
Serve over rice sprinkled with sesame seeds.

Serves 6


Friday, September 29, 2017

One-Pan Noodle Bowls

This is not your ordinary Ramen Noodle Bowl.  It is a bowl of steaming noodles that are tossed with seasoned chicken and veggies.  By far the best Ramen Noodle Bowl I have ever eaten.  And this meal is so easy to make and  is very versatile. The original recipe called for pork which I did not have so I substituted chicken.  You could also use beef, tofu, or shrimp.  Whatever you choose your family or friends will be having a delicious dinner.


One-Pan Noodle Bowls
From Cook's Country Magazine

1/4 cup hoisin sauce
3 tablespoons soy sauce
2 teaspoons cornstarch
12 ounces boneless and skinless chicken breasts (pork tenderloin in original recipe) cut into bite-size pieces
2 1/4 cups chicken broth
2 tablespoons vegetable oil
4 ounces white mushrooms, trimmed and sliced thin
1 tablespoon grated fresh ginger
2 garlic cloves, minced
3 (3 ounce) packages ramen noodles, seasoning packages reserved for another use
12 ounces broccoli florets, cut into 1-inch pieces
3 scallions, sliced thin on bias

1. Whisk 1 tablespoon hoisin, 1 tablespoon soy sauce, and cornstarch together in bowl.  Add chicken (pork) and toss to coat; set aside.  Whisk broth, remaining 3 tablespoons hoisin, and remaining 2 tablespoons soy sauce together in second bowl; set aside.
2. Heat 1 tablespoon oil in 12-inch nonstick skillet over medium-high heat until shimmering.  Add mushrooms and cook until browned, about 5 minutes.  Add ginger and garlic and cook until fragrant, about 30 seconds.
3. Add broth mixture and bring to boil.  Arrange noodles in skillet in single layer; cover and reduce heat to medium.  Cook until noodles have softened on bottoms (tops will still be dry), about 3 minutes.
4. Uncover skillet and using tongs, flip noodles and stir to separate.  Spread noodles in even layer and scatter broccoli over top.  Cover and cook until noodles and broccoli are tender, about 3 minutes, tossing halfway through cooking.  Divide noodle mixture evenly among individual bowls; tent will aluminum foil.
5. Wipe skillet clean with paper towels.  Heat remaining 1 tablespoon oil in now-empty skillet over high heat until just smoking.  Add chicken (pork) in single layer breaking up any clumps and cook without stirring until browned on bottom, about 1 minute.  Stir and continue to cook until chicken (pork) is not longer pink.  Divide the chicken (pork) among the bowls.  Sprinkle with scallions and serve.

Makes 4 servings


Friday, September 15, 2017

Slow Cooker Mongolian Beef

Mongolian Beef is one of my favorites to order when I go out. I love the tenderness of the beef and the flavor of the sauce.   I found a tasty slow cooker recipe that recreates this dish beautifully and with little effort.

You start by slicing some flank steak into thin slices and coat it with cornstarch.  In a slow cooker you place some soy sauce, water, brown sugar, carrots, and garlic.  Add the meat, stir, cover and cook for 5 hours on low.  Before serving, stir the beef and serve over rice.  Top with some green onion slices if desired.

You and your family are in for delicious dinner that was so easy to prepare.   Enjoy.


Slow Cooker Mongolian Beef
From The Recipe Critic
INGREDIENTS
1 ½ pounds Flank Steak
¼ cups cornstarch
2 tablespoons Olive Oil
½ teaspoons mince Garlic, Cloves
¾ cups Soy Sauce
¾ cups Water
¾ cups Brown Sugar
1 cup grated Carrots
green onions, for garnish

INSTRUCTIONS

1. Cut flank steak into thin strips. In a zip lock bag add flank steak pieces and cornstarch. Shake to coat.
2. Add olive oil, minced garlic, soy sauce, water, brown sugar and carrots to slow cooker. Stir ingredients. Add coated flank steak and stir again until coated in the sauce.

3. Cook for high 2-3 hours or on low 4-5 hours until cooked throughout and tender. Can serve over rice and garnish with green onions.

Serves 4-6


Wednesday, September 13, 2017

20 Minute One Pan Shrimp and Orzo Dinner

Need something quick and easy for dinner that tastes delicious?  Look no further than this post. This recipe I found on the  Laughing Spatula blog is perfect for those days when you do not want to to spend or have a lot of time to spend on dinner.  This dinner is ready in 20 minutes and the clean up is so easy.  One pan to clean up - a big plus in my mind.

As I mentioned earlier, everything is cooked in one pan.  You start by heating up some oil and butter and adding the onions, garlic and pasta.  Cook until the onions are tender and the pasta is slightly golden.  Next stir in the chicken broth, cover and cook for about 10 minutes.  Next you add the shrimp and some lemon juice, cover and cook until the shrimp are cooked.  Remove the lid, sprinkle with  some Parmesan cheese and serve. 

The pasta had a wonderful flavor and the shrimp were tender and flavorful.  The dish had a nice refreshing flavor from the lemon juice.  This meal was a family favorite. It is  in my file of recipes to make again and again and again.


20 Minute One Pan Shrimp and Orzo Dinner
From Laughing Spatula Modified Slightly by From My Southwest Kitchen

Ingredients:
1 pound medium shrimp - thawed if frozen
1 tablespoon butter
1 tablespoon olive oil
1 cup chopped onion
3 cloves of garlic - minced
1 cup uncooked Orzo pasta
2 cups chicken broth
1 teaspoon dried parsley flakes
1 fresh lemon cut in half - divided
Parmesan cheese

Directions:
1. Heat large skillet on medium high heat.
2. Add butter and olive oil.  Heat until butter is melted.
3. Add onion, garlic and orzo to the skillet.
4. Cook for 3-4 minutes until onion is translucent and orzo is slightly toasted.
5. Add chicken broth and parsley flakes.  Stir.
6. Reduce heat to medium.   Cover and cook for about 10 minutes, stirring occasionally, until orzo is soft and just a small amount of liquid remains in the pan.
7. Toss in the shrimp and the juice from one of the lemon halves.  Stir.
8.  Cover and cook for an additional  5-6 minutes or until shrimp is cooked through.
9. Cut the remaining lemon half into slices.  Garnish the Shrimp and Pasta with the lemon slices and grated Parmesan cheese.

Serves 6


Friday, September 8, 2017

Southwestern Grilled Cheese

Grilled Cheese.  That all time favorite of sandwiches.  You cannot get much better than a Grilled Cheese sandwich, in my opinion.  You can make the traditional grilled cheese sandwich or you can jazz it up a bit.  That is just what I did with this delicious Southwestern Grilled Cheese.  I started with the traditional grilled cheese  added some green chile - a New Mexico favorite and slipped in a fried egg.   Life doesn't get any better.  Every bite was simply delicious.


Southwestern Grilled Cheese

Ingredients:
2 slices sandwich bread
Butter
2 slices cheddar cheese
1 roasted green chile - peeled
1 fried egg

Directions:
1. Spread butter on one side of both slices of bread.
2. Heat a skillet over medium heat.
3. Place one slice of bread in the skillet buttered side down.  Place a slice of cheese on the slice of bread, followed  by the fried egg, green chile, another slice of cheese.  Top with the other slice of bread buttered side up.
4. Cook until the bread is a golden brown in color.  Turn the sandwich and grill the other side until golden brown.   Serve.

Serves 1


Monday, August 28, 2017

Blistered Shishito Peppers

I went to one of my favorite Growers Market and bought some Shishito Peppers this past weekend.  I love these delicious little peppers.  Not spicy but they have a little sweetness to them.  They are so easy to prepare and taste fantastic. I usually toss them with some oil and salt, cook them in a frying pan.  When they are done I sprinkle them with some more salt.  I cook them until they are slightly charred and then serve  immediately.  Pick them up by the stem and enjoy.  Everything on the pepper is edible except the stem.


Blistered Shishito Peppers
Ingredients:

1 pound Shishito Peppers
1 1/2 tablespoons olive oil or grape seed oil
Sea Salt

Directions:
1. Wash and pat dry Shishito Peppers.  Place in a large bowl and set aside  Heat a large skillet over medium high heat.
2. Toss the Shishito Peppers with the oil.   Sprinkle with salt and toss.  When the skillet is hot place the peppers in the skillet.


3. Cook the peppers until lightly charred tossing frequently.  Once peppers are cooked remove from heat.  Sprinkle with a little more salt - if desired and serve.


Wednesday, August 23, 2017

Spicy Ginger Cucumbers

I have been busy picking the cucumbers in the garden.    They have gone wild which is wonderful.  I love the taste of garden fresh cucumbers.  Cucumbers are so versatile in cooking.  You can use them in a salad, make a cucumber salad, pickle them, use them in a sandwich, they add great refreshment to water,  just to name a few.

With the cucumbers I picked this morning, I made Spicy Ginger Cucumbers -  a very easy salad to make.  I start off with a large English cucumber, or  2  regular cucumbers.  If the seeds are large, I remove them otherwise I just slice up the cucumbers into 1 inch to 1 1/2 inch chunks.  I place the cucumbers in a colander and sprinkle with some salt.  I place the colander over a bowl, and cover the cucumbers with some plastic wrap.  I refrigerate for one hour and give the cucumbers a toss every now and then.  Once the cucumbers are ready, I pat them dry with a paper towel and toss them in a dressing of Rice Vinegar, a pinch of black pepper, a pinch of sugar, a tablespoon of minced fresh ginger, some Mirin, and a pinch of red pepper flakes.  Once the cucumbers are well tossed, I cover and place them in the fridge until I am ready to serve them.

They taste wonderful -  crunchiness, with a slightly sweet and spicy gingery flavor.  I love them - one of my favorite ways to enjoy garden fresh cucumbers.


Spicy Ginger Cucumbers
Ingredients:

1 English cucumber or 2 regular cucumbers
1 teaspoon kosher salt
1/4 cup rice vinegar
1 tablespoon minced fresh ginger
1 teaspoon Mirin
Pinch of black pepper
Pinch of sugar
Pinch of crushed red pepper flakes

Directions:
1.  Wash and peel the cucumber.  Cut the cucumber in half lengthwise.  If the seeds are large remove them with a spoon.  Cut each of the halves in half lengthwise and cut the cucumber into 1- 1 1/2 inch chunks.
2. Place the cucumbers in a colander.  Set the colander over a large bowl.  Sprinkle the cucumbers with salt.  Cover the cucumbers and place in the fridge for 1 hour.  Toss the cucumbers every 20 minutes.
3. Pour the rice vinegar in a small mixing bowl.  Add the ginger, Mirin, black pepper, sugar and crushed red pepper flakes.  Stir until well mixed.
4. Remove the cucumbers from the fridge.   Path the cucumbers dry with a paper towel.   Place in a medium bowl and toss with the rice vinegar mixture.
5. Cover and place back in the fridge.   Chill for 2-4 hours.  Before serving toss the cucumbers.

Serves 4-5