Pages

Friday, December 30, 2016

Holidays 2016: Cheddar Olives


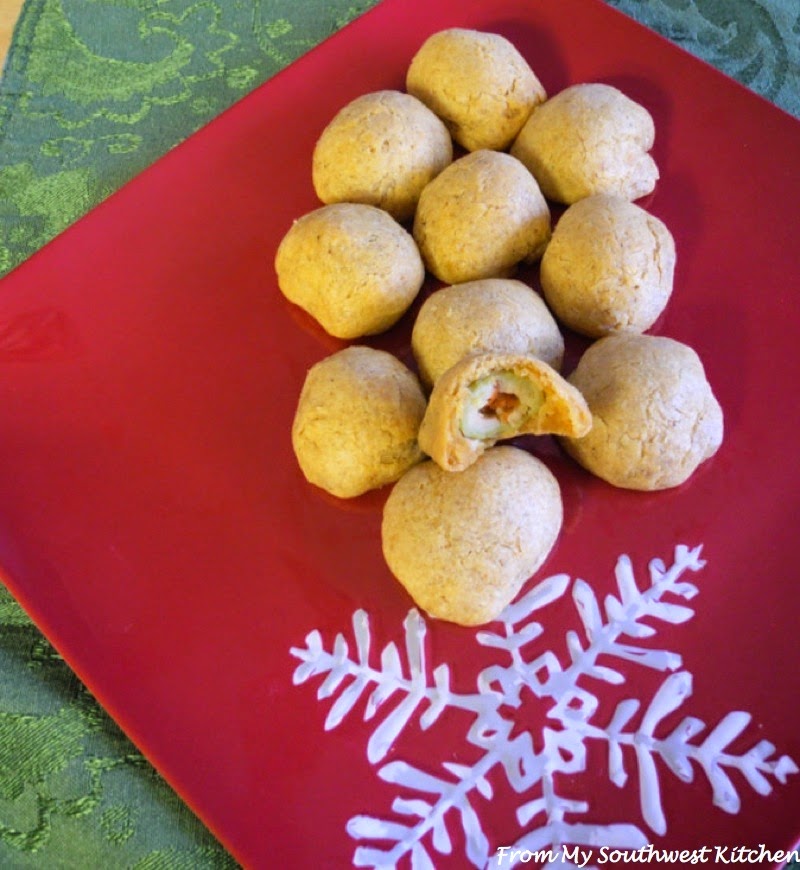
Green olives wrapped in a cheesy dough and baked until golden brown.  The result is a delicious appetizer for your upcoming holidays.  A huge plus for this recipe- other than the taste - is they can be made ahead of time.  Yes, you can freeze these delicious nibbles.

The dough for this recipe is made in a food processor which makes it come together quickly.  Once the dough is made you take 2 teaspoons and pat it into a 2-inch circle.  An olive is placed in the center and the dough is them formed around the olive.   Put in the fridge for 1 hour up to 24 hours.  If you plan to use them at a later date, pop them into the freezer.

When you are ready to bake your Cheddar Olives, place them in a 350 degree F oven for 16-18 minutes.  When baked, remove from oven and let them cool before serving.

Your family and friends will enjoy these tasty bites:)

Cheddar Olives
From Cook's Country Magazine 

Use regular-size, not colossal or queen, cocktail olives. The cheddar olives must chill for at least 1 hour before baking.

INGREDIENTS

40 pimento-stuffed green olives, rinsed
1 cup (5 ounces) all-purpose flour
3/4 teaspoon paprika
1/2 teaspoon pepper
1/8 teaspoon cayenne pepper
8 ounces extra-sharp cheddar cheese, shredded (2 cups)
7 tablespoons unsalted butter, cut into 7 pieces
1 large egg, lightly beaten
1 tablespoon water
1 teaspoon Worcestershire sauce

INSTRUCTIONS

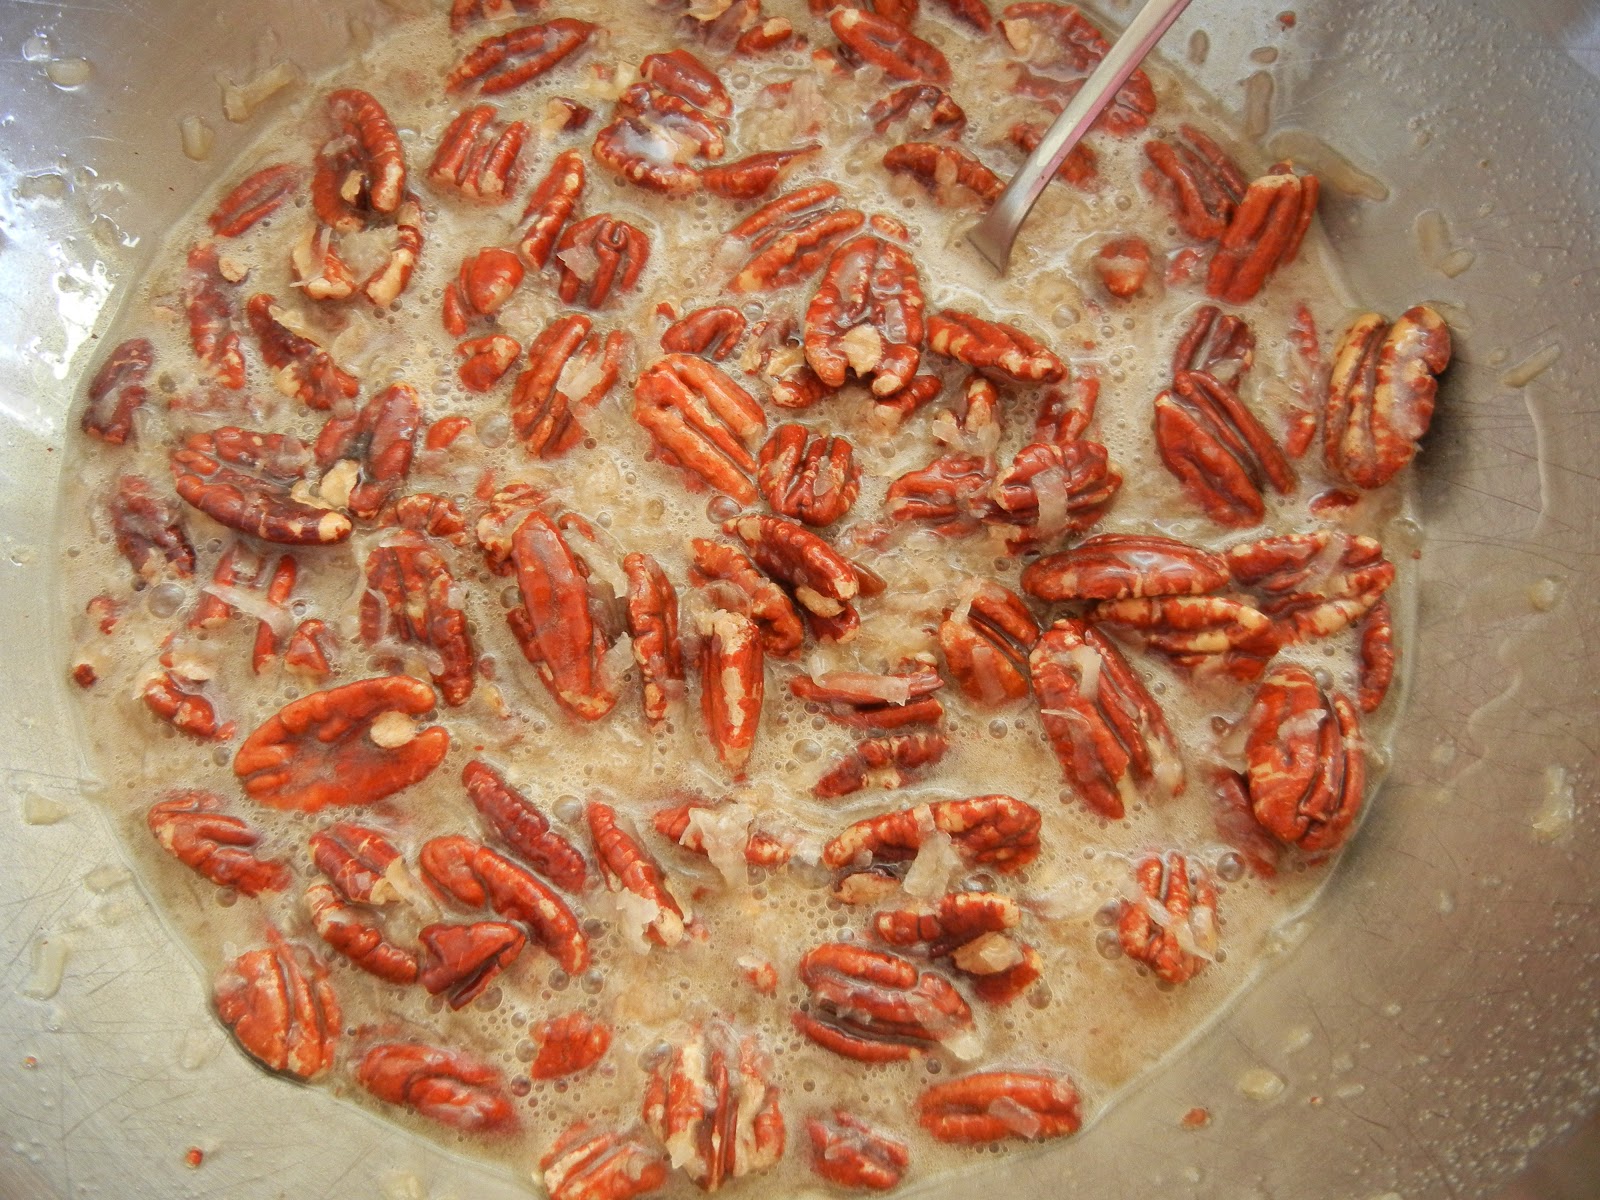
1. Spread olives on dish towel and roll around to dry. Pulse flour, paprika, pepper, and cayenne in food ­processor until combined, about 3 pulses. Add cheddar and butter and pulse until mixture resembles coarse crumbs, about 12 pulses. Add egg, water, and Worcestershire and process until dough ball forms, about 20 seconds.

2. Working with 2 teaspoons dough and 1 olive at a time, pat dough into 2-inch circle; place olive in center of dough; form dough around olive; and roll cheddar olive between your hands to make uniform ball. Place cheddar olives on large platter, cover tightly with plastic wrap, and refrigerate for 1 hour or up to 24 hours (or freeze to bake later).

3. Adjust oven racks to upper-middle and lower-middle positions and heat oven to 350 degrees. Line 2 rimmed baking sheets with parchment paper. Space cheddar olives evenly on prepared sheets. Bake until bottoms are well browned and tops are golden, 16 to 18 minutes (if baking from frozen, increase cooking time to about 25 minutes), switching and rotating sheets halfway through baking. Transfer cheddar olives to wire rack and let cool for about 30 minutes before serving.

MAKES 40 WRAPPED OLIVES

Saturday, December 24, 2016

Merry Christmas 2016

Merry Christmas Everyone!  


Jesus - The Reason For The Season


'And there were in the same country shepherds abiding in the field, keeping watch over their flock by night. And, lo, the angel of the Lord came upon them, and the glory of the Lord shone round about them: and they were sore afraid. And the angel said unto them, Fear not: for, behold, I bring you tidings of great joy, which shall be to all people. For unto you is born this day in the city of David a Savior, which is Christ the Lord. And this shall be a sign unto you; Ye shall find the babe wrapped in swaddling clothes, lying in a manger. And suddenly there was with the angel a multitude of the heavenly host praising God, and saying, Glory to God in the highest, and on earth peace and goodwill towards men.'"

Friday, December 23, 2016

Christmas: Thumbprint Cookies

Thumbprint cookies are one of my favorite Christmas cookies.  The delicate buttery cookie  dipped in chopped nuts with a touch of jam in the center is truly delicious.  They are also a great cookie to have the kids help with.  My kids love making the thumbprint and dropping the jam in the center.

This recipe from Simply Recipes is one of the best recipes I have found for Thumbprint cookies.  They were a hit with family and friends.  I made half with nuts and half without.  They were both delicious.

Thumbprint Cookies
From Simply Recipes

INGREDIENts:

1 cup of butter (2 sticks or 8 ounces), room temperature
1/2 cup of sugar
2 eggs, room temperature - separated
1 teaspoon of vanilla extract
Pinch of salt
2 cups of flour
1 cup of chopped nuts (optional)
3/4 cup of your favorite jam
Parchment paper

Directions:

1 Cream the butter and sugar.  In a medium bowl whisk together the flour and salt.  Set aside.
2 Add the yolks and vanilla extract to the butter mixture. 
3 Add the flour and salt. Mix until just combined. Chill dough in the fridge for 30 minutes and preheat the oven to 350F.  While dough is chilling whisk the egg whites until frothy.  If you are not using nuts, save the egg whites for a later use.
4 Roll the dough into balls about 1 inch in diameter. If using nuts, dip the balls into the egg whites then roll them into the nuts until covered. Place the balls on parchment lined cookie sheets or on cookie sheets with silicon baking sheets.
5 Press down with your thumb to make a small well in the center of the cookie.  Caution: Do not press too hard or the cookie will fall apart. Fill with 1/2 teaspoon of jam.
6 Bake for 12-15 minutes or until slightly firm rotating halfway thru baking. Allow to cool for a few minutes on the cookie sheet to firm up before moving them to a wire rack to finish cooling.

Makes 2 dozen


Tuesday, December 20, 2016

Christmas: Pecan Pralines

 Pecan Pralines
My husband's favorite Christmas sweet is Pecan Pralines.  They are  delicious confections made from  lots of  butter, sugar, cream and of course pecans.  My favorite recipe is from "Chef Paul Prudhomme's Louisiana Kitchen."   The pecans taste great when they are cooked in the syrup and not just added at the end.  Using both pecan pieces and pecan halves make the pralines extra good and crunchy.

When making pralines, I have all the ingredients premeasured, cookie sheets lined, and all my equipment - spoons and candy thermometer ready to go.   I also read and re read the recipe.  The cooking process requires your undivided attention - you are constantly stirring the syrup mixture.  Use a wooden spoon when you are making the pralines.   The candy needs to be stirred while it is hot and a wooden spoon will not absorb the heat like a metal spoon.


I always have a bowl of ice water handy.  They syrup can "spit" at you while you are stirring, or you can get some on your hands as you are spoon dropping the pralines.

Last, but not least,  I have a good candy thermometer.  It saves me alot of frustration.   I have not been  able to master the softball stage in candy cooking.


  Pecan Pralines
 From Chef Paul Prudhomme's Louisiana Kitchen
                           

Special Equipment:  Candy Thermometer, Wooden Spoon

Ingredients:
1 1/2 sticks unsalted butter
1 cup sugar
1 cup packed light brown sugar
1/2 cup heavy cream
1 cup milk
1 cup chopped pecans
2 cups pecan halves
2 tablespoons vanilla extract


Directions:
1.  Line  two cookie sheets with parchment paper.
2. In a 3- quart  heavy bottomed saucepan melt the butter over medium to medium high heat.
3. Add the sugars and the cream to the melted butter.  Cook 1 minute stirring constantly with a wooden spoon.
4. Add the milk and chopped pecans.  Cook 4 minutes more, stirring constantly.  Reduce the heat to medium and continue cooking and stirring 5 minutes.
5. Add the pecan halves and vanilla.  Continue stirring and cooking until the mixture reaches 240 degrees on the candy thermometer.
6. Remove the pan from the heat.  Quickly and carefully drop the batter onto the cookie sheet(s)  by heaping spoonfuls.  Use a second spoon to scoop the batter off the first.
7. Cool completely and store the pralines in an airtight container, or wrap each praline in plastic wrap or foil.

Makes about 24 pralines


Cooking and Stirring

Spooning Out Pralines

Bowl of Ice Water  


Thursday, December 15, 2016

Christmas: Red Velvet Peppermint Swirl Brownies

Red Velvet-Peppermint Brownies


When I read the title of this recipe, I knew I had to make it.  I love red velvet anything, add peppermint and cream cheese,  and I am in dessert heaven.   Being it is the holiday time, I do not need an excuse to bake something yummy.   I don't worry about the calories,  I just go for it.   I was surprised on how easy these brownies were to make.  You make two layers - the chocolate layer and the cream cheese layer.  Swirl them together and you have beautiful and tasty brownies.
For the chocolate layer:  The chocolate is melted with  the butter in the microwave.  Eggs are then added along with the food coloring, peppermint extract and vanilla extract.  Stir until everything is combined and stir in the dry ingredients.  The batter is poured into a lined 13x9-inch baking dish.
For the cream cheese layer: Next you make the cream cheese topping.  Cream cheese and sugar are beat at medium speed until fluffy.  Add egg whites and vanilla extract and beat until combined.  Stir in the flour and the cream cheese layer is complete.  Spoon it over the brownie batter and swirl the cream cheese into the brownie layer and bake.  Remove the brownies from the oven and cool completely before cutting into squares.
The result: Delicious brownies with melt in your mouth goodness.  They are more fudgy than cake like.  The taste of peppermint is ever so mild and that makes these brownies extra good.  They are a  great treat for your family and friends or to put in your holiday goodie tins:)

Red Velvet-Peppermint Swirl Brownies
From Southern Living Magazine

Ingredients:

1 (4-ounce) bittersweet chocolate baking bar, chopped
3/4 cup butter
2 1/4 cups sugar, divided
4 large eggs
1 (1-ounce) bottle red liquid food coloring
1/4 teaspoon peppermint extract
2 teaspoons vanilla extract, divided
1 1/2 cups all-purpose flour
1/8 teaspoon salt
1/2 (8-ounce) package cream cheese, softened
2 egg whites
2 tablespoons all-purpose flour

Directions:

1. Preheat oven to 350 degrees F.  Line bottom and sides of a 13x9-inch pan with aluminum foil, allowing 2 to 3 inches to extend over sides; lightly grease foil.
2. Microwave chocolate and butter in a large microwave-safe bowl at HIGH 1 1/2 to 2 minutes or until melted and smooth, stirring at 30-second intervals.  Whisk in 2 cups sugar.  Add eggs, 1 at a time whisking just until blended  after each addition.  Add food coloring, peppermint extract, and 1 teaspoon vanilla.  Gently stir in 1 1/2 cups flour and 1/8 teaspoon salt. Pour batter into prepared pan.

Chocolate and Butter
Melted Chocolate and Butter
3. Beat cream cheese and remaining 1/4 cup sugar at medium speed with an electric mixer until fluffy.  Add egg whites and remaining 1 teaspoon vanilla, and beat until blended.  Stir in 2 tablespoons flour until smooth.  Drop cream cheese mixture by heaping tablespoonfuls over batter in pan; gently swirl with a knife.
Chocolate Layer
Dollops of Cream Cheese on Chocolate Layer
Cream Cheese Swirled in Chocolate Layer
4. Bake at 350 degrees F for 30 to 32 minutes or until a wooden pick inserted in center comes out with a few moist crumbs.  Cool completely in pan on a wire rack (about 1 hour).  Lift brownies from pan, using foil sides as handles.  Gently remove foil; cut brownies into squares.

Makes about 2 dozen


Baked Goodness


Wednesday, December 14, 2016

Peppermint Holiday Rice Krispies Treats

Rice Krispies Treats are great for the holidays.  You can decorate them, use bright holiday colors, experiment with different  flavored marshmallows.  I also enjoy making them because they are quick, easy, and fun for kids to make. I found a box of Holiday Color Rice Krispies and some Peppermint Marshmallows.   I thought these are perfect to make a quick batch of  Christmas treats. 

Start by melting some butter in a saucepan.  Next add your marshmallows and stir until melted.  Add your Rice Krispies and coat well with the marshmallows.  Press into an 9x13-inch baking dish.  Cool, cut and eat.  That's it.

I loved the seasonal flavor the Peppermint Marshmallows gave to these treats.  It wasn't overpowering,  just a hint of cool peppermint flavor.


Peppermint Holiday Rice Krispies Treats
Ingredients:
3 tablespoons butter
4 cups Peppermint flavored marshmallows - miniature
6 cups Kellogg's Rice Krispies cereal with Holiday Colors

Directions:
1.  Spray a 13x9x2-inch baking dish lightly with cooking spray. Set aside.  In a large saucepan melt butter over low heat.  Add the marshmallow and stir until they are melted.
2. Stir in the Rice Krispies cereal. Keep stirring until all of the cereal is coated.
3. Press cereal mixture into the prepared pan using waxed paper.  Set aside and let cool.
4. Cut into squares and serve.


Tuesday, December 13, 2016

Christmas: German Chocolate Pecan Pie Bars

German Chocolate Pecan Pie Bars
These cookies are Scrumpdillyicious:)  I love em. I could have sat down and eaten all of them by myself. What makes them soo good is this rich German Chocolate filling in every bite.  Think of pecan pie filling with coconut and chocolate.  This delicious filling is  spread over a chocolate shortbread crust.  MMM gooey, chocolaty goodness.   These cookies are not that hard to make.  The crust is made in a food processor and then patted down in a foil lined baking dish.  You bake the crust and then sprinkle chocolate chips over the crust.  Let the crust cool.  You then make your filling - brown sugar, eggs, light corn syrup, butter coconut, and toasted pecans.  Spoon the filling over the crust and bake.  Cool,  refrigerate and eat. The family loved these cookies, except for the child who HATES coconut.  I do not know where the child got this hatred of coconut. After devouring these cookies the   majority of the family agreed on two main things.  Instead of having both Pumpkin and Pecan pies for Thanksgiving,  we will have Pumpkin Pie and our German Chocolate Pecan Pie Bars. Second,  this cookie will be the main focus of our Christmas Cookie Neighborhood Exchange.  Now to share this recipe with you.

German Chocolate Pecan Pie Bars
From Southern Living Magazine

Ingredients:

3 cups pecan halves and pieces
1 3/4 cups all-purpose flour
3/4 cup powdered sugar
3/4 cup cold butter, cubed
1/4 cup unsweetened cocoa
1 1/2 cups semisweet chocolate morsels
3/4 cup firmly packed brown sugar
3/4 cup light corn syrup
1/4 cup butter, melted
3 large eggs, lightly beaten
1 cup sweetened flaked coconut

Directions:

1. Preheat oven to 350 degrees F.  Bake pecans in a single layer in a shallow pan 8 to 10 minutes or until lightly toasted and fragrant, stirring halfway through.
Getting Ready To Toast Pecans
2. Line bottom and sides of a 13-x9-inch pan with heavy-duty aluminum foil, allowing 2 to 3 inches to extend over sides.  Lightly grease foil.
3. Pulse flour and next 3 ingredients in a food processor 5 to 6 times or until mixture resembles coarse meal.  Press mixture on bottom and 3/4 inch up sides of prepared pan.


4. Bake crust at 350 degrees F for 15 minutes.  Remove from oven and sprinkle chocolate morsels over crust.  Cool completely on a wire rack (about 30 minutes).


5. Whisk together brown sugar and next 3 ingredients until smooth.  Stir in coconut and toasted pecans, and spoon into prepared crust.


6. Bake at 350 degrees F for 25 to 30 minutes or until golden and set.  Cool completely on a wire rack (about 1 hour).  Chill 1 hour.  Lift baked bars from pan using foil sides as handles.  Transfer to a cutting board; cut into bars.


Yummy Goodness:)


 Makes about 24 bars


Saturday, December 10, 2016

Christmas:Red Velvet Crinkle Cookies

Red Velvet Crinkle Cookies
Don't these cookies get you in the holiday spirit?  They are so pretty and  they remind me of Christmas.  And the taste is absolutely delicious.  You cannot eat just one.

I first saw these cookies when the kids and I were eating lunch at Panera Bread.  They looked so inviting.  I already had a cookie with my lunch, so I decided to go home and find a recipe for these holiday cookies.

I found several recipes, but the one I loved was from Chelsea's Culinary Indulgence.  This recipe is very easy.  Start by getting a box of red velvet cake mix (the recipe suggested Duncan Hines), some flour, eggs, vegetable oil, and vanilla extract.  Mix them together with a stand mixer until the batter is smooth.  You then stir in 1 cup of white chocolate chips.  Roll about 1 tablespoon of the dough into a ball and roll the ball in powdered sugar.  Place the cookies on a baking sheet lined with parchment paper.  Bake the cookies for 10 minutes or until the cookies begin to crack.  Remove the cookies from the oven and transfer to a wire rack to cool.

That's all there is to it.  The cookies are ready to enjoy.  For my family it was love at first bite.  These cookies are going to be made many times over at the Saucier House.

This recipe makes about 2 dozen cookies


Red Velvet Crinkle Cookies
From Chelsea's Culinary Indulgence

Ingredients:
1 box Duncan Hines red velvet cake mix
2 tablespoons all-purpose flour
2 large eggs
1/2 cup vegetable oil
1 teaspoon vanilla extract
1 cup white chocolate chips
Powdered sugar for rolling the cookies

Directions:

1.  Preheat oven to 375 degrees F.  Line your baking sheets with parchment  paper and set aside.
2.  Over a large bowl, sift cake mix and flour.  In the bowl of a stand mixer, mix together the cake mix, flour, eggs, oil, and vanilla extract.  Mix well until smooth.  Stir in white chocolate chips until combined.
3. Take about 1 tablespoon of the dough and roll into  a ball.  Roll the ball in powdered sugar until fully coated.  Place the cookie balls on the prepared baking sheets.  Bake for 10 minutes, or until edges are set and the cookies begin to crack.  Note: Even if the cookies don't look completely done take them out of the oven after about 10 minutes.  Transfer cookies to a wire rack to cool.


Thursday, December 8, 2016

Chicken Crescent Wreath

Need something, quick, easy, and festive for the upcoming holidays?  I found a great recipe on  Taste of Home's website.  It is a festive wreath made with crescent dinner rolls and chicken filling.  The filling has broccoli and  red peppers which give it a festive flair.

Filling
You start by forming a circle with the crescent rolls.


 Next spoon the filling onto the wide side of the roll.


 Once you have finished spooning the filling fold the point of the rolls over the filling.  Pop into a 375 degree F oven and bake for 20-25 minutes.  Remove from the oven and your holiday wreath is done.

This is a great recipe for family meals, potlucks, Christmas party, or whatever event your holidays may bring.  Not only is this wreath festive it also tastes delicious.

Chicken Crescent Wreath
From Taste of Home

Ingredients
2 tubes (8 ounces each) refrigerated crescent rolls
1 cup (4 ounces) shredded Colby-Monterey Jack cheese
2/3 cup condensed cream of chicken soup, undiluted
1/2 cup chopped fresh broccoli
1/2 cup chopped sweet red pepper
1/4 cup chopped water chestnuts
1 can (5 ounces) white chicken, drained or 3/4 cup cubed cooked chicken
2 tablespoons chopped onion
Directions
1. Arrange crescent rolls on a 12-in. pizza pan, forming a ring with pointed ends facing the outer edge of pan and wide ends overlapping.
2. Combine the remaining ingredients; spoon over wide ends of rolls. Fold points over filling and tuck under wide ends (filling will be visible).
3. Bake at 375° for 20-25 minutes or until golden brown.

Serves 6-8


Tuesday, December 6, 2016

Christmas: Gingerbread Scones


Scones go perfect with a nice cup of tea or coffee.  These scones are no exception.  They have the flavors of the holidays and are tender and flavorful.  They are like eating a delicious ginger snap cookie in scone form.

I made three changes to the recipe.  First the instructions state to cut in the butter.  I like to grate my butter and work it in with my hands.  I like to feel the mixture.  Also, the  aroma of the spices is delicious as you are working in the butter.  Second, I added 2 tablespoons more milk.  My dough wasn't coming together as it should- it was dry.  Just that little bit of milk cured the problem.   I liked the texture of this dough. It wasn't too sticky and this made it easy to work with.  Finally, instead of cutting the dough into 12 wedges, I only cut it in 8 wedges.

Once the dough was patted into a circle, you cut it into 8 wedges, brush with some egg white and sprinkle with coarse sugar, and bake.  These scones smelled wonderful as they were baking.    Remove from oven, cool and eat.

I enjoyed mine with a cup of Starbucks Blonde Roast Holiday blend I made in my Keurig.  A great way to start any day or just for some "me" time.


Gingerbread Scones
From "Taste of Home" Magazine

Ingredients:
2 cups all-purpose flour
3 tablespoons brown sugar
2 teaspoons Baking Powder
1 teaspoon ground ginger
1/2 teaspoon salt
1/2 teaspoon baking soda
1/2 teaspoon ground cinnamon
1/4 cup cold butter, cubed
1/3 cup molasses
1/4 cup milk
1 egg, separated
Coarse sugar

Directions:
1. Preheat oven to 400°. In a large bowl, whisk the first seven ingredients. Cut in butter until mixture resembles coarse crumbs. In another bowl, whisk molasses, milk and egg yolk until blended; stir into crumb mixture just until moistened.
2. Turn onto a lightly floured surface; knead gently 6-8 times. Pat into an 8-in. circle. Cut into 12 (I did 8) wedges. Place wedges 1 in. apart on a greased baking sheet.
3. In a small bowl, beat egg white until frothy; brush over scones. Sprinkle with sugar. Bake 12-15 minutes or until golden brown. Serve warm.

Yield: 8 scones


Friday, December 2, 2016

Pressure Cooker Chicken Marsala

You have heard me rave about my Instant Pot and how much I love it.  Well, today's recipe is another get tasting dinner you can make in your Instant Pot or other pressure cooker with little time and fuss. 

Start by browning your chicken breasts  in your pressure cooker. When the chicken has browned, remove and add in the onion and thyme.  Next add your mushrooms and brown them.  The next ingredients that go into the pot are garlic, salt, pepper, flour, Marsala, and the chicken stock.  Cook these ingredients for about 2 minutes.  Return the chicken to the pressure cooked, close and lock the lid and set pressure to low.

While the chicken is cooking, cook up some pasta.  When the pasta is done transfer it to a serving platter to place the chicken on top.

When the chicken is done open the pressure release valve and allow the stem to escape.  Unlock the pressure cooker and  carefully remove the lid.  Place chicken on top of the pasta and spoon the sauce over the chicken and pasta.  Serve.

Delicious and so easy to make.   Enjoy.


Pressure Cooker Chicken Marsala 
From Relish 

Ingredients:
4 8-ounce boneless, skinless chicken breasts
1 1/4 teaspoons salt
3/4 teaspoon freshly ground black pepper
4 tablespoons unsalted butter (1/2 stick)
1 cup sliced yellow onion (1 medium onion)
1 sprig fresh thyme, plus 2 teaspoons fresh thyme leaves
12 ounces mushrooms such as shiitake or button, wiped clean, stemmed and sliced
2 teaspoons minced garlic (2 to 3 cloves)
3 tablespoons all-purpose flour
3/4 cup Marsala
1 1/2 cups homemade chicken stock or packaged low-sodium chicken broth
Cooked penne pasta or other pasta for serving
Instructions:

  1. Season the chicken all over with 1 teaspoon of the salt and ½ teaspoon of the pepper.
  2. Set a 6-quart pressure cooker to the “browning” program and add 1 tablespoon of the butter. When the butter has melted, brown the chicken, in batches, on one side for 5 minutes. Remove the chicken and set aside.
  3.  Add the remaining 3 tablespoons butter to the pressure cooker. When it has melted, add the onion and thyme sprig, and cook until the onion is soft, about 3 minutes. Then add the mushrooms and cook for 5 minutes, until browned. Stir in the garlic, the remaining ¼ teaspoon salt, and the remaining ¼ teaspoon pepper. Stir in the flour and continue to cook, stirring as needed, for 2 minutes. Add the Marsala, simmer for 3 minutes, and then add the chicken stock. Return the chicken breasts to the pressure cooker, browned side up. Close and lock the lid, and set to “low pressure” for 2 minutes.
  4. Bring a large pot of salted water to a boil, add the pasta, and cook according to the package directions.
  5. Open the pressure release valve and allow the steam to escape. Unlock and carefully open the lid. Transfer the chicken to a serving platter. Discard the thyme sprig. Set the pressure cooker to the “simmer” program and reduce the sauce until the desired consistency is reached, about 3 minutes. Stir in the thyme leaves. Serve the Chicken Marsala over the pasta.

    Serves 4


Wednesday, November 30, 2016

Pot Roast

After eating turkey and all of the leftovers, the family was ready for something else.  Being busy getting ready for Christmas, I decided on making a pot roast for dinner.  Usually, I make the roast in the cock pot but I found a great recipe from The Pioneer Woman.

You start by browning your veggies in a Dutch oven.   Once the veggies are browned, remove them from the pan and brown your roast.  When browned, remove your roast from the pan and deglaze your pan.  You want to scrape up all those brown bits that are loaded with flavor.  Place the roast back in the pan and add enough stock to cover the roast halfway.  Add the veggies and the herbs and cook in oven until done.

When the roast is done remove it from the oven and place on a serving platter surrounded by all the delicious veggies.

The meat is so moist and flavorful it practically melts in your mouth.  The veggies are wonderful too.  A great family meal cooked in one pot.