Pages

Showing posts with label dessert. Show all posts

Wednesday, March 3, 2021

Blondie Bars


Blondies are one of my favorite bar cookies. Rich, chewy, chocked full of chocolate chips, toffee bits, and nuts.  Happiness in every bite.  The perfect bar cookie in my book.  Yes, they are a step above brownies.  These Blondies are easy to make and you can whip up some quickly for dessert, snack, or just to enjoy.  The house smells wonderful as they are baking. Every time I make them, I wonder why it takes me so long to make them again. 

This recipe is from Dories Greenspan which I found on the Epicurious website

Blondie Bars

Blondie Bars

INGREDIENTS

2 c. flour

3/4 tsp. baking powder

1/2 tsp. baking soda

1/2 tsp. salt

2 sticks (8 oz.) unsalted butter, at room temp

1 1/2 c. packed light brown sugar

1/2 c. white sugar

2 large eggs

1 tsp. vanilla

1 c. chocolate chips or chopped bittersweet chocolate

1 c. butterscotch chips or toffee bits

1 c. coarsely chopped walnuts

PREPARATION

Preheat oven to 325 and butter a 9x13 pan. Whisk flour, baking powder, baking soda, and salt together. In in a stand mixer with a paddle attachment or with a hand mixer, beat the butter on medium speed until smooth and creamy. Add both sugars and beat for another 3 minutes, or until well-incorporated. Add the eggs one by one, beating for 1 minute after each addition, then beat in vanilla. Reduce the mixer speed to low and add the dry ingredients, mixing until they just disappear into the batter. Using a rubber spatula, stir in the chips, nuts, or anything else you're adding. Scrape the batter into the prepared pan and use a spatula to even the top. Bake for about 40 minutes, or until a knife inserted into the center of the blondies comes out clean. They should pull away from the sides of the pan and the top should be a nice honey brown. Cool to room temperature before cutting into bars.


Yield 24 bars


Monday, August 31, 2020

Banana Pudding

Banana Pudding is the ideal comfort dessert.  Everyone in the family loves it, I wondered why I don't make it more often.  It is not hard to make and takes minimal time to make.   Basically, you make a custard, slice up some bananas, and make layers of vanilla wafers, custard, bananas and repeat.  The top of the pudding is covered with beaten egg whites.  Bake for about 10 minutes and your dessert is done.
A rich creamy pudding with a tasty combination of bananas and vanilla wafers.

Banana Pudding
From Southern Living Adapted Slightly by From My Southwest Kitchen 

Ingredients:
1/2 cup sugar
2 tablespoons cornstarch
Dash Salt
2 1/4 cups whole milk
4 large eggs, separated
2 tablespoons unsalted butter
1 teaspoon vanilla extract
3 1/3 cups vanilla wafers
4-5 ripe bananas
3 tablespoons sugar

 Directions: 
 Step 1
Preheat oven to 375°. Whisk together first 3 ingredients in a small bowl. Whisk together sugar mixture, milk, and 4 egg yolks in a medium-size heavy saucepan until well blended. Cook over medium heat, stirring constantly, 6 to 8 minutes or until thickened. Remove from heat; stir in butter and vanilla.

 Step 2
Layer half of vanilla wafers in an 8-inch square baking dish. Top with half of banana slices and half of pudding. Repeat procedure with remaining wafers, banana slices, and pudding.

 Step 3
Beat egg whites at high speed with an electric mixer until foamy. Gradually add 3 Tbsp. sugar, beating until sugar dissolves and stiff peaks form. Spread meringue over pudding, sealing to edge of dish.

 Step 4
Bake at 375° for 7 to 10 minutes or until golden. Let cool 30 minutes, and serve warm; or chill an additional hour, and serve cold.

Makes 8-10 servings

Thursday, August 3, 2017

Instant Pot Tapioca Pudding

Tapioca  pudding is one of those desserts I make  that brings back fond memories.  My mother used to make Tapioca for dessert when I was growing up.  I loved it.  Simple but delicious.      I used to dread making the pearl tapioca because of the time involved.   Not any more.  The Instant Pot came to the rescue.

The Tapioca pearls are cooked in the Instant Pot for a few minutes.  Release the steam, stir  in the milk, egg yolks, sugar, and vanilla extract.  Mix well and bring to a boil.   Let the Tapioca cool.  Your Tapioca Pudding is ready to serve.  The result is a rich and tasty pudding that will be enjoyed by all.

Instant Pot Tapioca Pudding
From Pressure Cooking Today

INGREDIENTS:
1/2 cup Reese’s small-pearl tapioca*
1 1/2 cups water
1/2 cup whole milk
1/2 cup sugar
1/4 teaspoon salt
2 egg yolks
1/2 teaspoon vanilla extract

DIRECTIONS:
1. In Instant Pot cooking pot, mix together tapioca and water.  Lock the lid in place and select High Pressure and 6 minutes cook time. When beep sounds turn off pressure cooker and use a natural pressure release for 10 minutes. After 10 minutes, release any remaining pressure with a quick pressure release.
2. Whisk sugar and salt into tapioca in pressure cooking pot.
3. In a small mixing bowl, whisk egg yolks with milk. Pour through a fine mesh strainer into pressure cooking pot. Select sauté and cook, stirring constantly, until mixture just starts to boil. Turn off pressure cooker and remove pressure cooking pot. Stir in vanilla.
4. Cool to room temperature, stirring occasionally. (Pudding will thicken as it cools. ) Pour into serving dishes and chill. Optional: Served garnished with whipped cream and a maraschino cherry.

*Do not use minute tapioca. Use a small pearl tapioca that has package directions that instruct you to do an overnight soak, such as Reese’s Small Pearl Tapioca. If the package directions don’t recommend an overnight soak, you may need to reduce the cook time on this recipe.

 Serves 4


Thursday, December 15, 2016

Christmas: Red Velvet Peppermint Swirl Brownies

Red Velvet-Peppermint Brownies


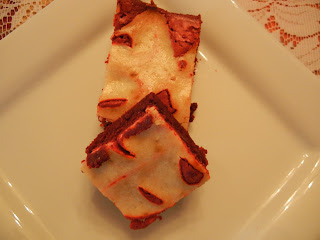
When I read the title of this recipe, I knew I had to make it.  I love red velvet anything, add peppermint and cream cheese,  and I am in dessert heaven.   Being it is the holiday time, I do not need an excuse to bake something yummy.   I don't worry about the calories,  I just go for it.   I was surprised on how easy these brownies were to make.  You make two layers - the chocolate layer and the cream cheese layer.  Swirl them together and you have beautiful and tasty brownies.
For the chocolate layer:  The chocolate is melted with  the butter in the microwave.  Eggs are then added along with the food coloring, peppermint extract and vanilla extract.  Stir until everything is combined and stir in the dry ingredients.  The batter is poured into a lined 13x9-inch baking dish.
For the cream cheese layer: Next you make the cream cheese topping.  Cream cheese and sugar are beat at medium speed until fluffy.  Add egg whites and vanilla extract and beat until combined.  Stir in the flour and the cream cheese layer is complete.  Spoon it over the brownie batter and swirl the cream cheese into the brownie layer and bake.  Remove the brownies from the oven and cool completely before cutting into squares.
The result: Delicious brownies with melt in your mouth goodness.  They are more fudgy than cake like.  The taste of peppermint is ever so mild and that makes these brownies extra good.  They are a  great treat for your family and friends or to put in your holiday goodie tins:)

Red Velvet-Peppermint Swirl Brownies
From Southern Living Magazine

Ingredients:

1 (4-ounce) bittersweet chocolate baking bar, chopped
3/4 cup butter
2 1/4 cups sugar, divided
4 large eggs
1 (1-ounce) bottle red liquid food coloring
1/4 teaspoon peppermint extract
2 teaspoons vanilla extract, divided
1 1/2 cups all-purpose flour
1/8 teaspoon salt
1/2 (8-ounce) package cream cheese, softened
2 egg whites
2 tablespoons all-purpose flour

Directions:

1. Preheat oven to 350 degrees F.  Line bottom and sides of a 13x9-inch pan with aluminum foil, allowing 2 to 3 inches to extend over sides; lightly grease foil.
2. Microwave chocolate and butter in a large microwave-safe bowl at HIGH 1 1/2 to 2 minutes or until melted and smooth, stirring at 30-second intervals.  Whisk in 2 cups sugar.  Add eggs, 1 at a time whisking just until blended  after each addition.  Add food coloring, peppermint extract, and 1 teaspoon vanilla.  Gently stir in 1 1/2 cups flour and 1/8 teaspoon salt. Pour batter into prepared pan.

Chocolate and Butter
Melted Chocolate and Butter
3. Beat cream cheese and remaining 1/4 cup sugar at medium speed with an electric mixer until fluffy.  Add egg whites and remaining 1 teaspoon vanilla, and beat until blended.  Stir in 2 tablespoons flour until smooth.  Drop cream cheese mixture by heaping tablespoonfuls over batter in pan; gently swirl with a knife.
Chocolate Layer
Dollops of Cream Cheese on Chocolate Layer
Cream Cheese Swirled in Chocolate Layer
4. Bake at 350 degrees F for 30 to 32 minutes or until a wooden pick inserted in center comes out with a few moist crumbs.  Cool completely in pan on a wire rack (about 1 hour).  Lift brownies from pan, using foil sides as handles.  Gently remove foil; cut brownies into squares.

Makes about 2 dozen


Baked Goodness


Saturday, July 2, 2016

Fourth of July: Dulce de Leche Brownies


Wow I don't remember the last time I ate a brownie sooo delicious.     It is hard to believe something that tastes so good is so simple to make.  Perfect for the upcoming holiday or just great anytime.  Instead of making the Dulce de Leche and the brownie mix from scratch, I did a very semi homemade brownie.

I started by buying my favorite brownie mix - Duncan Hines Double Decadent Brownie Mix and a can of Dulce de Leche.  That is it.  Two main ingredients for  a  slightly chewy delicious brownie with the goodness of Dulce de Leche.


I prepared the brownie mix using the instructions for cake like brownies.  I spread half the batter in an 8x8-inch baking dish that was lined with foil that was lightly sprayed.   Next, I dropped spoonfuls of the Dulce de Leche on top of the batter and made swirly design patterns in the brownies  using a knife.  I then spread the remaining brownie batter over the swirled batter.  I then repeated the process with the Dulce de leche.


I baked the brownies according to package directions and let them cool.

Of course the family had to sample the brownies and all agreed they were delicious.

Dulce de Leche Brownies

Ingredients:

1 box of  Duncan Hines Double Decadent Brownie Mix or your favorite brownie mix
1 cup of Dulce de Leche
Ingredients on back of brownie box for cake like brownies

Directions:

1. Line an 8x8-inch baking dish with foil.  Spray lightly with cooking spray and set aside.
2. Prepare brownie mix according to package directions following instructions for cake like brownies.
3. Spread half of the brownie batter in the prepared pan.
4. Drop by spoonfuls half of the Dulce de leche on top of the brownie batter.   Using a knife make swirly patterns through the Dulce de leche and brownie batter.
5. Spread the remaining batter over the top of the first layer.  Repeat with the remaining Dulce de Leche.
6.  Bake according to package directions.  Remove from oven and cool.  Cut into 16 squares.

Makes 16 brownies


Friday, August 7, 2015

Lime-Avocado Ice Cream


Avocado ice cream?  At first, I was skeptical. I wasn't sure how avocados would fair as the main ingredient for ice cream.  Let me tell you - it is wonderful.  It has been a long time since I have tasted such delicious ice cream.   It is so rich and creamy and has a wonderful buttery texture.  The lime and the avocados compliment each other to make a delicious frozen treat.  It kinda tastes like Key Lime Pie filling.  Besides the flavor another big plus for this recipe is no ice cream freezer required.  Everything is done in your blender and then the "custard" is poured in a metal pan.  Freeze for 2 hours - stir - freeze for 2 hours and serve.  That is it:)  Your delicious ice cream  is ready to enjoy.


Lime-Avocado Ice Cream
From Good Housekeeping Magazine

Ingredients:
3 ripe avocados
1 (14-ounce) can sweetened condensed milk
1 cup whole milk
1 tablespoon finely grated lime peel
3/4 cup lime juice (6 limes)
1/4 teaspoon salt

Directions:
1. In a blender add the avocados, sweetened condensed milk, and the whole milk.  Puree until smooth.
2. Add the lime peel, lime juice, and salt.  Blend until smooth.


Everything Blended Together


3. Pour into a 9-inch square metal pan.  Freeze 2 hours.  Stir frozen edges of ice cream toward center.  Freeze 2 hours longer or until firm.  Serve.


Ready For The Freezer