Pages

Wednesday, February 19, 2014

Corn Chowder

Corn Chowder
I had two delicious bowls of Corn Chowder for dinner.  Corn Chowder is one of my favorite comfort soups. I love the combination of flavors - sweet corn, potatoes, spices, onion, garlic, cream, and lots of pepper - mmm wonderful. When corn is in season, I use fresh but in this batch I used frozen corn.  For the potatoes - I like to use Yukon Gold potatoes in my Corn Chowder - they do not break down as much as other types do.  I also prefer their sweet flavor in this chowder.

Basic ingredients are used in this soup - corn, potatoes, chicken broth, butter, onions, a little garlic, thyme, parsley flakes, bay leaf, salt, and black pepper.  I use lots of black pepper to season my chowder.  I start by melting some butter in a Dutch Oven and adding the diced onions with a little salt.  Once the onions are soft, I add the garlic until fragrant.  I then sprinkle some flour over the onions and garlic.  I let it cook for about a minute before I add the chicken broth, diced potatoes, (my family states my potatoes are more chunks than diced) and spices.   Once the potatoes are tender I add the corn and cook for about 5-7 minutes.  I add the heavy cream, taste and season with salt and pepper.  Once the soup is heated through I ladle it into bowls and serve with some fresh ground pepper on top (I told you I like pepper with this soup).  You can garnish your soup with a drizzle of olive oil, if you wish.


Corn Chowder
Ingredients:
3 tablespoons butter
1 onion, diced
1/2 teaspoon salt
2 cloves of garlic
1/4 cup all-purpose flour
6 cups chicken stock
1 teaspoon dried parsley flakes
1 bay leaf
1/2 teaspoon dried thyme
2 Yukon Gold potatoes, peeled and diced
1 (16 ounce package) frozen corn - about 3 cups
2 cups heavy cream
Salt and fresh ground black pepper
Directions:
1. Melt the butter in a Dutch Oven over medium heat.  Add the onion and cook until soft - about 8-10 minutes.
2. Add the garlic to the onions and cook until fragrant.  Sprinkle the flour over the onion mixture and stir to coat.  Cook about 1 minute.
3. Add the chicken stock, parsley flakes, bay leaf, dried thyme, and bring to a boil.  Add the potatoes and cook for about 10 minutes or until the potatoes are tender.
4. Add the corn to the broth and bring to a boil.  Cook about 5-7 minutes or until corn is tender.
5. Add the cream and heat until the chowder is heated through.  Taste and season with salt and black pepper.  Remove the Bay leaf before serving.  


Makes 8 servings


Monday, February 17, 2014

Beef With Snow Peas

Beef With Snow Peas
Beef With Snow Peas is one of those dinners you can put together quickly. Great for nights when you are busy but yet want to prepare a healthy meal. This has been a favorite dinner of the family's for years.  I spice this dish up a bit with some red pepper flakes. The older two kids in the family like their stir fry extra spicy so I put a bottle Sriracha sauce on the table.
  
I marinate some sliced flank steak in soyy sauce, mirin, sugar, garlic, and fresh ginger.  A tip in slicing the flank steak thin is to put it in the freezer for 30 to 40  minutes or until it is firm.   The marinated beef and snow peas are fried over high heat in a heavy skillet - I used my favorite cast iron one.  Then they are added to a sauce made of soy sauce, mirin,  cornstarch, and some chicken stock. I then sprinkle some pepper flakes on top.  Check for seasoning and add salt if necessary.  I serve over some Jasmine rice but you could also  serve it over some Chinese noodles.  Here is a  satisfying dinner that is quick and delicious:)


Beef With Snow Peas

Ingredients:
1 1/2 pound beef flank steak
4 tablespoons soy sauce, divided
2 tablespoons Mirin, divided
1 tablespoon minced ginger
2 1/2 teaspoons sugar, divided
1 teaspoon minced garlic
3 tablespoons cornstarch
8 ounces fresh snow peas
5-6 tablespoons peanut oil
3 tablespoons water
1 teaspoon onion powder
Crushed Red Pepper Flakes
Salt
Jasmine rice cooked according to package directions

Directions:
1. Cut the beef across the grain into 1/8-inch thick slices.  Set  aside.
2. In a small bowl combine 2 tablespoons soy sauce, 1 tablespoon Mirin, the ginger, 2 teaspoons sugar, 1 teaspoon minced garlic, 1 tablespoon oil,  and 1 tablespoon cornstarch.  Mix well. Add the beef and marinate at room temperature for 30 minutes.
3. Mix 2 tablespoons cornstarch and the onion powder with some cold water until smooth.  Stir in the chicken stock, 2 tablespoons sauce sauce, 1 tablespoon mirin and 1/2 teaspoon sugar.  Set aside.
4. Heat 3 tablespoons oil in the skillet.  Add the snow peas and stir-fry for about 1 minute.  Remove the peas to a plate.
5. Add more oil if needed to the skillet.  Scatter the beef, 1/3 at a time in the skillet.  Cook for about 1 minutes.  Remove to a plate and cook the remaining beef.
6. Stir the chicken broth mixture.  Add to the skillet and heat to boiling.  Cook for about 1 minute or until the sauce has thickened.  Add the beef, peas and crushed red peeper flakes.  Cook another minute.  Taste and add salt if needed.
7. Serve over the cooked rice.

Makes 6 servings

.


Thursday, February 13, 2014

Salted Caramel-Chocolate Dump Cake

Salted Caramel-Chocolate Dump Cake
Chocolate, caramel, a pinch of salt, some more chocolate.  Add some pudding and milk and what do you get?  A delicious quick and easy cake.  This is by far the best dump cake I have ever tasted.  It has a texture similar to a cake brownie.  The caramel and the salt make this cake.  They add the little extra goodness that puts this cake in a class by itself.

The ingredients are basic: cake mix, a package of instant chocolate pudding, milk, caramels, coarse sea salt, semi-sweet chocolate chips, and whipped cream which is optional.   First you mix the pudding and milk together.  You then add the cake mix and stir.  The batter is very thick.  Spread the batter evenly into a prepared baking dish.  Sprinkle the caramels over the cake mix followed by a sprinkling of sea salt.  The cake is baked for about 30-40 minutes.  Remove the cake from the oven and cool.  In the meantime, melt some semi-sweet chocolate chips in the microwave.  Once the chips have melted, drizzle the chocolate over the cooled cake.  Your cake is ready to serve.  If you wish you can serve the cake with a dollop of whipped cream.  I used Reddi Wip and everyone loved it.


Salted Caramel-Chocolate Dump Cake
From Tablespoon Blog
Doesn't This Look Good:)

INGREDIENTS
1 small (3.9 ounce) package instant chocolate pudding
1 1/2 cups cold milk
1 box Betty Crocker Super Moist Devil's Food cake mix
1 1/2 cups chopped caramels
Coarse sea salt for sprinkling
1 cup semi-sweet chocolate chips
Whipped cream, for serving (optional)

DIRECTIONS
1. Preheat oven to 350 degrees F. Lightly grease a 13-by-9-inch pan and set aside.
2. In a large bowl, whisk together chocolate pudding and milk for one minute to combine.
3. Add cake mix ONLY and stir until thoroughly combined.
4. Spread batter evenly into bottom of prepared pan (batter will be thick). Sprinkle with chopped caramels. Sprinkle with sea salt to taste (remember: A little bit goes a long way).
5. Bake cake 30-40 minutes or until edges pull away from sides and a toothpick inserted in the cake portion comes out clean.

Out of the Oven and Cooling
6. Remove cake from oven and let cool on a cooling rack.
7. Pour chocolate chips into a medium microwave-safe bowl. Microwave on high for 2-3 minutes, stirring every 30 seconds, until chocolate is fully melted. Using a spoon, drizzle chocolate over cooled cake.
8. Serve cake with a dollop of whipped cream, if desired.


Monday, February 10, 2014

Cucumber Salad

Cucumber Salad
 A Cucumber Salad is a refreshing and easy salad to put together.  It takes just a few ingredients - a cucumber, vinegar, salt, olive oil, and a few spices.  In this recipe, I added a little chopped red bell pepper to add some color and a sweet flavor.   I prefer to use English cucumber when making my cucumber salads.  They do not have the bitter flavor some other cucumber have and seeds are smaller - I don't worry about seeding the cucumbers for my salads.  In this recipe I added some fresh minced ginger and red pepper flakes to kick up the flavor a bit.  I omit the red onions because the family is not fond of them.   Once I have sliced up the cucumbers and add the red peppers I toss them in a dressing made of of rice vinegar, olive oil, ginger, red pepper flakes, salt, and sugar.  I put the salad in the fridge for about 30 minutes before serving.

This salad has a nice crunch to it and the dressing adds a nice slightly sweet spicy flavor to the cucumbers This salad is  healthy and inexpensive to make.


Cucumber Salad

Ingredients:

1 English cucumber
2 Tablespoons diced red bell pepper
4 tablespoons olive oil
2 tablespoons rice vinegar
1 teaspoon minced ginger
1/2 teaspoon salt
1/2 teaspoon red pepper flakes
1/4 teaspoon sugar

Directions:

1. Cut cucumber in half lengthwise and slice into 1/2- inch pieces crosswise. Add  the diced red pepper.  Set aside.
2. In a small mixing bowl, whisk together the olive oil, rice vinegar, minced ginger, salt, red pepper flakes, and sugar.
3. Pour dressing over the cucumbers and red bell pepper.  Toss well until the veggies are well coated.  Put in an airtight container and chill for 30 minutes before serving.

Makes 4 servings


Friday, February 7, 2014

Irish Cheese Potato Soup

Irish Cheese Potato Soup
Dubliner cheese is one of my favorites.  I first tasted this cheese years ago at Costco and it soon became one of my favorites.  I  love the slightly nutty and  sweet taste of this cheese.  I eat it with crackers and fruit or use it in my mac and cheese.  It also makes a great grilled cheese sandwich.

Today, I used it in some potato soup I was making.  It was a cold and bleak  day  (it was snowing most of the day) so I made some soup to warm us up.  What set this soup apart from my usual recipes is the Dubliner cheese and lager/ale.   I love what lager/ale does to cheese soup so I thought it would be great in this soup.

I started out by cooking some diced veggies in butter with a sprinkling of salt  After a few minutes when the veggies began to soften, I tossed some flour over them and cooked about 2 minutes.  I then added the broth, a bay leaf, and the lager.  Added the diced potatoes and brought to a boil.  I covered the soup and cooked about 30 minutes or until the the potatoes were tender.   I let the soup cool for about 10 minutes before I processed it in my blender.  The pureed soup was returned to the pot where I added some heavy cream, dried parsley flakes, some, Worcestershire sauce, Tabasco sauce (use to your taste preference) and white pepper.  I heated the soup through and then gradually added the cheese.  I then added some salt and pepper and the soup was ready to serve.

I served this soup with some crumbled bacon on top but you could do chives, additional cheese, fresh chopped rosemary.  It was a hearty soup with a velvety texture.  You could taste the difference the Irish cheese made - it was a subtle flavor not as robust as you would get with a sharp cheddar.  If the soup is too thick for your taste thin it with some broth.


Irish Cheese Potato Soup

Ingredients:

4 tablespoons butter
1 medium onion diced
1/2 cup diced carrots
1/2 cup diced celery
1/2 teaspoon salt plus more if needed after tasting
1/4 cup all purpose flour
1 1/2 quarts chicken broth
6 small russet potatoes peeled and diced
1 bay leaf
1 cup lager or ale
1 cup heavy cream
1 tablespoon dried parsley flakes
1 teaspoon Worcestershire sauce
1/2-1 teaspoon Tabasco sauce
1/2 teaspoon white pepper
1/2 pound Dubliner cheese shredded
Crumbled Bacon

Directions:

1. In a Dutch Oven melt the butter.  Add the onion, carrots, celery and salt.  Cook for 5 to 10 minutes stirring occasionally or until vegetables begin to soften.
2. Sprinkle the flour over the vegetables and cook for 2 to 3 minutes stirring constantly.
3. Add the chicken stock, potatoes,  bay leaf, and lager/ale.  Bring to a boil, reduce heat, cover and cook for about 30 minutes or until the potatoes are tender.
4.  Remove from heat and let cool for about 10-15 minutes.  Remove bay leaf and process in a blender in batches.
5. Return the soup to they Dutch Oven and add the cream, parsley flakes, Worcestershire sauce, Tabasco sauce, and white pepper.  Heat through and add cheese one small handful at a time.  Do not add more cheese until the prior handful has melted.
6. Taste and adjust seasoning.  Ladle soup into bowls and garnish with some crumbled bacon or other garnishes of your choice.

Makes 8-10 servings


Wednesday, February 5, 2014

Garlic Herb Roasted Turkey Breast

Garlic Herb Roasted Turkey Breast
What is for dinner?  Turkey.  Turkey?  Yes, turkey.  It isn't a holiday so why are we having turkey?  I thought it would be good for a change and besides I wanted to experiment with an idea I had.  Who said turkey had to be only for a holiday or special occasions?

I picked up a frozen turkey breast at the store and let it thaw in the fridge.  I love the fact you can by your favorite turkey parts.  Anyway, back to my idea. I made a special buttery garlic herb spread that I rubbed on the turkey flesh.  I  began by gently separating the skin from the flesh and massaged the buttery spread onto the flesh.  The little I had left,  I rubbed  on the outside of the breast.  In the cavity, I added some onions and carrots. Any left over veggies that did not fit in the cavity I placed in the bag around the breast.   I baked the turkey in an Oven Bag.  I love Oven Bags. One of the better cooking inventions in my opinion.  

The turkey baked for about 2 hours.  I let the turkey sit for awhile and then I sliced it up.

Mmmm was this ever good.  I love what garlic and herbs can do for poultry.  The breast was very flavorful and moist.  I served the turkey with the carrots and onions from the bag along with some mashed potatoes and gravy.    Great dinner with little fuss and clean up.


Garlic Herb Roasted Turkey Breast

Ingredients:

1 (10-12 pound) bone in turkey breast thawed
1 large size Oven Bag
5 tablespoons butter, softened
4 garlic cloves minced
1 teaspoon dried parsley flakes
1 teaspoon rubbed sage
1/2 teaspoon dried thyme
1 medium onion cut into 8 pieces
2 carrots cut into 2-inch pieces
1 tablespoon flour

Directions:
1. Make three medium balls out of aluminum foil.  Place in a triangle pattern in the bottom of a roasting pan.    Preheat oven to temperature stated in Oven Bag directions.
1.  Wash turkey breast and  be sure to rinse out the cavity.  Pat dry with paper towels.  Set aside.
2.  Place the butter, garlic, parsley flakes, sage, and thyme in a small bowl.  Mix together until you have a smooth spread and the garlic and herbs are well incorporated into the butter.


3. Loosen the skin from the turkey flesh.  Massage the butter spread onto the turkey breast.  Any left over butter,  rub on the outside of the turkey.
4. Fill the cavity with the onions and carrots. It is fine if there are some left over.
5. Place  the flour in the oven bag and shake.  Add the left over veggies.
6. Place turkey in the oven bag and place in the roasting pan.
7. Bake turkey according to the instructions found in the Oven Bag package.
8. Remove turkey from the oven and let rest for 10 minutes before slicing.  Slice and serve.

Makes 8 servings


Monday, February 3, 2014

Crunchy Pecan-Banana Coffee Cake Muffins

Crunchy Pecan-Banana Coffee Cake Muffins
The other day at the store I bought some Great Grains Cereal.  That has been the cereal of choice recently in my house.  Some like the pecan others like the banana.  As I was pouring myself a bowl, I spotted this recipe on the side and it sounded wonderful and the muffins looked delicious.  I also like the healthy ingredients they had such as yogurt, egg white, maple syrup, and bananas.  If I am going to make muffins and they are the breakfast of choice at my house, I want them to be somewhat healthy and good.
Good is the essential word for my kids.  Sometimes when I have made muffins with too healthy ingredients they thought the were eating wood.  Bran and whole wheat flour are not well received by my kids in muffins.
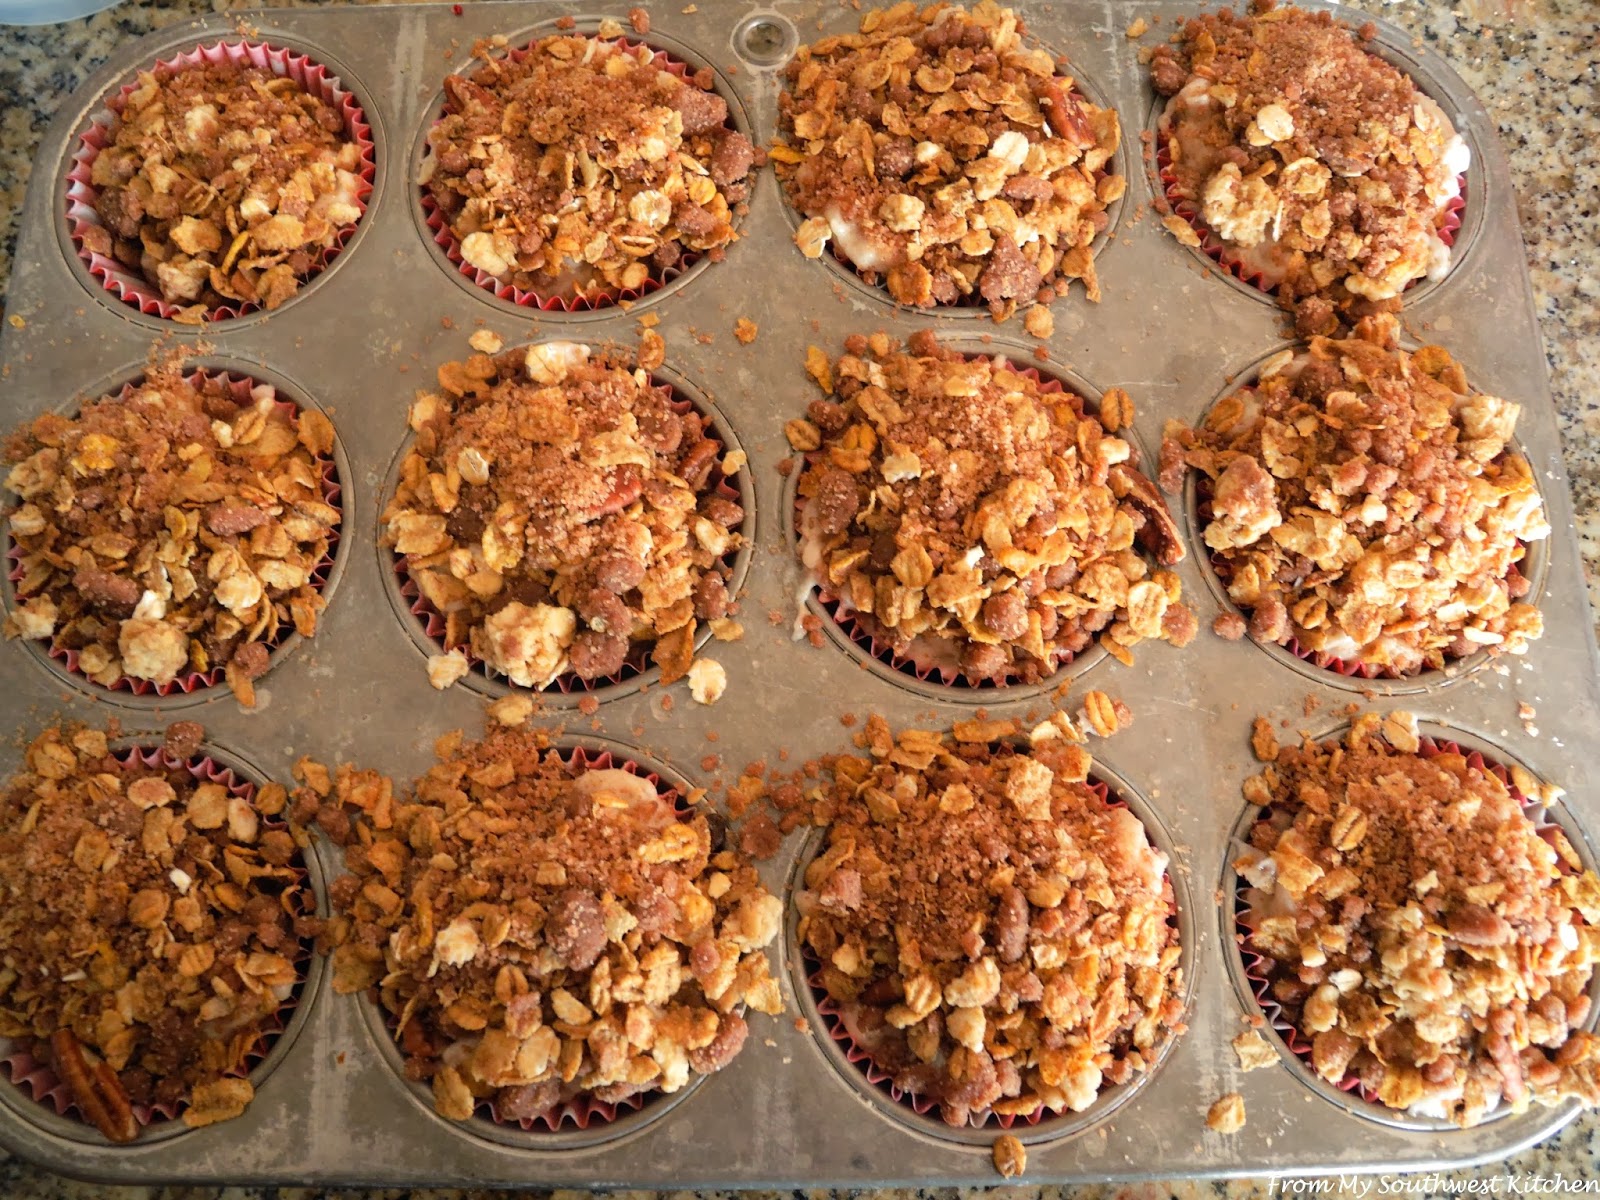
In looking over this recipe, I felt I would be safe in making them.  The streusel topping has one of my favorites - pure maple syrup mixed with some flour, sugar, cinnamon, salt, canola oil and Great Grains Crunch Pecan cereal.  The batter is very thick.  You need to spoon it into the muffin cups.   Once you have spooned in the batter the topping is sprinkled and lightly pressed into the batter.  The muffins are ready for the oven.  Bake for about 25 minutes and take them out to cool.

Batter
These muffins were quite popular at the house.  My older son stuffed a couple into his backpack and my picky eater grabbed one on the run.  The muffins were very moist with just a little chewiness to them.  The streusel topping made them extra good.  

Nice Moist Slightly Chewy Texture


Crunchy Pecan-Banana Coffee Cake Muffins

Ingredients:

Streusel:

1/3 cup unbleached all purpose flour
Pecan Great Grains Cereal
2 tablespoons sugar
1 1/2 teaspoons ground cinnamon
1/8 teaspoon salt
2 tablespoons canola oil
1 tablespoon pure maple syrup
3/4 cup Great Grains Crunchy Pecan cereal

Batter:

1 1/4 cups unbleached all purpose flour
1/2 cup sugar
1 teaspoon baking powder
1/2 teaspoon baking soda
1/2 teaspoon salt
1 teaspoon ground cinnamon
3/4 teaspoon ground nutmeg
2 ripe bananas (14 ounces total), peeled
1 cup plain low fat yogurt
1/3 cup canola oil
1 large egg white
1 1/4 cups Great Grains Crunchy Pecan cereal

Directions:

For the streusel:

1. Preheat the oven to 375°F. Line 12 standard muffin cups with paper liners.
2. Toss the flour, sugar, cinnamon, and salt in a large bowl to blend.
3. Stir in the oil and maple syrup. Stir in the cereal. Set the streusel aside.


For the batter:

1.Whisk the flour, sugar, baking powder, baking soda, salt, cinnamon, and nutmeg in a medium bowl to blend.
2. Using a fork, coarsely mash the bananas in a large bowl.
3. Stir in the yogurt, oil, and egg white.
4. Add the dry ingredients to the yogurt mixture and stir just until blended.
5. Stir in the cereal. The batter will be thick.
6. Spoon the batter into the prepared cups.
7. Sprinkle the streusel over, gently pressing it into the top of the batter.
Ready for Oven
8. Bake until a tester inserted into the center of the muffins comes out clean, about 25 minutes.
9. Cool 5 minutes in the pan on a cooling rack.
10. Remove the muffins from the pan and cool completely on the rack.
Out of Oven and Cooling
The muffins can be made 1 day ahead. Store airtight at room temperature.

Makes 12 muffins