Pages

Showing posts with label Easy. Show all posts

Friday, August 18, 2023

Skillet Cacio E Pepe Tortellini With Spinach


 This is by far the easiest and tastiest dinner I have ever made.  I will admit, at first I was skeptical, but was delighted by the first bite.   I also like this recipe because it is a one pan dish.  

You begin by browning the tortellini in some olive oil.  Once they are browned, you add water and spices.  Cover and cook for about 5 minutes.  Stir in the spinach, wilt and add the cheese.  Serve.  That is it.  Dinner awaits.  


Skillet Cacio E Pepe Tortellini With Spinach

From Simply Recipes Adapted by From My Southwest Kitchen


Ingredients:

5 tablespoons olive oil

16-20 ounces fresh cheese tortellini

1 1/2 cups water

1 teaspoon salt

1 teaspoon pepper

1/2 teaspoon Italian seasoning

3 ounces fresh spinach - 3 packed cups

1/3 - 1 cup finely grated Pecorino Romano cheese - adjust to taste. More for serving

Directions:

1.  Heat 3 tablespoons of olive oil in a 12-inch cast iron skillet until shimmering.  Add tortellini and cook.  Toss until browned in spots.

2. Add the water, salt, pepper, and Italian seasoning to the tortellini.  Stir to combine and scrape up any browned bits on the bottom of the skillet. Cover and cook for about 5 minutes.  Be sure almost all of the water has evaporated.

3. Lower the heat and add the spinach a handful at a time.  Cook until the spinach is wilted.  Remove from heat and add the cheese and remaining 2 tablespoons of olive oil.  NOTE: Add a small amount of the cheese at a time and adjust for taste.    Serve with additional cheese and freshly ground pepper.

Makes 4 servings

Saturday, July 29, 2023

Smashed Cucumber Salad


 With hot summer days approaching, I like the cool and refreshing taste of cucumbers.  Biting into a slice of cucumber refreshes me instantly. There is truth to the saying 'cool as a cucumber.'  Cucumbers are easy to grow, can be found a your local market and farmers markets. 

 In this recipe, the cucumbers are smashed -  a Chinese technique which releases the seeds.  The cucumbers are cut into chunks and sprinkled with salt and sugar.  The cucumbers then rest for 20minutes. They are then tossed with a flavorful vingerarette and refrigerated.  

I like this technique of smashing the cucumbers because the dressing get into the cracks of the cucumbers.  This adds a wonderful flavor to the cucumbers. When you serve the salad, a tasty and refreshing dish awaits you.


Smashed Cucumber Salad

Ingredients

2 medium English cucumbers

1/2  teaspoon salt 

1 teaspoon sugar 

2 tablespoons rice wine vinegar 

2 teaspoons soy sauce 

1 teaspoon sesame oil 

1 small clove garlic, finely grated 

1 teaspoon minced garlic

1/4 teaspoon crushed red pepper flakes

Directions

1. Quarter the cucumbers lengthwise. Put the slices on a cutting board, skin-side-up. Use the flat side of your knife to lightly smash along the length, then cut the cucumbers into 3/4-inch pieces. Toss the cucumbers with 1/2 teaspoon each  salt and sugar, then drain in a colander for 20 minutes.

2. Whisk together the vinegar, soy sauce, sesame oil, garlic and remaining 1/2 teaspoon sugar. Add the cucumbers and toss to coat. Sprinkle with crushed red pepper, if using.  Refridgerate for 4 hours  before serving.

Serves 4

Wednesday, October 28, 2020

Breadsticks


Who doesn't love breadsticks.  Tasty pieces of bread you can dip in pizza sauce, eat with salad, soup, just about anything.  And don't forget the you can just pick one up and munch.  This recipe I found on Our Best Bites, is so easy to make and they taste delicious.


Breadsticks

Ingredients:
1 1/2 cup warm (105–115 degrees) water
1 tablespoon sugar
1 tablespoon yeast
1/2 teaspoon kosher salt
3–4 1/2 cups all-purpose flour
Butter


Instructions:
In a large bowl (the bowl of your mixer, if you have one), combine water, sugar, and yeast. Let stand for 10 minutes or until yeast is bubbly.

Add salt and stir. Add 1 1/2 cups of flour and mix well. Gradually add more flour (usually between 3-4 cups, depending on your elevation and your humidity) until dough starts to pull away from the sides of the bowl and it barely sticks to your finger.

Cover and allow to rise for 45 minutes or until doubled in bulk. While the dough is rising, line a baking sheet with parchment and set aside.

Remove from bowl and place on a surface sprayed with cooking spray. Roll into a rectangle and cut into 12 strips with a pizza cutter.

Roll out each piece of dough into a snake about 18″ long, then drape the middle of the “snake” over your forefinger and twist the dough. Place on baking sheet and repeat with remaining 11 pieces of dough. Try to space them evenly, but it’s okay if they’re close; pulling apart hot bread is one of life’s greatest pleasures!

Cover pan and allow dough to rise for another 30 minutes.

When there’s about 15 minutes to go, preheat your oven to 425. When done rising, bake for 12-15 minutes (it will depend on your oven) or until golden brown. Rub some butter on top of the breadsticks (just put a ziploc bag on your hand, grab some softened butter, and have at it) and sprinkle with garlic bread seasoning or the powdery Parmesan cheese in a can and garlic salt.

Monday, October 12, 2020

Tomato Tortellini Soup


 A  delicious soup is always welcome on a chilly day.   Tomato soup is always a favorite. This recipe adds in some cheese tortellini to the soup with some fresh basil from the garden.   In addition, some balsamic vinegar is added which gives a wonderful flavor to the soup.  Sprinkle with some parmesan cheese and you have a tasty soup that is rich and creamy studded with tortellini.   This recipe is very easy and takes about 30 minutes to prepare.  

Tomato Tortellini Soup

INGREDIENTS

2 tablespoons unsalted butter
1 medium yellow onion, diced
2 cloves garlic, minced
1/2 teaspoon kosher salt
1/4 teaspoon freshly ground black pepper
1 tablespoon balsamic vinegar
4 cups (32 ounces) lochicken broth
1 (28-ounce) can crushed tomatoes
1/2 cup heavy cream
2 bay leaves
1 (14-ounce) package fresh or frozen cheese tortellini
1/2 cup fresh basil leaves, thinly sliced, plus more for garnish
Grated or shredded Parmesan cheese, for garnish (optional)

INSTRUCTIONS

1. Melt the butter in a Dutch oven over medium heat. Add the onion, garlic, salt, and pepper and cook, stirring occasionally, until tender, about 6 minutes.
2. Stir in the vinegar. Add the crushed tomatoes, broth, cream, and bay leaves, and bring to a boil. Reduce the heat to a simmer and simmer for 5 minutes. Add the tortellini and simmer until cooked through, 5 to 6 minutes more (check at 3 minutes for fresh tortellini). Remove from the heat, remove and discard the bay leaves, and stir in the basil. Ladle into bowls and top with Parmesan cheese and more basil, if desired.

Serves 4

Monday, September 28, 2020

Cole Slaw


Cole Slaw is a quick and easy side to make.  It goes well with practically everything, cookouts, sandwiches, BBQ,  fish, poultry, etc.  I  open up a bag of cole slaw mix and toss it with a nice vinaigrette dressing.  Mmmmm delicious.


Cole Slaw
Ingredients:

3 tablespoons apple cider vinegar
4 tablespoons olive or vegetable oil
3 tablespoons white sugar
1/2 teaspoon dijon mustard
1/4 teaspoon celery seeds
Salt & pepper to taste
1 bag (16 ounce) Cole Slaw mix

Directions:
1.  Making the vinaigrette:  Whisk the first 6 ingredients together in a bowl.  
2. Making the Cole Slaw:  Open and pout the bag of Cole Slaw Mix in a large bowl.   Pour the dressing over them and toss well.  Refrigerate for an hour or more before serving.

Serves 6


Wednesday, September 2, 2020

Steak Stir Fry

Stir Fry is a quick and nutritious meal to make.   This recipe comes together quickly and is very easy to make. Slice  some carrots, peppers, steak, onions; add some garlic and ginger.  Cook the ingredients separately, and then add to a stiry fry sauce and serve with rice.  Your dinner is ready to enjoy with your family.
Note:  I threw in about 4 ounces of mushrooms because I had them on hand.
Steak Stir Fry
Taste of Home Ingredients:
1 teaspoon beef bouillon granules
1 cup boiling water
2 tablespoons cornstarch
1/3 cup soy sauce
1 pound beef top sirloin steak, cut into thin strips
1 garlic clove, minced
1 teaspoon ground ginger
1/4 teaspoon pepper
2 tablespoons canola oil, divided
1 large green pepper, julienned
1 cup julienned carrots or sliced celery
5 green onions, cut into 1-inch pieces
Hot cooked rice

Directions:

1. Dissolve bouillon in water. Combine the cornstarch and soy sauce until smooth; add to bouillon. Set aside. Toss beef with garlic, ginger and pepper. In a large skillet or wok over medium-high heat, stir-fry beef in 1 tablespoon oil until meat is no longer pink; remove and keep warm.
2. Heat remaining 1 tablespoon oil; stir-fry vegetables until crisp-tender. Stir soy sauce mixture and add to the skillet; bring to a boil. Cook and stir for 2 minutes. Return meat to pan and heat through. Serve with rice.

Makes 4 servings


Friday, May 29, 2020

Cheesy Crustless Quiche

Quick is a nice dish to serve for lunch, brunch, or a tea.  This recipe is so easy to make because you don't need to worry about making a crust.  For me, that is a plus.

This recipe is pretty versatile.  I din't have the cherry tomatoes and my family hates green onions so I just topped it with bacon.   I also substituted Gruyere cheese for the Swiss cheese.

The quiche came out perfectly.  It is very creamy and it was delicious.   The combination of the cheeses added to the flavor as did the Dijon mustard.  The family loved this recipe.  Next time, I will be sure to have the cherry tomatoes on hand.    You can get the original recipe here  Simply Recipes.   My rendition is below.


Cheesy Crustless Quiche
From Simply Recipes Adapted Slightly From My Southwest Kitchen

INGREDIENTS
1/2 stick of butter (1/4 cup)
1/4 cup all-purpose flour
3/4 cups milk
1 cup cottage cheese
1/2 teaspoon baking powder
1/2 teaspoon salt
1/2 teaspoon Dijon mustard
5 eggs
4 ounces cream cheese, softened
6 ounces shredded Gruyere cheese
3 slices of cooked bacon, crumbled

Directions:
1 Make a roux: Melt the butter in a medium saucepan on medium heat. Stir in flour; cook, stirring until bubbly.
Gradually add the milk; cook over medium heat, stirring occasionally, until sauce thickens.
Remove from the heat; set aside to cool, about 15-20 minutes.
2 Preheat oven to 350°F. Combine cottage cheese, baking powder, salt and mustard; set aside.
3 Make the filling: Beat the eggs in a large mixing bowl. Slowly add the cream cheese, the cottage cheese mixture and the milk/flour sauce.
Stir in the Gruyere and Parmesan cheeses.
4 Bake: Pour into a buttered 10" pie plate. Sprinkle the top with chopped  crumbled bacon.
Bake at 350°F for 40 minutes, until puffy and lightly browned. A knife inserted into the center of the quiche should come out clean. Let rest for 15 minutes, serve.

Serves 8

Wednesday, May 20, 2020

Famous Blueberry Muffins

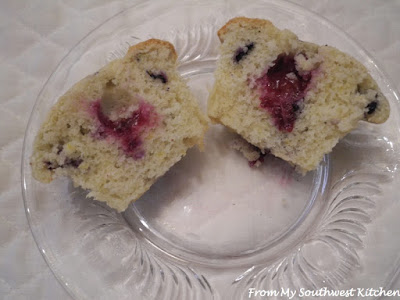
These are the best blueberry muffins I have ever made.  The family agreed.    This recipe is a clone of the Jordan Marsh Department Store blueberry muffins.    I pretty much followed the recipe except that I added 1 tablespoon of lemon zest.  I love the lemon blueberry combination.  MMM.

This was a very easy recipe to make. The batter came out perfect and the crushed blueberries added great flavor.  Don't skip the sugar on top - it kicks the muffins up a notch.  These muffins where chocked-full of blueberries and they were very moist.  They were delicious.  I am going to make another batch as soon as I finish writing this post.


Famous Blueberry Muffins
King Arthur Flour

Ingredients

8 tablespoons (113g) butter, at room temperature
1 cup (198g) sugar
2 large eggs
2 teaspoons baking powder
1/2 teaspoon salt
1 teaspoon vanilla extract
2 cups (241g) King Arthur Unbleached All-Purpose Flour
1/2 cup (113g) milk
2 1/2 cups (354g) blueberries, fresh preferred
1 tablespoon lemon zest
1/4 cup (50g) sugar, for topping


Instructions

1. Preheat the oven to 375°F. Lightly grease a standard 12-cup muffin tin; or line the tin with papers, and grease the papers.

2. In a medium-sized bowl, beat together the butter and sugar until well combined.

3. Add the eggs one at a time, scraping the sides and bottom of the bowl and beating well after each addition.

4. Beat in the baking powder, salt, and vanilla.

5. Add the flour alternately with the milk, beating gently just to combine. Scrape the bottom and sides of the bowl.

6. Mash 1/2 cup of the blueberries. Add the mashed and whole berries to the batter,  along with the lemon zest, stirring just to combine and distribute.

7. Scoop the batter by the heaping 1/4-cupful into the prepared muffin pan; a muffin scoop works well here.

8. Sprinkle about 1 teaspoon granulated sugar atop each muffin, if desired. It's traditional — go for it!

9. Bake the muffins for about 30 minutes, until they're light golden brown on top, and a toothpick inserted into the middle of one of the center muffins comes out clean.

10. Remove the muffins from the oven, loosen their edges from the pan, and after about 5 minutes transfer them to a rack to cool.

Makes 12 muffins

Thursday, April 2, 2020

Quick Green Chicken Chili

This chili is fantastic and so easy to make.  You use many ready made products like rotisserie chicken, green salsa, and canned cannelloni beans.  Put all of the ingredients in a pot, stir and cook.  That is it.  Dinner is ready and it tastes as if you spent hours preparing it.

I love this recipe.  It tastes wonderful and has a nice light spicy flavor to it. Leftovers taste better the next day.  The family also loved this chili.  It is a keeper.


Quick Green Chicken Chili
From Cook's Country

Ingredients:
1 tablespoon vegetable oil
1 onion chopped fine
3/4 teaspoon pepper
1/2 teaspoon salt
3 garlic cloves, minced
2 teaspoons ground cumin
4 cups chicken broth
2 (15-ounce) cans cannelloni beans, rinsed
1 cup jarred green salsa
1 (2 1/2-pound) rotisserie chicken, skin and bones discarded, meat shredded into bit-size pieces (3 cups)
1/2 cup chopped fresh cilantro

Directions:
1. Heat oil in Dutch oven over medium heat until shimmering.  Add onion, pepper, and salt and cook until softened, about 4 minutes.  Stir in garlic and cumin and cook until fragrant, about 1 minute.
2. Increase heat to medium-high.  Stir in broth, beans and salsa and bring to boil.  Reduce heat to medium-low and simmer until flavors have melded, about 10 minutes.
3. Using  the back of  a wooden spoon, mash some beans against side of pot until chili is slightly thickened. Stir in chicken and cilantro and cook until warmed through, about 2 minutes.  Serve.

Serves 4


Sunday, March 29, 2020

Skiillet Baked Ziti


Wondering what to make for dinner tonight.  Why not try Skillet Baked Ziti. This is a very tasty dish that is easy to prepare and maybe a future family favorite.  I like this dish because it is all cooked in one pan and it comes together nicely. It also tastes great the next day - if you have any leftovers.


Skillet Baked Ziti
From Our Best Bites Adapted Slightly by From My Southwest Kitchen

Ingredients:
1 pound ground beef
1 (28-ounce) can crushed tomatoes
1 tablespoon olive oil
6 medium cloves of garlic minced
1/4 teaspoon red pepper flakes
Salt
3 cups water
12 Ounces (about 3 3/4 cups) ziti or penne pasta
1/2 cup heavy cream
1/2 cup grated Parmesan cheese
1/4 cup torn fresh bail leaves or 1 tablespoon dried basil added to the crushed tomatoes
Black pepper
1 cup shredded mozzarella cheese

Diretions:
1. Adjust an oven rack to the middle position.  Preheat the oven to 475 degrees F.
2. Heat a 12-inch or larger oven-safe skillet on medium high heat and add the olive oil.  Brown the ground beef.   Drain the beef of excess fat.
3. Add the garlic and red pepper flakes to the ground beef.  Cook until fragrant.  Stir in the tomatoes and 1/2 teaspoon salt.
4. Reduce the heat to medium-low and simmer gently for about 10 minutes stirring occasionally.
5. Stir in the water and add the pasta.  Cover and increase the heat to medium-high.  Stir often and cook until the pasta is tender about 15-20 minutes.
6. Stir in the cream, Parmesan cheese, and the basil if using fresh. Season with salt and pepper to taste. Sprinkle the mozzarella cheese over the top.
7. Place the skillet in the oven and bake until the cheese has melted and is a nice golden brown about 10-15 minutes.
8. Remove from oven and serve.

Makes 4-6 servings

Friday, November 8, 2019

Green Chile Crustless Quiche

As a native New Mexican, I  love my Green Chile.  I eat it in eggs, stews, main courses,  jams, jellies, and even dessert.  It gives a wonderful flavor to foods.

Today, I am posting an easy and quick recipe for a Green Chile Crustless Quiche - a delicious cheesy dish with a southwestern flavor.    Eggs, milk, flour, spices, chopped green chiles, and cheeses are mixed together and poured into a quiche dish or an 8-inch deep-dish pie plate.    The quiche is baked in a 375 F degree oven for about 30 minutes or until golden brown.   I  let  it cool for about 10 minutes then cut and serve.

A great dish for a light dinner or brunch.


Green Chile Crustless Quiche

Ingredients:

5 large eggs
1 cup whole milk
1 cup cottage cheese
1 cup diced green chilies
4 tablespoons flour
1 teaspoon salt
1 teaspoon garlic powder
3/4 teaspoon baking powder
1/2 teaspoon ground cumin
1/4 teaspoon cayenne pepper
1 (8-ounce) package shredded Mexican cheese

Directions:

1. Preheat oven to 375 F degrees.
2. Lightly spray a quiche pan or an 8-inch deep-dish pie pan.
3. In a large bowl whisk eggs until well blended.  Add the milk, cottage cheese, green chile and mix well.
4. In a small bowl whisk together the flour, salt, garlic powder, baking powder, ground cumin, and cayenne pepper.
5. Stir the flour mixture into the egg mixture.  Mix until there are no lumps.  Add the Mexican cheese and mix until incorporated.
6. Pour the mixture into the prepared pan.
7. Bake until the top is golden and the quiche is set in the center about 30-35 minutes.
8. Cool for about 10 minutes before cutting into wedges.

Serves 6


Tuesday, March 19, 2019

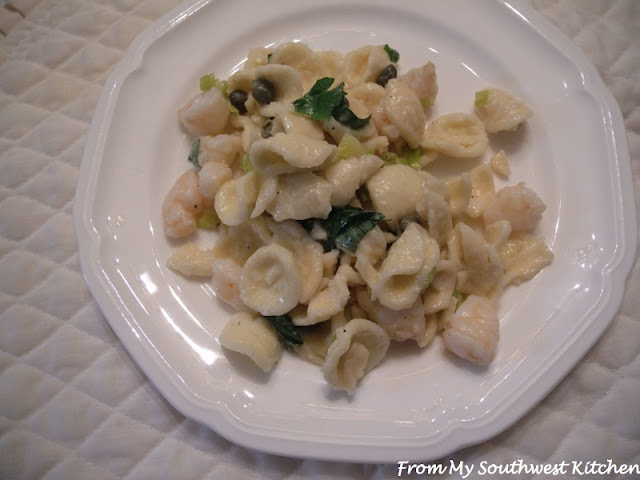
Orecchiette With Shrimp, Pepperoncini, and Basil

If you need something quick and easy not to mention delicious for dinner, this recipe is for you.  The basil and pepperoncini add a wonderful flavor to this dish.  As I mentioned, it is very easy to prepare. You start by preparing the shrimp and then cook the pasta according to package directions.  Next you add some oil to a skillet and cook the garlic and the shrimp.  When the shrimp is cooked remove from heat and add the pasta, pepperoni, capers, cheese and basil.   Serve with lemon and more cheese.   That is it.  I told you it was easy.  Dinner is ready.   Enjoy.


Orecchiette With Shrimp, Pepperoncini, and Basil
From Cook's Country

Ingredients:

1 1/2 pounds extra-large shrimp (21 to 25 per pound),peeled, deveined, tails removed, and cut into 1/2-inch pieces
Salt and pepper
12 ounces (3 1/3 cups) orecchiette
1/3 cup extra-virgin olive oil
4 garlic cloves, sliced thin
1 ounce Parmesan cheese, grated (1/2 cup), plus extra for serving
1/4 cup chopped pepperoncini, plus 1 tablespoon brine
1/4 cup capers, rinsed
1/4 cup chopped fresh basil
Lemon wedges

Directions:
1. Sprinkle shrimp with 1/4 teaspoon salt and 1/4 teaspoon pepper and refrigerate until ready to use.  Bring 4 quarts water to boil in large Dutch oven.  Add pasta and 1 tablespoon salt and cook, stirring frequently, until al dente.   Reserve 1/2 cup cooking water, then drain pasta.
2. Heat oil in now-empty  pot over medium heat until shimmering.   Add garlic and cook until beginning to brown, about 1 minute.  Add shrimp and cook until just opaque, about 4 minutes.
3. Off heat, add pasta, Parmesan, pepperoncini and brine, capers, basil, and reserved cooking water and toss to combine.  Serve, passing lemon wedges and extra Parmesan separately.

Serves 4


Tuesday, March 5, 2019

Spanish Tortilla

Tonight's dinner was super easy and it tasted delicious. A Spanish Tortilla.  I have heard of a Spanish Tortilla but I never had tasted or made one. They are so easy to prepare and you probably have everything you need at home.  Eggs, potatoes, onions, red peppers, salt, pepper and hot sauce.

Begin by cooking the potatoes, bell pepper and onion in an ovenproof skillet.  Next pour the egg mixture over the veggies.  Press down on the veggies so they are submerged.  Place the skillet in the oven and bake until the tortilla is set.  You are ready to enjoy a wonderful and tasty dinner.  Serve with a salad and you are set.


Spanish Tortilla
From Martha Stewart

Ingredients

1 tablespoon olive oil, plus more for serving
1 pound Yukon gold potatoes, peeled and sliced inch thick
1 red bell pepper (ribs and seeds removed), thinly sliced
1 medium onion, halved and thinly sliced
Coarse salt and ground pepper
8 large eggs
1/4 cup chopped fresh parsley, plus more for garnish
1/2 teaspoon hot sauce

Directions

1. Preheat oven to 375 degrees. In a medium ovenproof nonstick skillet, heat oil over medium. Add potatoes, bell pepper, and onion; season with salt and pepper (skillet will be very full). Cover, and cook, stirring occasionally, until potatoes are crisp-tender, 14 to 16 minutes. Uncover, and cook off excess liquid, 1 to 2 minutes.
2. In a bowl, whisk together eggs, parsley, hot sauce, 1/2 teaspoon salt, and teaspoon pepper. Pour egg mixture over vegetables in skillet, and stir to distribute evenly. With the back of a spatula, press down on vegetables so they lay flat and are submerged.
3. Bake until tortilla is set, 12 to 16 minutes. To unmold, run a rubber spatula around edge of skillet to release tortilla; invert onto a serving plate. Drizzle tortilla with oil; garnish with parsley.

Serves 4

Monday, July 23, 2018

Slow Cooker Barbecue Beef Sandwiches

Barbecue Beef Sandwiches are a great meal and an easy one to prepare. You just need to put the ingredients in a slow cooker, cover, cook, and go on with your day.  When you are ready for dinner just shred the meat, return to the sauce, stir in the beef to get it coated with the delicious sauce and pile high on rolls.  Serve with red onion slices and/or dill pickle slices.  I usually have sides of beans, corn, and Cole Slaw.


Slow Cooker Barbecue Beef Sandwiches
From My Recipes

Ingredients

5 tablespoons dark brown sugar, divided
3/4 teaspoon black pepper
2 (1-pound) flank steaks
1 cup chopped onion
1 cup tomato paste
3 tablespoons Worcestershire sauce
3 tablespoons molasses
3 tablespoons cider vinegar
1 tablespoon chili powder
1 teaspoon garlic powder
1 teaspoon dry mustard
1 teaspoon ground cumin
1/2 teaspoon salt
10 (2 1/2-ounce) submarine rolls, halved or Hamburger Buns -  butter toasted
Red onion slices (optional)
Dill pickle slices (optional)

Directions:

1. Combine 1 tablespoon brown sugar and pepper; rub over both sides of steaks.
2.Combine 1/4 cup brown sugar, onion, and next 9 ingredients (onion through salt) in an electric slow cooker. Add steaks; turn to coat. Cover with lid; cook on high-heat setting for 1 hour. Reduce heat setting to low; cook for 7 hours.
3. Remove steaks; reserve sauce. Shred steaks with 2 forks. Return shredded steak to cooker; stir into sauce.
4.Spoon 1/2 cup steak mixture onto bottom half of each roll; top with onion and pickles, if desired. Cover with tops of rolls.

Serves 10

Thursday, July 5, 2018

PF Chang's Style Mongolian Beef


Mongolian Beef is one of my favorites to order when I go to PF Chang's.   I love the flavor of the beef and the tenderness.  It is my go to dish.   I was super excited when I found this recipe as I was doing some random searching.

I made this recipe for dinner last night and it was every bit as good  as PF Chang's.  The meat was tender and the sauce was very tasty with a slight garlic and ginger taste.  Better than take out any day of the week.


PF Chang's Style Mongolian Beef
From Spend With Pennies


Ingredients:
2 teaspoons + 2 tablespoons oil (vegetable or olive)
1/2 teaspoon ginger , minced
4 cloves garlic , finely minced
1/2 cup soy sauce (low sodium is best)
1/4 cup water
1/2 cup packed brown sugar
1 lb flank steak (or your favorite cut of beef thinly sliced)
1/3 cup cornstarch
2 green onions , sliced

Directions:
1. Heat oil in a small pan over medium low. Add ginger and garlic and stir just until fragrant (about 1 minute). Add soy sauce, water and brown sugar and bring to a boil. Let boil 3-5 minutes or until slightly thickened. Set aside.
2. Slice the flank steak into 1/4" slices and toss with cornstarch. Gently shake off any excess.
Place 1 tablespoon at a time of oil in a pan or wok and heat over medium high heat. Cook the beef in small batches for about 2 minutes. (It doesn't need to cook all of the way through,it will cook completely when combined with the sauce).
3. Once all the beef has been cooked, combine with the sauce and heat over medium until hot and bubbly. Remove from heat and stir in green onions. Serve over rice.


Saturday, February 24, 2018

Quick Southern Style Baked Beans

Baked Beans are one of my favorite sides.  I love them with grilled burgers, brisket, chicken, barbecue - just to name a few.  They make the meal in my view.  I love this recipe for Baked Beans. They are so easy to make and I have never tasted such delicious Baked beans.
Start with cooking some bacon and then remove and drain on paper towels.  Cook some diced onions and green peppers (I used a red pepper) in the bacon drippings.  Add some Pork and Beans, barbecue sauce, brown sugar, cider vinegar, and some mustard.  Stir and bring to a simmer.  Add the bacon strips and bake for about 2 hours.

Best Baked Beans ever.


Quick Southern-Style Baked Beans
recipe by Pam Anderson From The Pioneer Woman

Serves up to 18

8 slices bacon, halved

1 medium onion, cut into small dice

1/2 medium green pepper, cut into small dice

3 large cans (28 ounces each) pork and beans

3/4 cup barbecue sauce

1/2 cup brown sugar

1/4 cup distilled or cider vinegar

2 teaspoons dry mustard or 2 tablespoons Dijon


Adjust oven rack to lower-middle position and heat oven to 325 degrees. Fry bacon in large, deep sauté pan skillet until bacon has partially cooked and released about 1/4 cup drippings. Remove bacon from pan and drain on paper towels. Add onions and peppers to drippings in pan and sauté until tender, about 5 minutes. Add beans and remaining ingredients bring to a simmer. (If skillet is not large enough, add beans and heat to a simmer then transfer to a large bowl and stir in remaining ingredients). Pour flavored beans into a greased 13-by 9-inch (or similar size) ovenproof pan. Top with bacon, then bake until beans are bubbly and sauce is the consistency of pancake syrup, about 2 hours. Let stand to thicken slightly and serve.


Wednesday, August 9, 2017

Green Chile Mac and Cheese

 I love Mac and Cheese.  A creamy cheesy dish that is very comforting and satisfying.  What could make it better?  Adding some green chile to it.   It gives this traditional dish a nice spiciness but not a hot spiciness. Coming from New Mexico we like green chile in just about everything.

In this recipe a creamy sharp cheddar cheese sauce is spiced up a notch with some hot sauce - my favorite is Cholula.  Add some Worcestershire sauce and you have a very flavorful sauce that will coat your macaroni and green chile.  All ingredients are then mixed together and poured into a 13x9-inch baking dish.  Bake for about 20 minutes.  Let the mac and cheese cool about 20 minutes before serving.   A traditional comfort food dish with some added zing.  A very tasty and satisfying meal.


Green Chile Mac and Cheese

Ingredients:

1 pound elbow macaroni
3 tablespoon butter
1 teaspoons salt
1/2 teaspoon pepper
1 tablespoon dry mustard
2 cups milk
2 cups heavy cream
4 cups shredded extra sharp cheddar cheese, divided
2 ounces cream cheese, cubed
2 tablespoons hot sauce
1 tablespoon Worcestershire sauce
2 (4-ounce) cans green chile, diced

Directions:

1. Preheat oven to 350F degrees. Cook macaroni according to package directions.  Once cooked, drain and set aside.
2. In a large saucepan, melt the butter.  Stir in the  dry mustard, salt, and pepper.   Cook until mixture bubbles.
3. Slowly add the milk and heavy cream to the mixture. Stir well and bring mixture to a boil stirring frequently.  Once the mixture has come to a boil, reduce heat and cook for 5 minutes.
4. Remove saucepan from heat and slowly add in 3 cups of the cheddar cheese. Whisk until  the cheese has melted then add some more cheese.  Next whisk in the cream cheese until melted.
5. Stir  in the hot sauce and the Worcestershire sauce.
6. In a large mixing bowl, add the cooked macaroni, cheese sauce, and green chile.   Stir until the macaroni  and green chile are  well coated.
7. Lightly spray a 13x9-inch baking dish with cooking spray.  Pour in the mac and cheese into the baking dish.  Sprinkle the remaining 1 cup of cheddar cheese over the macaroni.
8. Place the mac and cheese in the oven and bake for 20 minutes or until bubbling.  Remove from the oven and let rest 20 minutes before serving.   Serve


Makes 8 servings


Sunday, April 2, 2017

Instant Pot: Asian Boneless Beef Short Ribs

I made another great tasting recipe in my Instant Pot.  Asian Boneless Beef Short Ribs.   They are tender, flavorful and better that you can get in any restaurant.  As with most Instant Pot recipes, this was easy and quick.

You begin by placing some oil in your Instant Pot and place on the sauté  setting.  Cook some garlic and ginger for about 1 minute.  Add some hoisin sauce, soy sauce, sherry, scallion white and cayenne.  Stir well and then add the beef. I turned my beef so both side could be coated with the sauce.

Set your Instant Pot on high pressure and cook for 35 minutes.  Once the ribs are cooked naturally release the pressure for about 15 minutes.  Vent the remaining pressure and transfer ribs to a platter and tent with foil. Strain the sauce and return to the Instant Pot.  Set on sauté and add the cornstarch mixture to the sauce.  Bring to a boil and cook for about 1 minute.  Pour the sauce in a small bowl.

Serve the ribs with the sauce, rice and top with the scallion greens if desired.

Asian Boneless Short Ribs
From Copycat Recipes Adapted Slightly by From My Southwest Kitchen

Special Equipment:  Instant Pot or Other Electric Pressure Cooker

Ingredients: 
1 tablespoon vegetable oil
4 garlic cloves, minced
1 (2-inch) piece ginger, peeled, sliced into 1/4" thick rounds
1/2 cup hoisin sauce
2 tablespoons soy sauce
4 scallions, white parts coarsely chopped, green parts thinly sliced
1/4 teaspoon cayenne pepper
6 (8 ounce) boneless beef short ribs, trimmed
2 tablespoons corn starch
2 tablespoons water
Cooked rice
Directions:
1. Set the Instant Pot to the Sauté setting.  Add the oil to the pot.  Heat for about 1 minute and the add the garlic and the ginger.  Sauté for about 1 minute or  until fragrant.  Stir in the hoisin sauce, soy sauce, sherry, scallion whites, and the cayenne pepper.
2. Place the short ribs in the sauce and turn to coat both sides.  Place the lid on the Instant Pot.  Be sure the valve is set to the Sealing setting.   Set the pressure on high and cook for 35 minutes.
3. Naturally release the pressure for about 15 minutes.  Move the valve to venting position to release the remaining pressure. Once the pressure is released carefully open the lid away from you.
4. Remove the ribs and place on a platter.  Tent with foil.  Strain the sauce and return to the pot.  Place Instant Pot on Sauté setting.
5. Place the cornstarch and water in a small bowl.  Mix well and gradually add to the pot.  Stir until the mixture comes to a boil  Cook for 1 minute.  Pour the sauce in a small bowl and serve with the ribs.
6.  Place some rice on a plate.  Top with a rib and some sauce.  Sprinkle with scallion tops.

Makes 6 servings


Tuesday, March 14, 2017

Crockpot: Creamy Spaghetti Squash with Peas and Bacon

Spaghetti squash is a fun squash to cook and eat.  When the squash is cooked these veggie strands of spaghetti are scooped out.  Usually, I just put my normal sauce over the squash, toss and serve.  Today's recipe is different.  It is a "cousin" to one of my favorite recipes of "Pasta With Peas and Ham."

This recipe is very easy to make.  Start by washing a spaghetti squash.  Poke it a few times with a fork and cook on high in a crockpot for 3 hours with a cup of water.  When the squash is done, scoop the spaghetti out.  In a bowl combine some bacon, peas, cream cheese, salt, and pepper.  Mix it well with the squash and place back in the crockpot for about 45 minutes.  After about 20 minutes, stir in the Parmesan cheese and cook for the remaining 25 minutes.  When done, serve with additional Parmesan cheese.

This is a delicious side dish or a main dish.  Enjoy.


Creamy Spaghetti Squash With Peas and Bacon
From Cooktop Cove

Special Equipment:  Crockpot

Ingredients:
1 (about 5 pounds) spaghetti squash
1 cup water
5 slices of bacon - diced
2 cups fresh or frozen petite peas
1/2 teaspoon kosher salt
1/4 teaspoon freshly ground black pepper
4 ounces cream cheese
1/2 cup  powdered Parmesan cheese plus extra for topping


Directions:
1. Clean squash and poke with a fork throughout the skin.  Place the spaghetti squash and the cup of water in the crock pot. Cover and set on high and cook for 3 hours.
2. Add the bacon to a skillet and cook until soft.  Set aside.
3. Remove the squash from the crockpot when it is cooked.  Cut open with a knife lengthwise.  Carefully remove the seeds.  Scoop out the spaghetti strands.  Place the squash back in the crockpot.
4. Stir together the bacon, peas, cream cheese, salt and pepper in a small bowl.  Add to the crockpot.  Stir and mix well.
5. Cover and cook for 20 minutes on high.  Add the Parmesan cheese, stir, cover and cook for another 25 minutes.  Serve and top with additional cheese if desired.  

Serves 6 main servings


Tuesday, February 28, 2017

Biscuits

Who can resist nice flaky tender biscuits?  I sure can't.  I love eating  them for breakfast with butter and jam,  or when I am eating a rich and hearty soup/stew.  They are great for getting the last bite of that good broth.  And how could I forget that delicious dish biscuits with gravy.  Biscuits are just great and so easy to make.

I found this easy biscuit recipe on the NYT Cooking website.  Instead of using a food processor, I combined the butter and the flour with my fingertips until the mixture resembled corn flakes.


Biscuits
From NYT COOKING

INGREDIENTS
2 cups all-purpose flour, plus more for dusting
2 tablespoons baking powder
1 scant tablespoon sugar
1 teaspoon salt
5 tablespoons cold, unsalted butter, preferably European style
1 cup whole milk

PREPARATION

1. Preheat oven to 425. Sift flour, baking powder, sugar and salt into a large mixing bowl. Transfer to a food processor. Cut butter into pats and add to flour, then pulse 5 or 6 times until the mixture resembles rough crumbs. (Alternatively, cut butter into flour in the mixing bowl using a fork or a pastry cutter.) Return dough to bowl, add milk and stir with a fork until it forms a rough ball.
2. Turn the dough out onto a well-floured surface and pat it down into a rough rectangle, about an inch thick. Fold it over and gently pat it down again. Repeat. Cover the dough loosely with a kitchen towel and allow it to rest for 30 minutes.
3. Gently pat out the dough some more, so that the rectangle is roughly 10 inches by 6 inches. Cut dough into biscuits using a floured glass or biscuit cutter. Do not twist cutter when cutting; this crimps the edges of the biscuit and impedes its rise.
4. Place biscuits on a cookie sheet and bake until golden brown, approximately 10 to 15 minutes.

Serves 6-8